Haier BD-429GB User Manual - Page 16
English, Storage time, Cleaning and maintenance
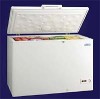 |
View all Haier BD-429GB manuals
Add to My Manuals
Save this manual to your list of manuals |
Page 16 highlights
English 8 Storage time The storage time for purchased deep-frozen products varies and depends on the type of product and its packaging. Therefore, strictly observe the producer's instructions on the packaging. For fresh food that you like to deep freeze, consult the storage table at the back of this user manual. After being defrosted, food must be consumed immediately but latest within the next 24 hours. 9 Cleaning and maintenance For the upkeep of the external appearance of your appliance, now and again clean with furniture polish or other enamel protecting product (never, on any account, use it in the inside. Clean the seal (B) with warm water now and again without using any cleaning product. If your appliance has a condenser (R) in the rear inside, from time to time remove dirt and dust. Dust and dirt impede the release of heat from the inner compartment and considerably increases consumption of energy. For best results, use a light brush or duster to remove dust from the condenser on the rear wall. If you leave your appliance out of use for an extended period (e.g. when on holidays), leave it open to prevent odours building up inside. For appliances with locks: when the chest lid is open, always set the lock in "closed" position and keep the key well away from small children to prevent accidents. Care is required with regard to frozen food in storage in the event of an extended non-running of the freezer (interruption of power supply or failure of the refrigerating system). A rise in temperature of the frozen food could shorten the storage life. When ice and frost layers form on the inner walls up to a certain thickness, they act as an insulation element and prevent the coldness being released from the inner walls. They must be removed from time to time. To remove ice from the inner walls, use a plastic or wood scraper without sharp edges. Cover the frozen food with a cloth which aids to collect the scraped ice and enables a simple removal. 10 Defrosting Under normal conditions (3 to 4 openings per day) the freezer must be defrosted once or twice a year (more often in other cases). Instruction for use Proceed as follows: 1. Make absolutely sure that you remove the plug from the power socket. 2. Dry your hands thoroughly to prevent skin damage by contact with ice (it is advisable to use gloves). 3. Remove all frozen food from the freezer, roll it firmly in newspaper, put it into the container, place the container in a cool, dry room. 4. Lift the divider (H) (not all models are equipped) upwards out of the guide-rail of the freezer. 5. Use the divider (so far as provided) as a defrosting dish and push it on the side under the freezer - where the defrosting water drain-plug is located. 6. If applicable to the freezer you have purchased, pull out the plug for the drainage hose loacted at the bottom of the freezer. If you do not have a drainage hose then you must wipe away the excess water with a sponge. 7. As previously described, scrape the thickest ice carefully from the freezer inside and put it into the kitchen sink. for defrosting. 8. If necessary, speed up defrosting by placing a large pot of warm (not too hot) water in the freezer 9. Thoroughly clean the inside(compartment).rinse it with warm water. 10. Wipe the freezer with an absorbent cloth thoroughly dry and allow to air for about 3 to 4 minutes. 11. Replace the drain-plug (if provided) 12. Empty the dry defrosting water dish (if provided) and slide it into the guide rails of the freezer. 13. Close the freezer door,replace the plug in the cosket and turn the freezer on. 14. Set the temperature control (FIG.1) to maximum setting (green and red lamps go on) and switch on the SUPER FREEZE SWITCH(FIG.4)(if provided)(yellow lamp lights additionally). 15. Now re-fill the frozen food - the oldest items at the top. To prevent frozen food from defrosting, carry out steps from 1 to 17 within max. two hours. In this courseˈa rise in temperature of the frozen food would shorten the storage life. 16. When the red light goes off, reset the temperature control to a as per the filling capacity suitable storage temperature. 17. Switch off the SUPER FREEZER SWITCH (if provided) after about 8 to 12 hours or, latest after 24 hours (the yellow light goes off). 4
-
 1
1 -
2
-
3
-
4
-
5
-
6
-
7
-
8
-
9
-
10
-
 11
11 -
 12
12 -
 13
13 -
 14
14 -
 15
15 -
 16
16 -
 17
17 -
 18
18 -
 19
19 -
 20
20 -
 21
21 -
22
-
23
-
24
-
25
-
26
-
27
-
28
-
29
-
30
-
31
-
32
-
33
-
34
-
35
-
36
-
37
-
38
-
39
-
40
-
41
-
42
-
43
-
44
-
45
-
46
-
47
-
48
-
49
-
50
-
51
-
52
-
53
-
54
-
55
-
56
-
57
-
58
-
59
-
60
-
61
-
62
-
63
 |
 |
