Haier HL40XSLW2 User Manual - Page 17
How to customize your own picture, status
 |
View all Haier HL40XSLW2 manuals
Add to My Manuals
Save this manual to your list of manuals |
Page 17 highlights
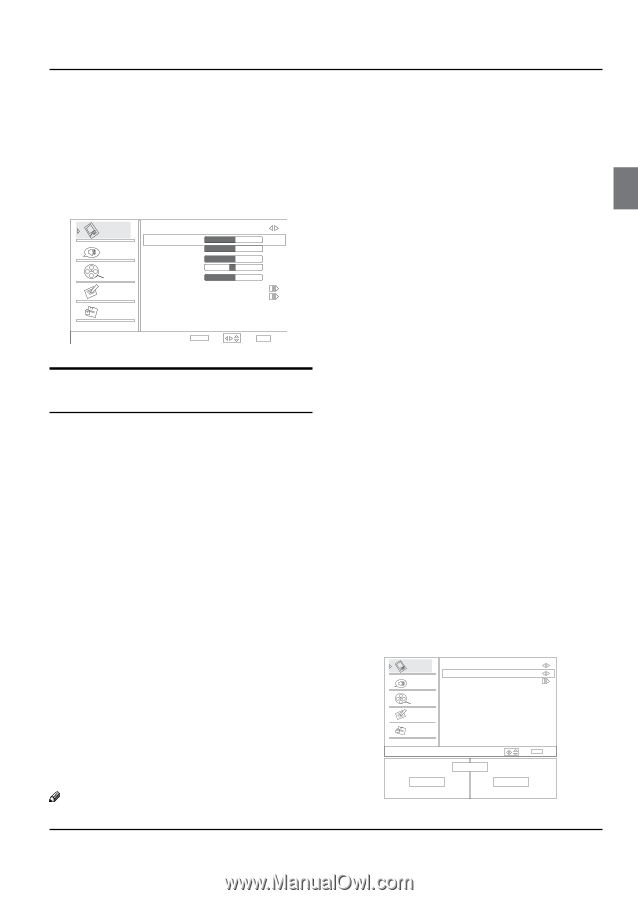
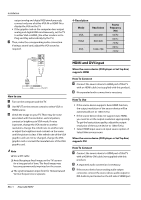
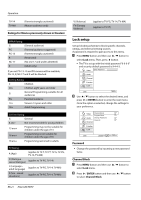
select Video menu. 5 6 B Press4/ ENTER button and then use / button to select Mode. C Press3/4button to select the option Standard, Vivid, Custom and Mild. You can also press PICTURE button on the remote control to select the option Standard, Vivid, Custom and Mild. Video Mode Brightness Custom 50 Audio Contrast Color 50 50 Channel Tint Sharpness 0 50 Function Color Temperature Advanced Video Lock Video ENTER Adjust / Select EXIT Back How to customize your own picture status 5 6 A Press MENU button and then use / button to select Video menu. 5 6 B Press4/ ENTER button and then use / button to select the desired items. C Press4/ ENTER button and then use 3/4button to adjust the setting. YYMode Select the mode of picture (Standard/ Vivid/ Custom/ Mild). YYBrightness This will adjust the light output of the complete picture, which will mainly affect the darker areas of the picture. YYContrast This will adjust the intensity of bright parts in the picture but keep the dark parts unchanged. YYColor This will adjust the saturation level of the colors to suit your personal preference. YYTint Allows you to select the color mix (Tint) of the picture. YYSharpness This will adjust the sharpness of fine details in the picture. Note Operation RR Only when the item of mode is custom, the Brightness, Contrast, Color, Tint, Sharpness and Color Temperature can be set by user. In other mode the value of them are preset. YYColor temperature This will increase or decrease Warm (red) and Cool (blue) colors to suit personal preferences. Select Cool to give the white colors a blue tint, Standard to give the white colors a neutral tint, Warm to give the white colors a red tint. YYAdvanced Video To adjust the picture in advanced: DNR, Black Level Extender, White Peak Limiter, CTI, Flech Tone, Adaptive Luma Control. •• DNR: Digital Noise Reduction, to adjust to reduce the appearance of digitizing errror caused by the compressin: Medium/Strong/Auto/off/Low. •• MPEG NR: To adjust the MEPG Noise Reduction: Medium, Strong, Off and Low. •• Adaptive Luma Control: To adjust changes in the luminance of the picture On or Off. •• Flesh Tone: To adjust the flesh colors: High, Off, Low or Medium. •• Blue Stretch: To set Blue Stretch: On and Off. •• Game Mode: To set Game Mode: On and Off. •• MJC: Motion judder cancellation (MJC), capable of solving film judder and motion blur. Effect:To set the MJC level: Off, Low ,Middle, High. Demo Partition:To set the effective area of MJC: Left, All, Right. 5 6 A Press MENU button and then use / button to select Video menu. 5 6 B Press4/ ENTER button and then use / button to select Advanced Video. 5 6 C Press4/ ENTER button and then use / button to select MJC. 5 6 D Press4/ ENTER button and then use / button to select the desired items. Video Effect Low Demo Partition Left Audio Demo Channel Function Lock MJC On MJC Demo / Select EXIT Back Off Haier LED HDTV EN-16
-
 1
1 -
2
-
3
-
4
-
5
-
6
-
7
-
8
-
9
-
10
-
11
-
 12
12 -
 13
13 -
 14
14 -
 15
15 -
 16
16 -
 17
17 -
 18
18 -
 19
19 -
 20
20 -
 21
21 -
 22
22 -
23
-
24
-
25
-
26
-
27
-
28
-
29
-
30
-
31
-
32
-
33
-
34
-
35
-
36
-
37
-
38
-
39
 |
 |