Haier HSU-36LEA03 User Manual - Page 2
Selection of pipe - hsu 12
 |
View all Haier HSU-36LEA03 manuals
Add to My Manuals
Save this manual to your list of manuals |
Page 2 highlights
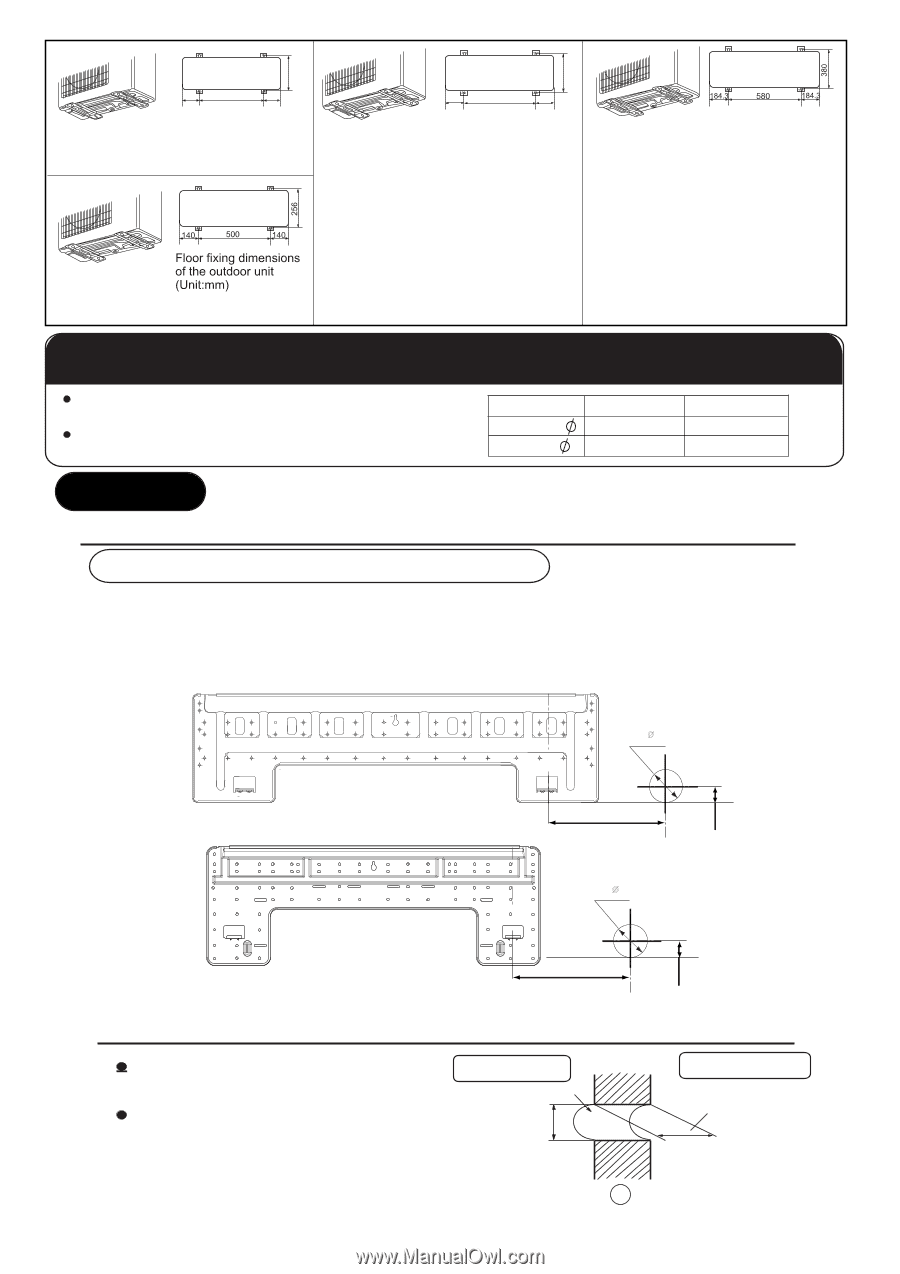
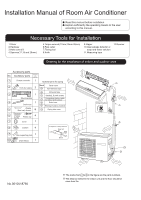
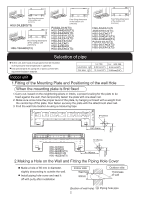
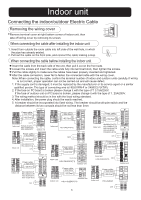
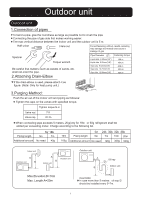
319.5 334.6 113.5 583 113.5 Floor fixing dimensions of the outdoor unit (Unit:mm) HSU-24LEB03(T3) HSU-18LEB03(T3) 113.5 633 113.5 Floor fixing dimensions of the outdoor unit (Unit:mm) PAS24L03-N(T3) HSU-24HEA03(T3) HSU-24LEA03(T3) HSU-24HEA13(T3) HSU-24LEA13(T3) HSU-24LEA13-M HSU-24LEA03 HSU-24HEA03 HSU-28LEA03(T3) Floor fixing dimensions of the outdoor unit (Unit:mm) HSU-32LEA13-W AMS30H03-N(T3) HSU-24LEA03-T HSU-30HEA13(T3) HSU-30HEA03(T3) PAS30H03-N(T3) HSU-36LEA03(T3) HSU-30LEA13(T3) Selection of pipe To this unit, both liquid and gas pipes shall be insulated as they become Iow temperature in operation. Use optional parts for piping set or pipes covered with equivalent insulation material. Liquid pipe ( ) Gas pipe ( ) For 18K 6.35mm(1/4") 12.7mm(1/2") For 24K-36K 9.52mm(3/8") 15.88mm(5/8") Indoor unit 1.Fitting of the Mounting Plate and Positioning of the wall Hole When the mounting plate is first fixed 1.Carry out, based on the neighboring pillars or lintels, a proper leveling for the plate to be fixed against the wall, then temporarily fasten the plate with one steel nail. 2. Make sure once more the proper level of the plate, by hanging a thread with a weight from the central top of the plate, then fasten securely the plate with the attachment steel nail. 3. Find the wall hole location A using a measuring tape B= 60mm 30mm A=145mm B= 60mm 30mm HSU-24LEA03 HSU-24HEA03 HSU-24LEB03(T3) HSU-24LEA13-M HSU-18LEB03(T3) A=145mm 2.Making a Hole on the Wall and Fitting the Piping Hole Cover Make a hole of 60 mm in diameter, slightly descending to outside the wall. Install piping hole cover and seal it off with putty after installation Indoor side Wall hole 60mm Outdoor side Thickness of wall (Section of wall hole) G Piping hole pipe 2
-
 1
1 -
 2
2 -
 3
3 -
 4
4
 |
 |