Haier HWF05XCR User Manual - Page 15

Completing The Installation
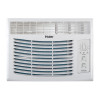
Page 15 highlights

COMPLETING THE INSTALLATION ATTACH SIDE CURTAINS TO WINDOW Fig. 17 1. Pull the right -hand curtain and frame out until it fits flush to the side of the window frame. (See Fig.17) 2. Use a 1/8" drill bit to drill a starter hole through the top hole in the side curtain and into the window sash. 3. Insert one (1) 1" wood screws through the top hole of the left hand curtain and into the window sash. (See Fig.18) 4. Repeat for the left-hand curtain. 5. Use a 1/8" drill bit to drill a starter hole into the window sill using the bottom hole in the side curtain as a guide. 6. Insert one (1) 1" wood screws through the bottom hole of the right -hand curtain and into the window sill. (See Fig.19) 7. Repeat for the left-hand curtain. Fig. 18 FINAL INSTALLATION 1. Uncoil the included foam seal. (See Fig.20) 2. Insert the foam seal behind the top of the lower window sash and against the glass of the upper window sash. 3. Place the window lock bracket as shown in the diagram using a screwdriver. Use a 1/8" drill bit to drill a starter hole through the hole in the window lock bracket and into the upper window sash. (See Fig.21) Fig. 19 4. Attach the window lock bracket to the upper window with one (1) 1" wood screw to secure the unit in place. 5. Plug unit into a grounded 3 prong outlet. 6. Press RESET on the power supply cord. On some devices a green Fig. 20 light will come on. See "Electrical Requirements" for full detail. Fig. 21 ENGLISH HOW TO INSTALL PAGE 13

  • 1
  • 2
  • 3
  • 4
  • 5
  • 6
  • 7
  • 8
  • 9
  • 10
  • 11
  • 12
  • 13
  • 14
  • 15
  • 16
  • 17
  • 18
  • 19
  • 20
  • 21
  • 22
  • 23
  • 24
  • 25
  • 26
  • 27
  • 28
  • 29
  • 30
  • 31
  • 32
  • 33
  • 34
  • 35
  • 36
  • 37
  • 38
  • 39
  • 40
  • 41
  • 42
  • 43
  • 44
  • 45
  • 46
  • 47
  • 48
  • 49
  • 50
  • 51
  • 52
  • 53
  • 54
  • 55
  • 56
  • 57
  • 58
  • 59
  • 60
  • 61
  • 62
  • 63
  • 64

COMPLETING THE INSTALLATION
ATTACH SIDE CURTAINS TO WINDOW
1.
l
l
u
P
the right -hand curtain and frame out until it fits flush to the side
of the window frame.
(See Fig.17)
2.
Use
a 1/8” drill bit to drill a
starter
hole through the top hole in the
side
curtain and into the window
sash.
3.
Insert
one (1) 1" wood
sc
rew
s
through the top hole of the left hand
curtain and into the window
sash.
(See Fig.18)
4. Repeat for the left-hand curtain.
5.
Use
a 1/8" drill bit to drill a
starter
hole into the window
sill
using
the
bottom hole in the side curtain as a guide.
6.
Insert
one (1) 1" wood
sc
rew
s
through the bottom hole of
the
right -hand curtain and into the window sill.
(See Fig.19)
7. Repeat for the left-hand curtain.
FINAL INSTALLATION
1. Uncoil the included foam
seal.
(See Fig.20)
2.
Insert
the foam
seal
behind the top of the lower window
sash
and
against
the
glass
of the upper windo
w sash.
3.
e
c
a
l
P
the window lock bracket
as
sh
own in the diagram
using
a
sc
rewdriver.
Use
a 1/8" drill bit to drill a
starter
hole through
the
sash.
(See Fig.21)
hole in the window lock bracket and into the upper window
4. Attach the window lock bracket to the upper window with one (1)
1" wood
sc
rew to
secu
re the unit in place.
5.
g
u
l
P
unit into a grounded 3 prong outlet.
6.
r
P
ess
RESET on the power
supp
ly cord.
On some devices a green
light will come on. See “Electrical Requirements" for full detail.
HOW TO INSTALL
PAGE 13
Fig. 17
Fig. 18
Fig. 20
Fig. 21
Fig. 19
ENGLISH