Haier JC-110GD User Manual - Page 6
Installing Your Wine Cellar
 |
View all Haier JC-110GD manuals
Add to My Manuals
Save this manual to your list of manuals |
Page 6 highlights
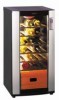
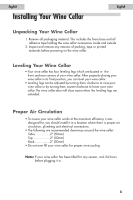
English English Installing Your Wine Cellar Unpacking Your Wine Cellar 1. Remove all packaging material. This includes the foam base and all adhesive tape holding the wine cellar accessories inside and outside. 2. Inspect and remove any remains of packing, tape or printed materials before powering on the wine cellar. LLeevveelliinngg YYoouurr W Wiinnee CCeellllaarr wLwceYfYfwwceLArreeeoxeoxooiifiivvltnnlunnttulenlneeeeaaeereernttnrllrriiwd..wndccaancclTeeeegeeeTnginihnvdnllllhdddlllleeeaa.aalele.eelrrrrrriwgcgencewioeioessagnainirlnlrnrlrcclaialebiaetacbetcsrrysognnycochfhersftreibauitnbnnalunllaerseleaaesraarnrnfrarlelrastoisihpnddpndudoarogojogorjeuofdfusosetsoilyjhstyirettuhtrtoieeloievosweeodmuweutdnvmenirlrel,ibid,lblnwcllwyyc,icyyogncoioloittunoglhnuutuolunueseeernstelrncgeecetcndceairgsaeenieroenncslangcwllaollgalsolawoehlrsirtecre.ithvcih.ehskvcArkeeuirewAehcwwlmpflmhtwfiyaeihpstyseoehrraceooecreuelnrlurpotoertpnotlroocrctrwaohklctwkloohlolwpaeoiwspcinewoetnwiaeeielsrseeelrdteeneleelrvycryvcedeteiyteoepneyollpoillldiloinlaanlruanrasuagtracrg.hrctr.itihiwsoinelsnwleeeeegiggbngyinyyseeosyeoouaoauurrurrerer adjusted to floor level. Proper Air Circulation • To assure your wine cellar works at the maximum efficiency it was designed for, you should install it in a location where there is proper air circulation, plumbing and electrical connections. • The following are recommended clearances around the wine cellar: Sides 2" (50mm) Top 2" (50mm) Back 2" (50mm) • Do not over fill your wine cellar for proper wine cooling. Note: If your wine cellar has been tilted for any reason, wait 24 hours before plugging it in. 5
-
 1
1 -
 2
2 -
 3
3 -
 4
4 -
 5
5 -
 6
6 -
 7
7 -
 8
8 -
 9
9 -
 10
10 -
 11
11 -
 12
12 -
13
-
14
 |
 |
