Haier LED32T3 User Manual - Page 8
Installing the Stand, CONNECTING YOUR TV
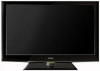 |
View all Haier LED32T3 manuals
Add to My Manuals
Save this manual to your list of manuals |
Page 8 highlights
02 About your LED LCD Installing the Stand To get started, you need the (5) screws that are included in the box with your TV . Glass stand is BS EN 12150: 2000 comply Model / Catalogue Number: 529-6091 Retailer: Argos Retailer address: 489-499 Avebury Boulevard Saxon Gate West Central Milton Keynes MK9 2NW To attach the stand to your TV, follow these steps: A Lay your TV screen down on a soft surface such as a couch or bed. B Make sure to distinguish between the front and back of the stand when assembling them. C Attach your stand to the TV. D Make sure the stand is installed on the stand at a proper level, do not apply excess pressure. E Fasten the (5) screws at the five positons as the right picture. CONNECTING YOUR TV ANTENNA CONNECTION Connect your aerial to the side of the TV into the ANTENNA IN socket. IMPROVE YOUR SIGNAL To improve picture quality in a poor signal area, use a signal amplifier (not supplied). CONNECT YOUR PC TO THE TV You can use your TV as a monitor for your personal computer by connecting it with a VGA cable (not supplied). A Read your computer user guide and check it has a VGA connector. B Turn the power off on your TV and PC. C Connect a D type 15-pin VGA interface cable to the VGA video interface connector on the PC. Connect the other end of the cable to the PC interface connector on the TV. Tighten the screws on the VGA connectors and connect the audio cable (not supplied) to the audio input socket on the back of the TV. D Turn on the power of the TV firstly and then the PC. E Press the button on the TV or TV remote control to set the video input mode to PC. F Once the image shows, if there is noise present, change the VGA mode to another resolution, change the refresh rate to another rate or adjust the brightness and contrast on the menu until the picture is clear. BUSH | 1080p Digital LED LCD| User Manual | Helpline: 0845 604 0105 P.07
-
 1
1 -
2
-
 3
3 -
 4
4 -
 5
5 -
 6
6 -
 7
7 -
 8
8 -
 9
9 -
 10
10 -
 11
11 -
 12
12 -
 13
13 -
14
-
15
-
16
-
17
-
18
-
19
-
20
-
21
-
22
-
23
-
24
-
25
-
26
-
27
-
28
-
29
-
30
 |
 |
