Harman Kardon A12 Owners Manual - Page 3
Connections
 |
View all Harman Kardon A12 manuals
Add to My Manuals
Save this manual to your list of manuals |
Page 3 highlights
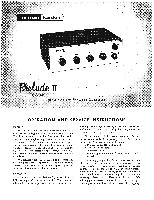
INSTALLATION Your amplifier may be installed on an open shelf, table, bookcase or high fidelity equipment cabinet. For cabinet mounting, refer to the template supplied with this book. Ventilation: All electrical equipment generates heat which must be allowed to escape. Although the Prelude II is well ventilated in itself, sufficient space should be allowed around it to permit free air flow. If it is placed in a bookcase, it should be located well toward the front, to provide as much clearance as possible at the rear. DO NOT place books or other objects on top of the Prelude II. Covering the perforated metal cage will prevent proper air flow and will result in sharply reduced component and tube life. For custom installation into a cabinet the cage must be removed to assure maximum ventilation. POWER REQUIREMENTS Plug the AC power cord into any outlet furnishing 117 volts, 50 or 60 cycles house current, The exact voltage is relatively unimportant and may vary between 105 and 125 volts. Be sure, however, that you have a 50 or 60 cycle AC power source. The Prelude II has a convenience outlet on the rear of the chassis. The proper use of this outlet is described in the section under Electrical Connections. ELECTRICAL CONNECTIONS Phonograph Connections: Any type of record player will operate with the Prelude II. To derive maximum enjoyment it is suggested that a high quality pickup and a rumble-free turntable be used. Two classes of phonograph pickups are in use today: Magnetic (GE, Audak, ESL, Fairchild, Pickering and Recoton) and Crystal (including the newly developed ceramics). All magnetic cartridges should be connected to the jack on the rear of the chassis marked "PHONO." Connect crystal or ceramic cartridges to the jack marked "AUX" also located on the rear of the chassis. A word of advice: The purchase of a diamond needle is a worthwhile investment. It has extremely long life and will not only protect your records, but will insure maximum tone quality. It is sometimes advisable to ground the phonograph chassis to the amplifier in order to reduce hum and other unwanted noise. Attach a wire to the metal framework of the changer and connect the other end to the "G" terminal of the Speaker Terminal Strip. The power cord of the record changer or turntable may be plugged into the AC convenience outlet located on the rear of the chassis. Tuner Input: A coaxial connector marked "Tuner" will be found on the rear of the Prelude II. A shielded cable may be connected between this receptacle and the output receptacle of any tuner rated for at least 1/2 volt output. The tuner output impedance will determine the maximum practical length of this cable. It is suggested that not more than 3 or 4 feet be used if the tuner has a high impedance output. A longer lead (up to 50 feet) can be used without hum pickup or high frequency attenuation if the tuner uses a cathode follower output. This position is controlled by the Function Selector Switch located on the front panel. Auxiliary Inputs: The Prelude II incorporates an "AUX" input located at the rear of the unit. Plug all high level equipment into this jack. (Tape recorder or TV tuner.) If you are using a ceramic or crystal phono cartridge make certain to connect your phonograph to the "AUX" jack. The "AUX" position is controlled by the Function Selector Switch on the front panel. Tape Input: This jack is located on the rear of the chassis. Program material from a tape recorder or tape deck may be connected to the amplifier in two different ways. If the tape player has a preamplifier or amplifier stage, it should be connected to the "AUX" jack. If the tape player has no preamplifier the tape head may be connected directly to the "Tape" jack. Setting the Function Selector Switch at the position marked "TAPE HEAD" will then activate the "TAPE" jack and provide the proper equalization. Tape Output; A jack marked "TAPE OUT" is located on the rear of the Prelude II chassis. This will provide program material to a tape recorder or other auxiliary equipment. In other words, any program material appearing at the speaker terminals also appears at the "TAPE OUT" jack, but unmodified by the volume or tone controls. This makes it possible to record a program with the proper recording equalization as determined by your tape recorder, while simultaneously monitoring the program with the proper tone control, contour and loudness setting. Convenience Outlets: The Prelude II incorporates an AC convenience outlet located at the rear of the unit. Auxiliary high fidelity equipment (tape recorder, television tuner or phonograph) may he connected to this outlet and will then he controlled by the on/off switch on the Prelude IL Never load this AC convenience outlet with more than a total of 2 amps. Speaker Connections: A unique method of connecting one or two loudspeakers is incorporated in the Prelude H in order that you may derive maximum enjoyment from this superlative instrument with any of today's fine speaker systems. Connecting one loudspeaker: Connect one of the two speaker leads to terminal "G" and the other lead to "A" on the three screw terminal strip at the rear of the chassis marked "SPEAKER
-
 1
1 -
 2
2 -
 3
3 -
 4
4 -
 5
5 -
 6
6
 |
 |
