Harman Kardon AVR 240 Owners Manual
Harman Kardon AVR 240 Manual
 |
View all Harman Kardon AVR 240 manuals
Add to My Manuals
Save this manual to your list of manuals |
Harman Kardon AVR 240 manual content summary:
- Harman Kardon AVR 240 | Owners Manual - Page 1
® Power for the Digital Revolution.® AVR 240 AUDIO/VIDEO RECEIVER OWNER'S MANUAL AVR 240 DIGITAL PRO LOGIC 3 STEREO HEADPHONE LOGIC 7 DSP 5 7 CH. STEREO SURR. OFF VID 1 DVD VID 2 CD VID 3 FMAM VID 4 TAPE 6 8 CH Optical 4 Coaxial 4 Video 4 - Harman Kardon AVR 240 | Owners Manual - Page 2
AVR 240 AUDIO/VIDEO RECEIVER 3 Introduction 4 Important Safety Information 4 Unpacking 5 Front-Panel Controls 8 Rear-Panel Connections 11 Remote Control Functions 15 Installation and Connections 16 System and Power Connections 18 System Configuration 18 Speaker Selection and Placement - Harman Kardon AVR 240 | Owners Manual - Page 3
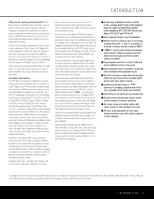
connection to digital recorders. Two video recording outputs, a preamp-out and a color-coded eight-channel input make the AVR 240 virtually futureproof, with everything needed to accommodate tomorrow's new formats right onboard. Until now, Harman Kardon AVRs have been able to accommodate almost any - Harman Kardon AVR 240 | Owners Manual - Page 4
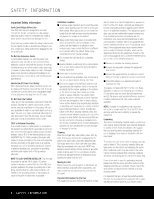
service center. CATV or Antenna Grounding If an outside antenna or cable system is connected to this product, be certain that it is grounded so as to provide some protection against voltage surges and static charges. Section 810 of the National Electrical Code beyond Harman Kardon's control, - Harman Kardon AVR 240 | Owners Manual - Page 5
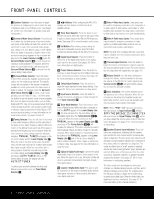
Ô Video 4 Audio Input Jacks Channel Adjust Selector Ò Volume Control Ú Input Indicators Û Speaker/Channel Input Indicators Ù Upper Display Line ı Lower Display Line ˆ Surround Mode Indicators ˜ Remote Sensor Window 1 Main Power Switch: Press this button to apply power to the AVR 240. When the - Harman Kardon AVR 240 | Owners Manual - Page 6
the process of trimming the channel output levels using an external audio source. (For more information on output level trim adjustment, see page 40.) Ò Volume Control: Turn this knob clockwise to increase the volume, counterclockwise to decrease the volume. If the AVR 240 is muted, adjusting the - Harman Kardon AVR 240 | Owners Manual - Page 7
When the Dolby Virtual Speaker mode is in use, no Surround Mode Indicator R will light. However, the surround mode name will scroll in the Lower Display Line Q. ˜ Remote Sensor Window: The sensor behind this window receives infrared signals from the remote control. Aim the remote at this area and do - Harman Kardon AVR 240 | Owners Manual - Page 8
the instructions that refer to this illustration, a larger copy may be downloaded from the Product Support section for this product at www.harmankardon.com. ¡ FM Antenna Jack ™ CD Audio Inputs £ Tape Outputs ¢ Tape Inputs ∞ Remote IR Input § Remote IR Output ¶ Preamp Outputs • Subwoofer Output - Harman Kardon AVR 240 | Owners Manual - Page 9
: This connection permits the IR sensor in the receiver to serve other remote controlled devices. Connect this jack to the "IR IN" jack on Harman Kardon (or other compatible) equipment. ¶ Preamp Outputs: Connect these jacks to an optional, external power amplifier for applications where higher power - Harman Kardon AVR 240 | Owners Manual - Page 10
and GND terminals in accordance with the instructions supplied with the antenna. NOTE ON VIDEO CONNECTIONS: When connecting a video source product such as a VCR, DVD player, satellite receiver, cable set-top box, personal video recorder or video game to the AVR 240, you may use either a composite or - Harman Kardon AVR 240 | Owners Manual - Page 11
easier to follow the instructions that refer to this illustration, a larger copy may be downloaded from the Product Support section for this product at www.harmankardon.com. REMOTE CONTROL FUNCTIONS c ba d e f g h i j k l m n o p q n r s t u v w x y z POWER ON OFF MUTE AVR VCR VID1 DIM DVD - Harman Kardon AVR 240 | Owners Manual - Page 12
factory to operate the AVR 240 and most Harman Kardon CD or DVD players and cassette decks. The remote is also capable of operating a wide variety of other products using the control codes that are part of the remote. Before using the remote with other products, follow the instructions on page 44 to - Harman Kardon AVR 240 | Owners Manual - Page 13
AVR 240, but when used with a compatible VCR, DVD or satellite receiver, pressing this button will switch between the output of the device and the external video input. Consult the owner's manual for your specific player or receiver for the details of how it implements this function. REMOTE CONTROL - Harman Kardon AVR 240 | Owners Manual - Page 14
be used in conjunction with the 6/8Channel Direct Input j as the audio source. f Mute: Press this button to momentarily silence the AVR 240 or TV set being controlled, depending on which device has been selected. When the AVR 240 remote is being programmed to operate another device, this button is - Harman Kardon AVR 240 | Owners Manual - Page 15
to the Video 1 Audio/Video and/or S-Video Output Jacks QY on the AVR 240. Although any video device may be connected to these jacks, we recommend connecting your video recorder to take advantage of the fact that the remote control is preprogrammed with video recorder product codes for the Video - Harman Kardon AVR 240 | Owners Manual - Page 16
these jacks, we recommend connecting your cable TV converter or satellite receiver to take advantage of the fact that the remote control is preprogrammed with the product codes of these device types for the Video 2 device. 3. Connect the analog audio and video outputs of a television or other video - Harman Kardon AVR 240 | Owners Manual - Page 17
NOTE: Many audio and video products go into a Standby mode when they are used with switched outlets, and cannot be fully turned on using the outlet alone without a remote control command. The Unswitched AC Accessory Outlet ° will receive power as long as the unit is plugged into a powered AC outlet. - Harman Kardon AVR 240 | Owners Manual - Page 18
audio, video and system connections have been made, the final steps before listening to your new AVR surround sound specific a guide, audio moves across the front of the room smoothly, without seeming to jump from one speaker to another. Center Channel Speaker The ideal location for the center channel - Harman Kardon AVR 240 | Owners Manual - Page 19
surround back speaker as soon as possible. Surround Speakers for 7.1 Systems For the ultimate home theater experience, a 7.1 surround system uses both traditional surround left/right channels and a surround of advanced surround modes such as Dolby Digital EX, DTS-ES and Harman Kardon's proprietary - Harman Kardon AVR 240 | Owners Manual - Page 20
menus. ** MASTER MENU ** INPUT SETUP AUDIO SETUP SURROUND SELECT EzSet+ MANUAL SETUP ADVANCED Figure 1 The semi-OSD system is also available, allowing you to make adjustments directly, by pressing the appropriate buttons on the front panel or remote control for the specific parameter to be adjusted - Harman Kardon AVR 240 | Owners Manual - Page 21
inputs so that they are properly configured to reflect the use of digital or analog audio inputs, component video inputs and the surround mode specifics of your home theater system. Remember that since the AVR 240 memorizes these settings for each input independently, you will need to make some of - Harman Kardon AVR 240 | Owners Manual - Page 22
. See page 27 for more information. Note that the AVR 240 is configured for 6.1/7.1 operation by default. It is easiest to complete the surround setup using the full-OSD on-screen menus, although you may also use the remote control buttons for each mode group (see pages 12-13). From the MASTER MENU - Harman Kardon AVR 240 | Owners Manual - Page 23
. In addition, some of the modes available in the AVR 240 will not appear unless a digital source is selected and is playing the correct bitstream. Remember that when 6.1-channel program material is playing, the same information will be heard through both of the surround back speakers. To select the - Harman Kardon AVR 240 | Owners Manual - Page 24
Buttons o on the remote are determined by whether the 5.1- or 6.1/7.1-channel configuration is in use. In either case, the selection of a Logic 7 mode enables Harman Kardon's exclusive Logic 7 processing to create fully enveloping, multichannel surround sound from either two-channel Stereo or Matrix - Harman Kardon AVR 240 | Owners Manual - Page 25
microphone into the AVR 240's Headphone Jack 4, making certain that the mini-plug to 1/4" phone plug adaptor supplied with the microphone is firmly connected. The microphone cable than six speakers. For smaller systems, configure your receiver using the manual setup section on pages 26-31. * EzSet+ - Harman Kardon AVR 240 | Owners Manual - Page 26
the settings entered by EzSet+, follow the instructions on the following pages. Manual Setup Harman Kardon recommends that you use the EzSet+ procedure described on pages 24-26 to configure your receiver for operation. However, you may manually configure your AVR if you have fewer than six speakers - Harman Kardon AVR 240 | Owners Manual - Page 27
7 as the surround mode the "large" option will not be available for the center speaker. This is due to the requirements of Logic 7 processing, and does not indicate a problem with your receiver. When NONE is selected, no signals will be sent to the center channel output. The receiver will operate - Harman Kardon AVR 240 | Owners Manual - Page 28
modes are available, and a full-range signal will be sent to the surround back channels, with no low-frequency information sent to the subwoofer output. NOTE: Although Harman Kardon strongly recommends using two surround back speakers, we recognize that some users may have only a single surround - Harman Kardon AVR 240 | Owners Manual - Page 29
for the speaker placement and acoustic conditions in your listening room or home theater. In addition to adjusting the delay time for each individual speaker position, the AVR 240 allows you to adjust the delay for the combined output of all speakers as a group. This feature is called A/V Sync Delay - Harman Kardon AVR 240 | Owners Manual - Page 30
the instructions in this section to manually set the correct speaker size, delay and output level for the surround back speaker. Remember that the test tone will circulate to all seven channels; you simply won't hear any sound when it reaches the right surround back channel. Harman Kardon strongly - Harman Kardon AVR 240 | Owners Manual - Page 31
need to reenter the delay and output level settings for each surround mode. When all settings and adjustments have been made, press the OSD Button v to return to normal operation of the AVR. Once the settings outlined on the previous pages have been made, the AVR 240 is ready for operation. While - Harman Kardon AVR 240 | Owners Manual - Page 32
iPod is inserted in an optional Harman Kardon TheBridgeTM that is connected to TheBridgeTM DMP Connector e on the rear panel, navigation messages will appear on any video display connected to the AVR's Video Monitor Outputs cV. The remote control or front-panel controls may be used to navigate the - Harman Kardon AVR 240 | Owners Manual - Page 33
the Digital Audio Playback section. The Dolby Pro Logic IIx modes are available only when the AVR 240 has been configured for 6.1/7.1 operation by setting the Surround Back speakers as either LARGE or SMALL as described on page 27. These modes provide a matrixed 6.1-channel presentation of analog - Harman Kardon AVR 240 | Owners Manual - Page 34
6.1/7.1 sound field is available. When the receiver is set for 6.1/7.1 operation and a Dolby Digital signal is present, the EX mode is automatically selected. Even if specific EX encoding is not available to provide the additional channel, EX mode may be manually selected to derive a 6.1/7.1 output - Harman Kardon AVR 240 | Owners Manual - Page 35
). The specific mode available will vary depending on the number of channels in the incoming Dolby Digital signal. Theater The Theater mode creates a sound field that resembles the acoustic feeling of a standard live-performance theater. Depending on whether you have configured your surround back - Harman Kardon AVR 240 | Owners Manual - Page 36
Consult the owner's manual for your player to find the specific information to find the proper setting. Selecting a Digital Source To utilize either digital mode, you must have properly connected a digital source to the AVR 240. Connect the digital outputs from DVD players, HDTV receivers, satellite - Harman Kardon AVR 240 | Owners Manual - Page 37
the surround back channel from the DTS bitstream information. Surround Mode Post Processing Thanks to the power of the AVR 240's DSP processor, a variety of surround mode options are available for most digital signals to deliver either the native information or to produce an enhanced sound field - Harman Kardon AVR 240 | Owners Manual - Page 38
ES Matrix, DTS-ES Discrete, DTS Neo:6 (6-channel), Logic 7 (7-channel), Hall 1 (6-channel), Hall 2 (6-channel), Theater (6-channel) and 7-channel Stereo modes are only available when the AVR has been configured for 6.1/7.1 operation by configuring the Surround Back channels as LARGE or SMALL. ***The - Harman Kardon AVR 240 | Owners Manual - Page 39
in the Lower Display Line ı and goes out. This will also activate manual tuning mode. Preset Tuning Using the remote, up to 30 stations may be stored in the AVR 240's memory for easy recall using the front panel controls or the remote. To enter a station into the memory, first tune the station using - Harman Kardon AVR 240 | Owners Manual - Page 40
When Harman Kardon's TheBridgeTM (optional) is connected and a compatible iPod® is docked in The Bridge, press the TheBridgeTM DMP Selector Button d to choose the iPod as the input source. Pressing the TheBridgeTM DMP Selector Button d will also activate the AVR remote's control codes for - Harman Kardon AVR 240 | Owners Manual - Page 41
after the AVR is turned off and then on again. To return the displays to full brightness of the displays or turning them off completely, you may wish to have them appear whenever a button on the remote or front panel is pushed, and then gradually fade out after a set time period. You may do this by - Harman Kardon AVR 240 | Owners Manual - Page 42
-On Volume Level As is the case with most audio/video receivers, when the AVR 240 is turned on, it will always return to the volume setting in effect when the unit was turned off. However, you may prefer to always have the AVR 240 turn on at a specific setting, regardless of what was last in use - Harman Kardon AVR 240 | Owners Manual - Page 43
exit the menu system. Default Surround Mode In normal operation, when the AVR 240 senses a Dolby Digital or DTS digital audio data stream, it will automatically default to the surround mode encoded on the DVD disc or in the digital video broadcast. (If a two-channel analog or PCM signal is detected - Harman Kardon AVR 240 | Owners Manual - Page 44
control that will control not only the receiver's functions, but also most popular brands of audio and video equipment, including CD players, cassette decks, TV sets, cable boxes, VCRs, satellite receivers and other home theater equipment. Once the AVR 240's remote is programmed with the codes - Harman Kardon AVR 240 | Owners Manual - Page 45
with the AVR 240. Other buttons will change their function so that they correspond to a secondary label on the remote. For example, the Sleep and Surround mode selector buttons also function as the Channel Up and Channel Down buttons when operating most TV sets, VCRs or cable boxes. The Channel Up - Harman Kardon AVR 240 | Owners Manual - Page 46
the specific TV, CD, DVD, cable or satellite receivers has been completed. • The AVR 240 remote is preprogrammed at the factory so that the Transport Control Functions ` operate the DVD player whenever the AVR device is selected. Resetting the Remote Memory As you add components to your home theater - Harman Kardon AVR 240 | Owners Manual - Page 47
Up Volume Up Volume Up Volume Up 20 Surr/CH- DSP Surround Mode Select Disc Menu or Title CDR Select Channel - Channel - Channel - Channel - Channel - 21 Night Night Mode Select Subtitle On/Off CDP Select 22 Spare HD Mode 23 Vol Down Volume Down Volume Down Volume Down Volume Down Volume - Harman Kardon AVR 240 | Owners Manual - Page 48
FUNCTION LIST No. Button Name AVR Function 45 Tuning Up Tuning Up 46 55 M3 Macro 3 56 M4 Macro 4 57 Dolby Surround Dolby Modes 58 DTS Surround DTS Digital Modes 59 DTS Neo:6 DTS Neo:6 Select 60 Logic 7 Logic 7 Select 61 Stereo Stereo Mode Select 62 Skip Down Skip - (DVD) 63 Skip - Harman Kardon AVR 240 | Owners Manual - Page 49
DAEWOO DAYTRON DIGI LINK DYNASTY DYNATECH ELECTROHOME EMERSON FUNAI FUTURETECH GE GOLDSTAR/LG GRUNDIG HALL MARK HARMAN KARDON HITACHI INFINITY INKEL JBL JC PENNEY JENSEN JVC KAWASHO KEC KENWOOD KMC KTV LLOYTRON LODGENET Setup Code Number 027 122 132 192 123 160 164 045 106 109 112 122 122 123 128 - Harman Kardon AVR 240 | Owners Manual - Page 50
QUASAR RADIO SHACK RCA REALISTIC RUNCO SAA SAMPO SAMSUNG SANYO SCOTT SEARS SHARP SIEMENS SIGNATURE SONY SOUNDESIGN SPECTRICON SSS SYLVANIA SYMPHONIC TANDY TATUNG TECHNICS TECHWOOD Setup Code Number 069 128 077 145 148 030 123 128 132 145 148 115 123 148 148 069 128 084 115 123 128 084 077 115 - Harman Kardon AVR 240 | Owners Manual - Page 51
/Brand TEKNIKA TELERENT TERA THOMSON TMK TOSHIBA TOTEVISION VIDEO CONCEPTS VIDTECH WARDS YAMAHA YORK YUPITERU ZENITH ZONDA Setup Code Number 045 069 115 123 128 132 069 156 190 191 128 063 129 202 132 160 128 069 128 132 148 123 128 128 045 069 090 122 SETUP CODE TABLE: TV SETUP CODES 51 - Harman Kardon AVR 240 | Owners Manual - Page 52
SETUP CODE TABLE: VCR Manufacturer/Brand AIWA AKAI AMPRO ASA AUDIO DYNAMICS BROKSONIC CANDLE CANON CAPEHART CITIZEN COMCAST CRAIG DAEWOO DAYTRON DBX DYNATECH EMERSON FISHER FUNAI GE GO VIDEO GOLDSTAR/LG HARMAN KARDON HITACHI JC PENNEY JENSEN JVC KENWOOD LLOYD LXI MAGIN MAGNAVOX MARANTZ MEMOREX MGA - Harman Kardon AVR 240 | Owners Manual - Page 53
SEARS SHARP SONY SOUNDESIGN SYLVANIA SYMPHONIC TANDY TASHICO TATUNG TEAC TEKNIKA THOMAS TiVo TMK TOSHIBA TOTEVISION UNITECH VECTOR RESEARCH VIDEO CONCEPTS VIDEOSONIC WARDS YAMAHA ZENITH Setup Code Number 017 020 040 045 159 020 045 051 095 105 109 048 116 147 017 020 110 112 017 020 129 156 080 129 - Harman Kardon AVR 240 | Owners Manual - Page 54
SETUP CODE TABLE: CD Manufacturer/Brand ADCOM AIWA AKAI AUDIO TECHNICA AUDIOACCESS AUDIOFILE BSR CALIFORNIA AUDIO CAPETRONIC CARRERA CARVER CASIO CLARINETTE DENON EMERSON FISHER FRABA FUNAI GE GENEXXA GOLDSTAR/LG HAITAI HARMAN KARDON HITACHI INKEL JC PENNEY JENSEN JVC KENWOOD LOTTE LUXMAN LXI - Harman Kardon AVR 240 | Owners Manual - Page 55
039 013 074 097 151 155 173 087 120 130 095 019 031 053 061 135 169 166 SETUP CODE TABLE: DVD Manufacturer/Brand APEX DIGITAL DENON GE GOLDSTAR/LG HARMAN KARDON JVC MAGNAVOX MARANTZ MITSUBISHI NAD ONKYO PANASONIC PHILIPS PIONEER PROCEED PROSCAN RCA SAMSUNG SHARP SONY THOMSON TOSHIBA YAMAHA ZENITH - Harman Kardon AVR 240 | Owners Manual - Page 56
NORSAT OPTIMUS PACE DSS PANASONIC PANASONIC DBS PANSAT PERSONAL CABLE PHILIPS PICO PRESIDENT PRIMESTAR RCA RCA DSS REALISTIC SAMSUNG SATELLITE SERVICE CO SCIENTIFIC ATLANTA SONY STAR CHOICE DBS STARCAST SUPER GUIDE TEECOM TOSHIBA UNIDEN ZENITH Setup Code Number 472 450 442 425 320 321 325 361 - Harman Kardon AVR 240 | Owners Manual - Page 57
SETUP CODE TABLE: TAPE Manufacturer/Brand HARMAN KARDON Setup Code Number 001 SETUP CODE TABLE: CBL Manufacturer/Brand ABC ALLEGRO AMERICAST ARCHER BELCOR CABLE STAR CITIZEN COLOUR VOICE DIGI EAGLE EASTERN ELECTRICORD EMERSON FOCUS G.I. GC ELECTRONICS GEMINI GENERAL GENERAL INSTRUMENT GOODMIND - Harman Kardon AVR 240 | Owners Manual - Page 58
: CBL Manufacturer/Brand REMBRANT SAMSUNG SCIENTIFIC ATLANTA SEAM SIGNATURE SPRUCER STARCOM STARGATE TANDY TELECAPATION TEXSCAN TFC TIMELESS TOCOM UNITED CABLE UNIVERSAL VIDEOWAY VIEWSTAR ZENITH ZENTEK Setup Code Number 032 003 072 186 183 203 221 222 121 001 188 053 081 177 189 002 011 163 120 - Harman Kardon AVR 240 | Owners Manual - Page 59
red • Amplifier is in protection mode due to possible short • Amplifier is in protection mode due to internal problems • Check speaker wire connections for shorts at receiver and speaker ends • Contact your local Harman Kardon service center No sound from surround or center speakers • Incorrect - Harman Kardon AVR 240 | Owners Manual - Page 60
Accessories The following accessory items are supplied with the AVR 240. If any of these items are missing, please contact Harman Kardon customer service at www.harmankardon.com. • A system remote control • A microphone • Extender rod for microphone • Two covers for front-panel jacks • An AM loop - Harman Kardon AVR 240 | Owners Manual - Page 61
47, 48, 54, 55, 62 Channel Adjust Menu 30 Channel Control Punch-Through 46 Cleaning and Maintenance 4 Coaxial Digital Audio Jacks 5, 6, 8, 9, 15-16, 21, 36 Code Readout 44 Component Video 3, 8, 9, 16, 20, 21, 32, 60, 62 Composite Video 8, 9, 10, 32 Default Surround Mode 21, 43, 62 Delay Adjust Menu - Harman Kardon AVR 240 | Owners Manual - Page 62
2: Audio Setup (Tone Control Settings) CONTROL Tone (In/Out) Bass Treble SETTING Table 3: Delay Settings CHANNEL Left Front Right Front Center Surround Left Surround Right Surround Back Left Surround Back Right Subwoofer Unit (Feet/Meters) A/V Sync Delay SETTING Table 4: Output Level CHANNEL - Harman Kardon AVR 240 | Owners Manual - Page 63
- Harman Kardon AVR 240 | Owners Manual - Page 64
® Power for the Digital Revolution.® 250 Crossways Park Drive, Woodbury, New York 11797 www.harmankardon.com © 2006 Harman International Industries, Incorporated. All rights reserved. Part No. CQX1A1026Z 4/06
-
 1
1 -
 2
2 -
 3
3 -
 4
4 -
 5
5 -
 6
6 -
 7
7 -
8
-
9
-
10
-
11
-
12
-
13
-
14
-
15
-
16
-
17
-
18
-
19
-
20
-
21
-
22
-
23
-
24
-
25
-
26
-
27
-
28
-
29
-
30
-
31
-
32
-
33
-
34
-
35
-
36
-
37
-
38
-
39
-
40
-
41
-
42
-
43
-
44
-
45
-
46
-
47
-
48
-
49
-
50
-
51
-
52
-
53
-
54
-
55
-
56
-
57
-
58
-
59
-
60
-
61
-
62
-
63
-
64
 |
 |

DIGITAL
LOGIC 7
VID 1
DVD
CD
FMAM
TAPE
6 8 CH
VID 2
VID 3
VID 4
PRO LOGIC
3 STEREO
DSP
5 7 CH. STEREO
SURR. OFF
AVR
240
Optical 4
Coaxial 4
Video 4
HEADPHONE
AVR 240
AUDIO/VIDEO RECEIVER
OWNER’S MANUAL
Power for the Digital Revolution
.
®
®