Harman Kardon AVR 510 Owners Manual - Page 17
Installation And Connections - watts per channel
 |
View all Harman Kardon AVR 510 manuals
Add to My Manuals
Save this manual to your list of manuals |
Page 17 highlights
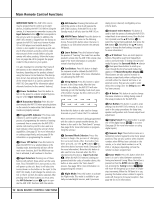
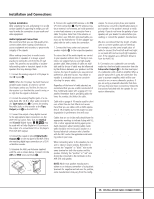
Installation and Connections IMPORTANT NOTE: Any cables run inside walls should be CL3/FT4-rated or carry any other certification that is required by the NEC or state and local building and electrical codes. To avoid interference, audio and speaker cables should not be parallel to, or run in the same conduits or path with, AC cables. If you have any questions about multiroom wiring, consult your dealer, custom installer or low-voltage electrical contractor. External Audio Power Amplifier Connections If desired, the AVR 510 may be connected to optional, external audio power amplifiers or used with equalizers or speaker systems that require connection between the preamp and amplifier sections of a receiver. To make these connections, remove the jumpers that connect the Preamp Out jacks ¤ and Amplifier In jacks ⁄ for the channels to be used with external devices. Store the jumpers in a safe place so that the AVR 510 may be used in its normal mode at a future date, if desired. When an external amplifier is used, connect the Preamp Out jacks ¤ to the inputs on the amplifier. When an equalizer or speaker processor is used, connect the Preamp Out jacks ¤ to the inputs of the processor, and connect the outputs of the processor back to the Amplifier In jacks ⁄ on the AVR 510. Note that when external amplifiers or devices are used, the volume control is still controlled by the AVR 510, although additional volume controls on the external device may impact the volume settings and output levels from the AVR 510. External Audio Decoder Connection To provide for ultimate flexibility, the AVR 510 may be used in conjunction with optional, external decoders for digital audio systems other than the AVR 510's own built-in Dolby Digital and DTS decoding system or with DVD players using the DVD Audio Format. If an external decoder is used, connect the output jacks of the decoder to the 6-Channel Direct Inputs ª, making sure to match channels. These jacks may also be used for connections to devices such as DVD players or High Definition Television (HDTV) sets or decoders that feature built-in digital surround decoders. Although the digital decoding system in the AVR 510 will typically provide audio performance that is superior to other decoders, you may use these jacks to provide an additional 6-channel input for connection to a DVD player or HDTV set with a built-in decoder and discrete 6-channel analog outputs. AC Power Connections This unit is equipped with two accessory AC outlets. They may be used to power accessory devices, but they should not be used with highcurrent draw equipment such as power amplifiers. The total power draw to each outlet may not exceed 100 watts. The Switched AC Accessory Outlet fl will receive power only when the unit is on. This is recommended for devices that have no power switch or a mechanical power switch that may be left in the "ON" position. NOTE: Many audio and video products go into a Standby mode when they are used with switched outlets, and cannot be fully turned on using the outlet alone without a remote control command. The Unswitched AC Accessory Outlet ‡ will receive power as long as the unit is plugged into a powered AC outlet. Finally, when all connections are complete, plug the power cord into a nonswitched 110-volt AC wall outlet. You're almost ready to enjoy the AVR 510! 17 INSTALLATION AND CONNECTIONS
-
 1
1 -
2
-
3
-
4
-
5
-
6
-
7
-
8
-
9
-
10
-
11
-
 12
12 -
 13
13 -
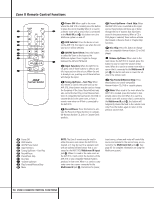 14
14 -
 15
15 -
 16
16 -
 17
17 -
 18
18 -
 19
19 -
 20
20 -
 21
21 -
 22
22 -
23
-
24
-
25
-
26
-
27
-
28
-
29
-
30
-
31
-
32
-
33
-
34
-
35
-
36
-
37
-
38
-
39
-
40
-
41
-
42
-
43
-
44
-
45
-
46
-
47
-
48
-
49
-
50
-
51
-
52
-
53
-
54
-
55
-
56
 |
 |
