Harman Kardon AVR 510 Owners Manual - Page 22
System Configuration - problems
 |
View all Harman Kardon AVR 510 manuals
Add to My Manuals
Save this manual to your list of manuals |
Page 22 highlights
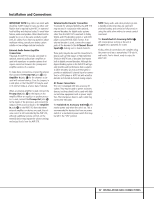
System Configuration OFF: When OFF is highlighted, the Night mode will not function. MID: When MID is highlighted, a mild compression will be applied. MAX: When MAX is highlighted, a more severe compression algorithm will be applied. We recommend that you select the MID setting as a starting point and change to the MAX setting later, if desired. Note that the Night mode may be adjusted directly any time that a Dolby Digital source is playing by pressing the Night button l. When the button is pressed, the phrase D-RANGE will appear in the lower third of the video screen and in the Main Information Display Y. Press the ⁄/¤ button n within three seconds to select the desired setting. When all settings for the surround setup have been made, press the ⁄/¤ buttons n so that the › cursor is next to RETURN TO MENU, and press the Set button p to return to the main menu. Speaker Setup This menu tells the AVR 510 which type of speakers are in use. This is important as it adjusts the settings that determine which speakers receive low-frequency (bass) information. For each of these settings use the LARGE setting if the speakers for a particular position are traditional full-range loudspeakers that are capable of reproducing sounds below 100Hz. Use the SMALL setting for smaller, frequency-limited satellite speakers that do not reproduce sounds below 100Hz. Note that when "small" speakers are used, a subwoofer is required to reproduce low-frequency sounds. Remember that the "large" and "small" descriptions do not refer to the actual physical size of the speakers, but to their ability to reproduce low-frequency sounds. If you are in doubt as to which category describes your speakers, consult the specifications in the speakers' owner's manual, or ask your dealer. It is easiest to enter the proper settings for the speaker setup through the SPEAKER SETUP menu (Figure 5). If that menu is not already on your screen from the prior adjustments, press the OSD button v to bring up the MASTER MENU (Figure 1), and then press the ¤ button n twice so that the cursor is on the SPEAKER SETUP line. At this point, press the Set button p to bring up the SPEAKER SETUP menu (Figure 5). * SPEAKER SETUP * LEFT/RIGHT: SMALL CENTER : SMALL SURROUND : SMALL SUBWOOFER : SUB SUB X-OVER FREQ:80 HZ RETURN TO MENU Figure 5 When the SPEAKER SETUP menu first appears, the on-screen cursor › will be at the top of the list of speaker positions, pointing toward the LEFT/RIGHT line, which sets the configuration for the front left and right speakers. If you wish to make a change to the front speakers' configuration, press the ‹/› buttons o 31 so that either LARGE or SMALL appears, matching the appropriate description from the definitions shown above. When SMALL is selected, low-frequency sounds will be sent only to the subwoofer output. If you choose this option and there is no subwoofer connected, you will not hear any low frequency sounds from the front channels. When LARGE is selected, a full-range output will be sent to the front left and front right outputs. Depending on the choice made in the SUBWOOFER line in this menu, bass information may also be directed to the front left/right speakers, a subwoofer or both. When you have completed your selection for the front channel, press the ¤ button n on the remote to move the cursor to CENTER. Press the ‹/› buttons o 31 on the remote to select the option that best describes your system, based on the speaker definitions shown below. When SMALL is selected, low-frequency center-channel sounds will be sent only to the subwoofer output. If you choose this option and there is no subwoofer connected, you will not hear low-frequency sounds from the centerchannel speaker. When LARGE is selected, a full-range output will be sent to the center speaker output, and NO center channel signal will be sent to the subwoofer output. NOTE: If you choose Logic 7 as the surround mode for the particular input source for which you are configuring your speakers, the AVR 510 will not make the LARGE option available for the center speaker. This is due to the requirements of Logic 7 processing, and does not indicate a problem with your receiver. When NONE is selected, no signals will be sent to the center-channel output. The receiver will operate in a "phantom" center channel mode and center-channel information will be sent to the left and right front channel outputs. When only front left and right speakers are used, with no center or surround speakers, VMAx is a good alternative mode. When you have completed your selection for the center channel, press the ¤ button n on the remote to move the cursor to SURROUND. Press the ‹/› buttons o 31 on the remote to select the option that best describes the surround speakers in your system based on the speaker definitions shown on this page. When SMALL is selected, low-frequency surround channel sounds will be sent to the subwoofer output only. If you choose this option and there is no subwoofer connected, you will not hear any low frequency sounds from the surround speakers. When LARGE is selected, a full-range output will be sent to the surround channel outputs, and NO surround channel signals will be sent to the subwoofer output. When NONE is selected, surround-sound information will be split between the front left and front right outputs. For optimal performance when no surround speakers are in use, the Dolby 3 Stereo mode should be used. When you have completed your selection for the surround channel, press the ¤ button n on the remote to move the cursor to SUBWOOFER. Press the ‹/› buttons o 31 on the remote to select the option that best describes your system. The choices available for the subwoofer position will depend on the settings for the other speakers, particularly the front left/right positions. 22 SYSTEM CONFIGURATION
-
 1
1 -
2
-
3
-
4
-
5
-
6
-
7
-
8
-
9
-
10
-
11
-
12
-
13
-
14
-
15
-
16
-
 17
17 -
 18
18 -
 19
19 -
 20
20 -
 21
21 -
 22
22 -
 23
23 -
 24
24 -
 25
25 -
 26
26 -
 27
27 -
28
-
29
-
30
-
31
-
32
-
33
-
34
-
35
-
36
-
37
-
38
-
39
-
40
-
41
-
42
-
43
-
44
-
45
-
46
-
47
-
48
-
49
-
50
-
51
-
52
-
53
-
54
-
55
-
56
 |
 |
