HealthRider Hotel Fitness Tr9800 Treadmill English Manual - Page 12
location see HOW TO MOVE THE TREADMILL
 |
View all HealthRider Hotel Fitness Tr9800 Treadmill manuals
Add to My Manuals
Save this manual to your list of manuals |
Page 12 highlights
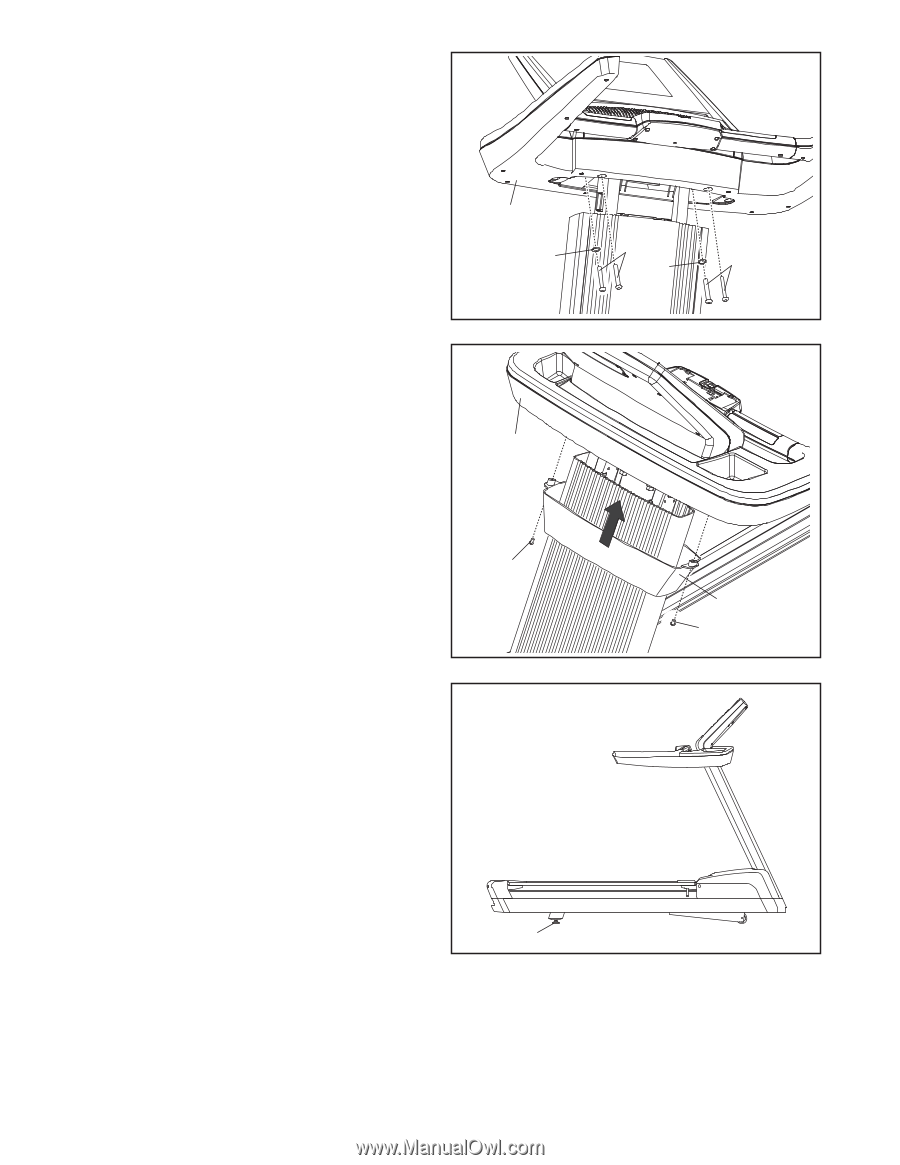
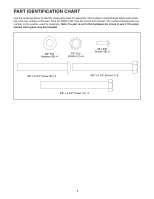
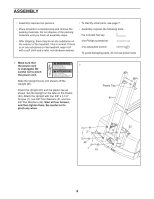
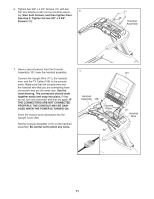
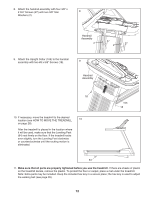
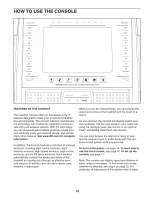
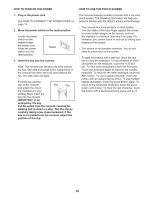
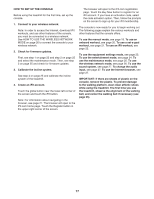
8. Attach the handrail assembly with four 3/8" x 2 3/4" Screws (27) with two 3/8" Star 8 Washers (2). Handrail Assembly 2 27 2 27 9. Attach the Upright Collar (105) to the handrail assembly with two #8 x 5/8" Screws (18). 9 Handrail Assembly 18 10. If necessary, move the treadmill to the desired location (see HOW TO MOVE THE TREADMILL 10 on page 28). After the treadmill is placed in the location where it will be used, make sure that the Leveling Feet (64) rest firmly on the floor. If the treadmill rocks even slightly, turn the Leveling Foot clockwise or counterclockwise until the rocking motion is eliminated. 105 18 64 11. Make sure that all parts are properly tightened before you use the treadmill. If there are sheets of plastic on the treadmill decals, remove the plastic. To protect the floor or carpet, place a mat under the treadmill. Note: Extra parts may be included. Keep the included hex key in a secure place; the hex key is used to adjust the walking belt (see page 35). 12
-
 1
1 -
2
-
3
-
4
-
5
-
6
-
 7
7 -
 8
8 -
 9
9 -
 10
10 -
 11
11 -
 12
12 -
 13
13 -
 14
14 -
 15
15 -
 16
16 -
 17
17 -
18
-
19
-
20
-
21
-
22
-
23
-
24
-
25
-
26
-
27
-
28
-
29
-
30
-
31
-
32
-
33
-
34
-
35
-
36
-
37
-
38
-
39
-
40
-
41
-
42
-
43
-
44
 |
 |