HealthRider Hotel Fitness Tr9800 Treadmill English Manual - Page 30
Remove the Right Cap Insert Bracket 41 and
 |
View all HealthRider Hotel Fitness Tr9800 Treadmill manuals
Add to My Manuals
Save this manual to your list of manuals |
Page 30 highlights
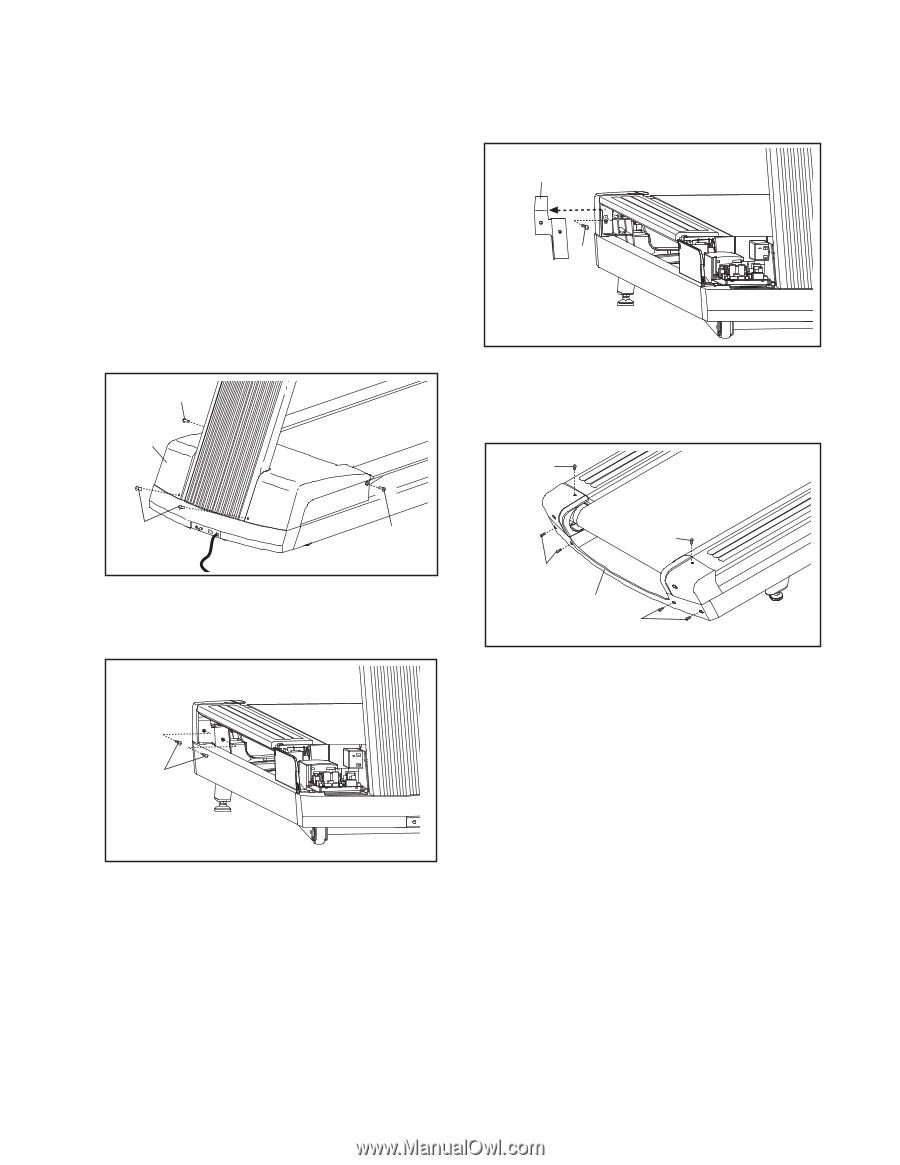
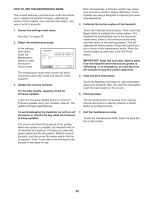
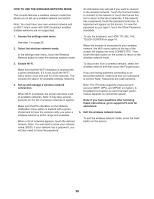
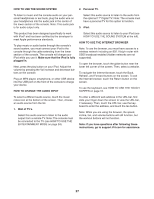
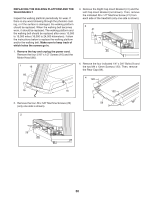
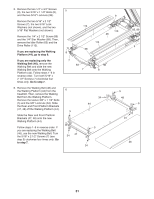
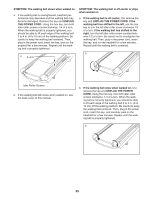
REPLACING THE WALKING PLATFORM AND THE WALKING BELT Inspect the walking platform periodically for wear. If there is any wood showing through the phenolic coating, or if the surface is damaged, the walking platform should be replaced. When the walking belt becomes worn, it should be replaced. The walking platform and the walking belt should be replaced after every 10,000 to 15,000 miles (16,000 to 24,000 kilometers). Follow the instructions below to replace the walking platform and/or the walking belt. Make sure to keep track of which holes the screws go in. 1. Remove the key and unplug the power cord. Remove the four 5/16" x 1/2" Screws (16) and the Motor Hood (66). 1 16 66 3. Remove the Right Cap Insert Bracket (41) and the Left Cap Insert Bracket (not shown). Then, remove the indicated #8 x 1/2" Machine Screw (21) from each side of the treadmill (only one side is shown). 3 41 21 4. Remove the four indicated 1/4" x 3/4" Bolts (9) and the two M4 x 13mm Screws (122). Then, remove the Rear Cap (59). 4 122 16 16 2. Remove the four #8 x 5/8" Machine Screws (26) (only one side is shown). 2 122 9 59 9 26 30
-
 1
1 -
2
-
3
-
4
-
5
-
6
-
7
-
8
-
9
-
10
-
11
-
12
-
13
-
14
-
15
-
16
-
17
-
18
-
19
-
20
-
21
-
22
-
23
-
24
-
 25
25 -
 26
26 -
 27
27 -
 28
28 -
 29
29 -
 30
30 -
 31
31 -
 32
32 -
 33
33 -
 34
34 -
 35
35 -
36
-
37
-
38
-
39
-
40
-
41
-
42
-
43
-
44
 |
 |