HP 1018 Service Manual
HP 1018 - LaserJet B/W Laser Printer Manual
 |
UPC - 882780435094
View all HP 1018 manuals
Add to My Manuals
Save this manual to your list of manuals |
HP 1018 manual content summary:
- HP 1018 | Service Manual - Page 1
HP LaserJet 1018 Service Manual - HP 1018 | Service Manual - Page 2
- HP 1018 | Service Manual - Page 3
HP LaserJet 1018 printer Service Manual - HP 1018 | Service Manual - Page 4
, check with a qualified electrician. Do not touch the contacts on the end of any of the sockets on the HP LaserJet 1018 printer. Replace damaged cords immediately. Unplug this product from wall outlets before cleaning or servicing. Do not install or use this product near water or when you are wet - HP 1018 | Service Manual - Page 5
HP LaserJet 1018 printer ...3 Model and serial numbers ...5 Hardware description ...5 Firmware description ...5 Product specifications ...6 Physical specifications ...6 Printer performance ...6 Environmental specifications 6 Electrical specifications ...7 Acoustic emissions ...8 Extended service - HP 1018 | Service Manual - Page 6
(engine control unit and power assembly 42 Printer-engine-control system 42 Printer laser/scanner unit 43 Power system on the engine power assembly 44 Image-formation system ...45 The seven image-formation processes 46 Print cartridge ...47 Printer paper-feed system 47 Jam detection ...49 - HP 1018 | Service Manual - Page 7
locations 90 Removing a jammed page 90 Print-quality troubleshooting ...93 Print-cartridge problems ...93 Checking the print cartridge 93 To redistribute toner in the print cartridge 93 Solving print-quality problems 93 Solving paper-feed problems ...105 Functional checks ...107 Half self-test - HP 1018 | Service Manual - Page 8
Accessories and consumables ...117 Accessories ...117 Common hardware ...118 How to use the parts lists and diagrams 118 Printer exchange/parts ...119 Major components ...122 Alphabetical parts list ...124 Numerical parts list ...126 Index ...129 vi ENWW - HP 1018 | Service Manual - Page 9
1 Product Information This chapter provides general product information for the HP LaserJet 1018 printer. ● Product configuration ● Overview of product ● Product specifications ● Extended service plan ● Print-cartridge information ● Regulatory information ENWW 1 - HP 1018 | Service Manual - Page 10
Product configuration The HP LaserJet 1018 printer (HP LJ 1018) offers the following features: ● Prints up to 12 ppm ● 10 seconds or less to first page out ● FastRes 1200: 1200 dpi effective output quality (600 x 600 x 2 dpi with HP Resolution Enhancement technology [REt]) ● 150-sheet input capacity - HP 1018 | Service Manual - Page 11
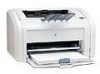
Overview of product HP LaserJet 1018 printer Figure 1-1 Front and right-side view 1 Attention light 2 Ready light 3 Print-cartridge door 4 Output-media support 5 Priority feed slot 6 150-sheet main input tray 7 Output bin ENWW Overview of product 3 - HP 1018 | Service Manual - Page 12
8 10 9 11 Figure 1-2 Back and left-side view 8 On/off switch 9 Power receptacle 10 USB port 11 Separation pad 4 Chapter 1 Product Information ENWW - HP 1018 | Service Manual - Page 13
-rating and regulatory information. Figure 1-3 Model- and serial-number label (HP LJ 1010 printer is shown) Hardware description The HP LaserJet 1018 printer offers HP REt technology for 600 x 600 x 2 dpi printing (effectively 1200 dpi). The printer prints up to 12 ppm. With an effective 1200 dpi - HP 1018 | Service Manual - Page 14
Product specifications This section lists the specifications for the HP LaserJet 1018 printer. Physical specifications Table 1-1 Physical specifications Model HP LaserJet 1018 printer Height 209 mm (8.3 inches) Depth 242 mm (9.5 inches) Width 370 mm (14.6 inches) Weight 5.9 kg (13.0 lb) - HP 1018 | Service Manual - Page 15
Table 1-5 Power consumption (average, in watts)1 Product model Printing2 Ready2 PowerSave Off HP LaserJet 1018 250 W 4 W 4 W 0 W printer 1 Values are subject to change. See http://www.hp.com/support/lj1018 for current information. 2 Power reported is highest value measured for printing - HP 1018 | Service Manual - Page 16
Printing LpAm = 49 dB (A) Ready Inaudible 1 Values are subject to change. See http://www.hp.com/support/lj1018 for current information. Configuration tested: HP LaserJet 1018 printer using the standard tray, A4 paper, and simplex, continuous printing. During other operations, acoustic emissions - HP 1018 | Service Manual - Page 17
service plan In most countries/regions, extended service plans are available for hardware and technical support coverage for terms of up to three years. The service plan must be purchased during the hardware product's period of original warranty validity (typically one year). ENWW Extended service - HP 1018 | Service Manual - Page 18
supply of toner. The HP LaserJet 1018 ships with a 1000-page introductory print cartridge. The standard replacement print-cartridge life is 2,000 pages, in accordance with ISO/IEC 19752. NOTE Actual print cartridge life depends on specific usage. Refilled print cartridges While Hewlett-Packard does - HP 1018 | Service Manual - Page 19
installation. This equipment generates, uses, and can radiate radio frequency energy. If it is not installed and used in accordance with the instructions . NOTE Any changes or modifications to the printer that are not expressly approved by Hewlett- Packard could void the user's authority to operate - HP 1018 | Service Manual - Page 20
statement for Finland LASERTURVALLISUUS LUOKAN 1 LASERLAITE KLASS 1 LASER APPARAT HP LaserJet 1018 -laserkirjoitin on käyttäjän kannalta turvallinen luokan 1 laserlaite. Normaalissa käytössä kirjoittimen suojakotelointi estää lasersäteen pääsyn laitteen ulkopuolelle. Laitteen turvallisuusluokka on - HP 1018 | Service Manual - Page 21
2 Installation and operation This chapter provides an overview of the appropriate operating environment, describes the control panel, describes media requirements, and describes how to load print - HP 1018 | Service Manual - Page 22
humidity (no condensation) ● Away from direct sunlight, open flames, and ammonia fumes ● With sufficient space around the product to accommodate access and ventilation requirements Figure 2-1 HP LaserJet 1018 printer dimensions 14 Chapter 2 Installation and operation ENWW - HP 1018 | Service Manual - Page 23
lights. These lights produce patterns that identify printer status. Figure 2-2 Control-panel lights 1 Attention light: Indicates that the print-cartridge door is open, print cartridge is missing, and other errors. 2 Ready light: Indicates that the printer is ready to print. ENWW Identifying the - HP 1018 | Service Manual - Page 24
printer performance and output quality. Media should conform to the guidelines in the User Guide. Media that does not meet HP media that does not meet HP specifications is not covered by the HP warranty or service agreements. Supported media sizes The printer supports media within this size range: - HP 1018 | Service Manual - Page 25
media HP LaserJet printers produce inks incompatible with the printer temperature, which is 200°C (392°F) for 0.1 second. Transparencies must be able to withstand 200°C (392°F), the maximum print temperature. Common media problems table Symptom Problem with paper Poor print quality or toner - HP 1018 | Service Manual - Page 26
labels that has already been sent through the printer. Envelopes Envelope construction is critical. Envelope fold inch) curl and should not contain air. Envelopes that trap air may cause problems. ● Condition: Make sure that the envelopes are not wrinkled, nicked, or Installation and operation ENWW - HP 1018 | Service Manual - Page 27
-off adhesive strip or with more than one flap that folds over to seal must use adhesives compatible with the heat and pressure in the printer: 200°C (392°F). The extra flaps and strips might cause wrinkling, creasing, or jams. ENWW Guidelines for using media 19 - HP 1018 | Service Manual - Page 28
157-g/m 2 (42-lb). Paper that is too heavy might cause misfeeds, stacking problems, jams, poor toner fusing, poor print quality, or excessive mechanical wear. Card-stock construction ● Smoothness Set margins at least 2 mm (0.08 inch) away from the edges. 20 Chapter 2 Installation and operation ENWW - HP 1018 | Service Manual - Page 29
Loading media Loading media in the HP LaserJet 1018 printer is simple and straightforward. This section , always adjust the side and rear media guides. Priority feed slot Use the priority feed slot to feed a single sheet of a recommended media for manual feeding and special operations. It can hold up - HP 1018 | Service Manual - Page 30
the correct type of media for the print job. An incorrect media type setting might cause image-quality problems. Set the media type 1. Open the Printer Properties dialog box. 2. Click Printer Preferences. 3. Select the correct media type from the Type Is drop down menu. 4. Click OK to close the - HP 1018 | Service Manual - Page 31
3 Maintenance This chapter describes the life expectancy of parts that wear, printer cleaning, printer maintenance, and the replacement of user-replaceable parts. ● Life expectancies of parts that wear ● Cleaning the product ● User-replaceable parts ENWW 23 - HP 1018 | Service Manual - Page 32
accordance with ISO/IEC 19752. For more information, see http//:www.hp.com/ go/pageyield. When print becomes faint, redistribute the toner in the cartridge by gently rotating the cartridge, or replace the cartridge. Pickup roller Printer separation pad RL1-0266-000CN RM1-0648-000CN 50,000 pages - HP 1018 | Service Manual - Page 33
shock hazard. To maintain quality, thoroughly clean the printer at the following times: ● Any time a new print cartridge is installed ● After printing approximately 2,000 pages ● Whenever print-quality problems appear Clean the outside of the printer with a water-dampened cloth. Clean the inside - HP 1018 | Service Manual - Page 34
HP LaserJet 1018 printer features a special cleaning mode to clean the paper path. NOTE This process requires using a transparency to remove dust and toner times to thoroughly clean the printer. Cleaning the print-cartridge area You do not need to clean the print-cartridge area often. However, - HP 1018 | Service Manual - Page 35
transfer roller inside the printer. By doing so, you can damage the printer. 3. With a dry, lint-free cloth, wipe any residue from the media-path area and the print-cartridge cavity. 4. Replace the print cartridge, and close the print-cartridge door (HP LJ 1010 series printer shown). ENWW Cleaning - HP 1018 | Service Manual - Page 36
5. Plug in the printer, and then turn it on. 28 Chapter 3 Maintenance ENWW - HP 1018 | Service Manual - Page 37
than replace it, use the following instructions. Remove the pickup roller as described in steps 1 through 5 of Replacing the pickup roller on page 30. With the roller outside the printer, use the following steps to complete the cleaning. 1. Dampen a lint-free cloth with water and scrub the roller - HP 1018 | Service Manual - Page 38
fix the problem, replace the pickup roller. CAUTION Failure to complete all of the steps in this procedure might damage the product. 1. Turn off the printer, unplug and remove the power cord. Wait for the printer to cool. 2. Open the print-cartridge door, and remove the print cartridge (HP LJ 1010 - HP 1018 | Service Manual - Page 39
4. Gently release the small, white tabs on each side of the pickup roller by pushing them away from the roller, and then rotate the pickup roller toward the front. CAUTION Use gentle pressure to release the small, white tabs to avoid breaking them. 5. Gently pull the pickup roller up and out. 6. - HP 1018 | Service Manual - Page 40
8. Reinstall the print cartridge, and close the print-cartridge door. 9. Plug in the printer, and then turn it on. 32 Chapter 3 Maintenance ENWW - HP 1018 | Service Manual - Page 41
If the printer regularly pulls multiple sheets of media at a time, you might need to change the separation pad. Recurring feed problems might to http://www.hp.com/go/hpparts. 1. Turn off the printer, unplug and remove the power cord. Wait for the printer to cool. 2. At the back of the printer, use a - HP 1018 | Service Manual - Page 42
4. Insert the new separation pad, and screw it in place. 5. Plug the printer in, and then turn it on. 34 Chapter 3 Maintenance ENWW - HP 1018 | Service Manual - Page 43
it. To order parts, go to http://www.hp.com/go/hpparts. 1. Carefully flex the main input tray just enough to release one side. NOTE Be careful not to break the hinge points. 1 23 Figure 3-1 Main input tray (HP LaserJet 1020 printer shown) 2. Remove the main input tray. ENWW User-replaceable - HP 1018 | Service Manual - Page 44
you break or damage the output-bin extension (also called the delivery-tray assembly), you can replace it. To order parts, go to http://www.hp.com/go/hpparts. 1. Carefully flex the sides of output-bin extension just enough to release the hinge pins. NOTE Be careful not to break the - HP 1018 | Service Manual - Page 45
4 Operational overview This chapter describes the general components and theory of operation of the HP LaserJet 1018 printer. ● Basic functions ● Formatter system ● Printer functions ENWW 37 - HP 1018 | Service Manual - Page 46
are the major systems of the printer: ● Formatter and I/O functions ● Formatter system ● Printer functions and operation ● Engine-control system (engine control unit [ECU] and engine power assembly) ● Image-formation system ● Paper-feed system PRINTER FORMATTER COMPUTER ENGINE UNIT ECU Figure - HP 1018 | Service Manual - Page 47
to send the print-image data to the laser system. The formatter sends the printimage data ( and print data. ● The HP LaserJet 1018 printer has 2 MB of RAM. USB driver is used, selecting draft or EconoMode from the driver allows the product to use less toner, extending the life of the print cartridge - HP 1018 | Service Manual - Page 48
receives from the host computer. When Enhanced I/O is enabled, you can send more data to the printer in less time, so that you can return to your software program sooner. Enhanced I/O has the following options: ● Auto: The product uses Enhanced I/O memory allocation to increase the speed of data - HP 1018 | Service Manual - Page 49
Printer functions Printer functions are divided into five groups: ● Engine control ● Formatter ● Image formation ● Laser/scanner ● Pickup and feed The following figure is a block diagram of the printer: Figure 4-2 Printer functional-block diagram ENWW Printer functions 41 - HP 1018 | Service Manual - Page 50
PCA. In the HP LaserJet 1018 printer, the control functions are Printer laser/scanner unit The engine-power assembly provides the following features in the power system: ● AC power distribution ● DC power distribution ● Overcurrent/overvoltage protection ● High-voltage power distribution Printer - HP 1018 | Service Manual - Page 51
Printer laser/scanner unit The ECU sends signals to the laser/scanner assembly to modulate the laser diode on and off modes and to drive the laser/scanner motor. VDO /VDO /BDI CNT0 CNT1 /BD Laser driver PCB Cylindrical lens BD sensor /ACC /DEC Photosensitive drum Formatter Engine controller - HP 1018 | Service Manual - Page 52
supply circuitry and to the ac driver circuitry, which controls ac voltage Parallel interface on the HP LJ 1015 printer formatter Main motor, laser/scanner motor, solenoid roller according to the instructions from the engine-control cartridge door is open. 44 Chapter 4 Operational overview ENWW - HP 1018 | Service Manual - Page 53
Figure 4-4 High-voltage power supply circuit Image-formation system Laser printing requires the interaction of several different technologies, including process functions independently and must be coordinated with the other printer processes. Image formation consists of seven processes, which are - HP 1018 | Service Manual - Page 54
roller, which is located in the print cartridge. The primary charging roller is coated with scanning exposure)-During this process, a modulated laser diode projects the beam onto a rotating scanning drum. To stabilize the feed system and prevent toner dropouts on the printed image at low temperature - HP 1018 | Service Manual - Page 55
toner cavity, and cleaning station. By including these components (which wear, degrade, or are consumed) in the replaceable print cartridge, the need for many service the beginning of the print cycle. The following steps occur when the printer receives a print job. Step 1 Step 2 Step 3 Step 4 - HP 1018 | Service Manual - Page 56
: Top-of-page sensor PS802: Paper-width sensor PS803: Paper-delivery sensor PS804: Fuser delivery paper width sensor M1: Main motor SL1: Pickup solenoid Figure 4-6 Printer paper path M1 Manual feed tray Pickup tray 48 Chapter 4 Operational overview ENWW - HP 1018 | Service Manual - Page 57
-page sensor (PS801) and the paper-delivery sensor (PS803) detect media moving through the printer. If a jam is detected, the ECU immediately stops the printing process and the jam or the paper-delivery sensor (PS803) detects media while the print cartridge door is open. ENWW Printer functions 49 - HP 1018 | Service Manual - Page 58
sensors, switches, and motor. Figure 4-7 Solenoid, sensors, switches, and motor 1 The door switch detects whether the print-cartridge door is closed. Printing cannot continue until the print-cartridge door is closed. 2 Power switch 3 The paper-width sensor senses the width of the paper. 4 The paper - HP 1018 | Service Manual - Page 59
Detects whether or not the cartridge is and to clean the primary charging roller. installed. STBY (Standby): From the VDO) sent from the formatter and to transfer the toner image onto the media. LSTR (Last Rotation Period): printer enters the INTR period immediately after the end of the LSTR - HP 1018 | Service Manual - Page 60
ENWW Figure 4-8 Printer timing diagram NOTE The timing chart is for one sheet of A4-size Charging Bias (DC) 11 Developing Bias (AC) 12 Developing Bias (DC) 13 Transfer Charging Bias 14 Laser Diode 15 LASER BEAM signal (BD) About Negative Bias Max. 1.5 0.2 1.7 1.8 1.0 16 17 18 19 20 STBY - HP 1018 | Service Manual - Page 61
5 Removal and replacement This chapter describes the removal and replacement of field-replaceable units (FRUs) only. ● Removal and replacement strategy ● User-replaceable parts ● Covers ● Internal assemblies ENWW 53 - HP 1018 | Service Manual - Page 62
service the product. If this warning is not followed, severe injury can result, as well as damage to the device. Certain functional checks during troubleshooting on the product. Never operate or service the printer with the protective cover removed from the laser/scanner assembly. The reflected beam, - HP 1018 | Service Manual - Page 63
Print cartridge 1. Open the print-cartridge door on the top of the printer. 2. Remove the print cartridge. CAUTION To prevent damage, do not expose the print cartridge to light. Cover it with a piece of paper. Figure 5-1 Removing the print cartridge ENWW Removal and replacement strategy 55 - HP 1018 | Service Manual - Page 64
Transfer-roller assembly Right-side cover Left-side cover Front-cover assembly Rear-panel assembly ECU assembly Engine-power assembly Laser/scanner assembly Fuser (fixing) assembly Figure 5-2 Parts-removal block diagram Paper-pickup assembly User-replaceable parts: Output bin Main input - HP 1018 | Service Manual - Page 65
fix the problem, replace the pickup roller. CAUTION Failure to complete all of the steps in this procedure might damage the product. 1. Turn off the printer, unplug and remove the power cord. Wait for the printer to cool. 2. Open the print-cartridge door, and remove the print cartridge (HP LJ 1010 - HP 1018 | Service Manual - Page 66
4. Gently release the small, white tabs on each side of the pickup roller by pushing them away from the roller, and then rotate the pickup roller toward the front. CAUTION Use gentle pressure to release the small, white tabs to avoid breaking them. 5. Gently pull the pickup roller up and out. 6. - HP 1018 | Service Manual - Page 67
8. Reinstall the print cartridge, and close the print-cartridge door. 9. Plug in the printer, and then turn it on. ENWW User-replaceable parts 59 - HP 1018 | Service Manual - Page 68
If the printer regularly pulls multiple sheets of media at a time, you might need to change the separation pad. Recurring feed problems might to http://www.hp.com/go/hpparts. 1. Turn off the printer, unplug and remove the power cord. Wait for the printer to cool. 2. At the back of the printer, use a - HP 1018 | Service Manual - Page 69
4. Insert the new separation pad, and screw it in place. 5. Plug the printer in, and then turn it on. ENWW User-replaceable parts 61 - HP 1018 | Service Manual - Page 70
replace it. To order parts, go to http://www.hp.com/go/hpparts. 1. Carefully flex the main input tray just enough to release one side. NOTE Be careful not to break the hinge points. 1 23 Figure 5-3 Main input tray (HP LaserJet 1020 printer shown) 2. Remove the main input tray. 62 Chapter 5 Removal - HP 1018 | Service Manual - Page 71
you break or damage the output-bin extension (also called the delivery-tray assembly), you can replace it. To order parts, go to http://www.hp.com/go/hpparts. 1. Carefully flex the output-bin extension just enough to release the hinge pins. NOTE Be careful not to break the hinge pins - HP 1018 | Service Manual - Page 72
the covers to gain access to the internal replaceable parts. Right-side cover 1. Before removing the cover, examine Figure 5-5 Remove the right-side cover (1 of 4; HP LJ 1020 printer shown) on page 64 and note the location of tabs on the cover. Figure 5-5 Remove the right-side cover (1 of - HP 1018 | Service Manual - Page 73
3. Open the print-cartridge door. Grasp the cover, and carefully pry up on the cover to release one tab. Figure 5-7 Remove the right-side cover (3 of 4; HP LJ 1020 printer shown) 4. Slightly rotate the back of the cover away from the product, and then slide the cover forward to remove it. NOTE If - HP 1018 | Service Manual - Page 74
cover. See Right-side cover on page 64. ● Left-side cover. See Left-side cover on page 66. 2. Open the print-cartridge door. 3. Remove two screws from the top of the printer (callout 1). 1 Figure 5-9 Remove the rear panel and top-cover assembly (1 of 6) 66 Chapter 5 Removal and replacement ENWW - HP 1018 | Service Manual - Page 75
on the plastic door-link clip to release it from the hinge arm on the print-cartridge door. CAUTION Do not drop the clip into the gear assembly that is on the side of the printer. Figure 5-10 Remove the rear panel and top-cover assembly (2 of 6) Hint Reinsert the plastic door - HP 1018 | Service Manual - Page 76
5. Remove one screw (callout 2) from the back of the product. 2 Figure 5-12 Remove the rear panel and top-cover assembly (4 of 6; HP LJ 1020 printer shown) 6. The top-cover assembly and metal rear-panel are interlocked with plastic tabs. Plastic tabs also secure the metal rear-panel at the bottom. - HP 1018 | Service Manual - Page 77
7. Lift up on the top-cover assembly to remove it. Figure 5-14 Remove the rear panel and top-cover assembly (6 of 6) Reinstalling the top-cover assembly 1. To reinstall the top-cover assembly, raise the two pressure-release levers. Figure 5-15 Reinstall the top-cover assembly (1 of 2) ENWW Covers - HP 1018 | Service Manual - Page 78
2. Position the top-cover assembly over the pressure-release levers (callout 1), and lower it onto the chassis. Make sure that the pressure-release levers are inserted through the slots (callout 2) on the top-cover assembly. 1 2 Figure 5-16 Reinstall the top-cover assembly (2 of 2) CAUTION Make sure - HP 1018 | Service Manual - Page 79
the front cover (1 of 3) on page 71 and note the locations of the plastic tabs at the top of the front cover. Open the print-cartridge door. Figure 5-17 Remove the front cover (1 of 3) ENWW Covers 71 - HP 1018 | Service Manual - Page 80
3. Release the tab on the bottom right side of the front cover, and then pull the bottom of cover away from the chassis. Repeat this step for the left side of the front cover. 21 Figure 5-18 Remove the front cover (2 of 3) 4. With the bottom of the front cover released, pull up and back at the top - HP 1018 | Service Manual - Page 81
transfer roller. This is not a service part. If the paper guide is broken, the entire printer must be replaced. CAUTION Do not touch the black-sponge portion of the transfer roller. Skin oils and finger prints can cause print-quality problems. 1. Open the print-cartridge door, and then release the - HP 1018 | Service Manual - Page 82
roller (3 of 3) 4. Angle the transfer roller up while holding on to the gear on the right side. Slide the roller toward right side of the printer, and lift both the transfer roller and the transfer-roller guide out of the printer. 74 Chapter 5 Removal and replacement ENWW - HP 1018 | Service Manual - Page 83
Reverse the removal process to install the new transfer roller. Then reinstall the paper guide by gently pressing the two ends of the guide onto the transfer-roller bearings until 2). 1 2 Figure 5-23 Remove the engine-power assembly (1 of 2; HP LJ 1020 printer shown) ENWW Internal assemblies 75 - HP 1018 | Service Manual - Page 84
4. Remove two screws from the back of the printer (callout 3), disconnect the high-voltage wire (callout of 2) Reinstallation tip When reinstalling the engine-power assembly, make sure that the cable guide is correctly installed by clipping it onto the PCB at the top, back corner and onto the metal - HP 1018 | Service Manual - Page 85
cables, as necessary, from near the top of the engine-power assembly, and disconnect the high-voltage wire (callout 1) from the back of the printer. CAUTION Do not pull directly on the wires when a connector is disconnected. Always pull on the plastic body of a connector to avoid damaging the - HP 1018 | Service Manual - Page 86
to remove the fuser). 2 Figure 5-26 Remove the fuser (fixing) assembly (2 of 2) 5. Lift the end of the fuser assembly from the right side of the printer, and remove it. Reinstallation tip When replacing the fuser assembly, be sure to transfer the delivery sensor PCB from the old fuser to the new - HP 1018 | Service Manual - Page 87
Paper-pickup assembly 1. Remove the following assemblies. ● Right-side cover. See Right-side cover on page 64. ● Left-side cover. See Left-side cover on page 66. ● Top-cover assembly. See Rear panel and top-cover assembly on page 66. ● Transfer roller. See Transfer-roller assembly on page 73. ● - HP 1018 | Service Manual - Page 88
Engine control unit (ECU) assembly 1. Remove the following assemblies. ● Right-side cover. See Right-side cover on page 64. ● Left-side cover. See Left-side cover on page 66. ● Top-cover assembly. See Rear panel and top-cover assembly on page 66. ● Front cover. See Front cover on page 71. 2. - HP 1018 | Service Manual - Page 89
5-29 Remove the ECU assembly (2 of 6) 4. Remove four screws (callout 3). 3 Figure 5-30 Remove the ECU assembly (3 of 6) 5. Lift the ECU cover up just enough to free it, and then tilt it back as far as it will go without forcing it. ENWW Internal assemblies 81 - HP 1018 | Service Manual - Page 90
6. Two sheet-metal hook hinges (one on each side) secure the cover. Use a screwdriver to push both hooks free, and then remove the ECU cover. 2 1 Figure 5-31 Remove the ECU assembly (4 of 6) 7. Release the plastic wire-retainer tab (arrow 1), and rotate the retainer up - HP 1018 | Service Manual - Page 91
the chassis. As you remove the ECU, unplug the additional connector to the laser/scanner assembly. CAUTION Do not pull directly on the wires when a connector is metal casing, make sure that the laser/ scanner shutter lever is inserted correctly through the plastic guide. ENWW Internal assemblies 83 - HP 1018 | Service Manual - Page 92
assembly on page 80. 2. Remove four screws (callout 1) and then remove the laser/scanner assembly. 1 Figure 5-34 Remove the laser/scanner assembly Reinstallation tip When replacing the laser/scanner assembly, be sure to transfer the laser shutter arm from the old assembly to the new one. 84 Chapter - HP 1018 | Service Manual - Page 93
and resolve printer problems, print-quality problems, and media problems. Troubleshooting details are provided to resolve problems or to isolate replaceable parts. ● Basic troubleshooting ● Control-panel lights ● Jams ● Print-quality troubleshooting ● Solving paper-feed problems ● Functional checks - HP 1018 | Service Manual - Page 94
the engine power assembly. 1. Make sure that the printer is plugged directly into a working wall receptacle. 2. Verify that the print-cartridge door is closed. 3. Verify that the print path and seated correctly but the problem persists, replace the printer. 86 Chapter 6 Troubleshooting ENWW - HP 1018 | Service Manual - Page 95
6-1 Basic troubleshooting (continued) Is the software installed correctly? Cause The software is not installed correctly, or an error occurred during software installation. Solution Uninstall and then reinstall the product software. Make sure that you use the correct installation procedure and - HP 1018 | Service Manual - Page 96
-light legend Table 6-2 Control-panel light patterns Light status State of the printer Ready The product is ready to print. Action No action is necessary. the cleaning page has finished and the printer is in the Ready state. This could take up to two minutes. 88 Chapter 6 Troubleshooting ENWW - HP 1018 | Service Manual - Page 97
requires operator intervention. Check the following: ● The print cartridge door must be completely closed. ● The print cartridge is correctly installed. ● There is no media jam. Printer initialization No action is necessary. The printer is initializing. Fatal error Both lights are off. Turn - HP 1018 | Service Manual - Page 98
at one time, reducing media jams. ● The media does not meet HP specifications. See Media specifications on page 16. Typical media jam locations ● Print cartridge area: See HP LaserJet 1018 printer on page 3. ● Input tray area: If the page is still sticking out of the input tray, gently try to - HP 1018 | Service Manual - Page 99
its exposure to direct light. Cover the print cartridge with a sheet of paper. 1. Open the print cartridge door, and remove the print cartridge. 2. Grasp the middle edge of the side of the media that is most visible, and carefully pull it free from the printer. CAUTION Do not use sharp objects, such - HP 1018 | Service Manual - Page 100
, replace the print cartridge, and close the print cartridge door. After clearing a media jam, you might need to turn the printer off then on again. NOTE When you add new media, remove all of the media from the input tray and straighten the stack of new media. 92 Chapter 6 Troubleshooting ENWW - HP 1018 | Service Manual - Page 101
toner in the print cartridge Before installing a new print cartridge or when toner begins to run low, redistribute the toner by rocking the cartridge back and forth five or six times. Solving print-quality problems Use the following tables to help solve problems with printed pages. If the problem - HP 1018 | Service Manual - Page 102
the print cartridge. The print cartridge is out of toner. Replace the print cartridge The high-voltage connection between the printer and the print cartridge has been interrupted. Perform a High-voltage-contacts check on page 110. The laser/scanner shutter lever is not installed correctly or - HP 1018 | Service Manual - Page 103
(for example, it is too moist or too rough). The print path is dirty. Solution Make sure that the media meets specifications detailed in the HP LaserJet Printer Family Print Media Guide. Clean the print path (see Cleaning the print path on page 26). ENWW Print-quality troubleshooting 95 - HP 1018 | Service Manual - Page 104
Make sure that the media meets the specifications detailed in the HP LaserJet Printer Family Print Media Guide. Open the Printer Properties dialog box, and then select Printing Preferences. Select the Finishing tab, and then clear the EconoMode (Save Toner) check box. Click OK to close the Printing - HP 1018 | Service Manual - Page 105
the print density setting. Click OK to close the Printer Properties dialog box. Change the media to a lower basis weight. Clean the print path (see Cleaning the print path on page 26). Move the product to a different location. Replace the print cartridge. ENWW Print-quality troubleshooting 97 - HP 1018 | Service Manual - Page 106
meets the specifications detailed in the HP LaserJet Printer Family Print Media Guide. Clean the print path. See Cleaning the print path on page 26. Open the Printer Properties dialog box, and then click Printing Preferences. Select the correct media type from 98 Chapter 6 Troubleshooting ENWW - HP 1018 | Service Manual - Page 107
problems (continued) The toner is loose, and it does not stay attached to the printed page. Cause The power strip is not working correctly or the ac power does not meet the specified requirements. The printer error persists, replace the engine power assembly. ENWW Print-quality troubleshooting 99 - HP 1018 | Service Manual - Page 108
menu. Click OK to close the Printing Preferences dialog box, and then click OK again to close the Printer properties dialog box. Try a different media. Make sure that the media meets specifications detailed in the HP LaserJet Printer Family Print Media Guide. 100 Chapter 6 Troubleshooting ENWW - HP 1018 | Service Manual - Page 109
the Printer properties dialog box. Make sure that the media meets the specifications detailed in the HP LaserJet Printer Family Print Media Guide. 1. Turn the stack of media over and put it back in the tray. 2. Rotate the media 180° and put it back in the tray. ENWW Print-quality troubleshooting - HP 1018 | Service Manual - Page 110
Gently rock the print cartridge back and forth to redistribute the toner (see the illustration on the print cartridge). Replace the print cartridge. Make sure that the media meets the specifications detailed in the HP LaserJet Printer Family Print Media Guide. 102 Chapter 6 Troubleshooting ENWW - HP 1018 | Service Manual - Page 111
rough). Solution Make sure the media is correctly loaded. Do not use media that is damaged or has already been put through a copier or printer. Make sure that the media meets the specifications detailed in the HP LaserJet Printer Family Print Media Guide. ENWW Print-quality troubleshooting 103 - HP 1018 | Service Manual - Page 112
edge Cause Solution Moisture in the printer is condensing on the fuser assembly. Try moving the printer to a less humid area. Try a different In excessively hot and humid areas, media retains moisture. media. NOTE Water droplets do not damage the printer. 104 Chapter 6 Troubleshooting ENWW - HP 1018 | Service Manual - Page 113
of heavier media, or one envelope or card. The media you are using does not meet HP's specifications Make sure that the media meets the specifications detailed (for example, it is too moist or too rough). in the HP LaserJet Printer Family Print Media Guide. ENWW Solving paper-feed problems 105 - HP 1018 | Service Manual - Page 114
problems (continued) The printer feeds multiple sheets or jams frequently from the main input tray or priority input slot. Cause Solution The paper guides sure that the guides are not in the HP LaserJet Printer Family Print Media Guide. Do Three sensors are in the printer: top-of-page sensor, - HP 1018 | Service Manual - Page 115
OK to close the HP LaserJet 1018 test page troubleshooting dialog box. Click OK again to close the Printer Properties dialog box. 2. Open the print-cartridge door the instant the leading edge of the paper exits the printer. 3. Remove the print cartridge. 4. Open the print cartridge drum shield to - HP 1018 | Service Manual - Page 116
1010 series products. The connections are located at the same place on the HP LaserJet 1018 printer. Figure 6-3 Check the fuser connections (HP LaserJet 1010 series shown) If a transfer problem exists, replace the transfer roller (do not touch the black-sponge portion of the transfer roller). If - HP 1018 | Service Manual - Page 117
of the printer. NOTE This test is especially important if refilled print cartridges have been used. 1. Open the print-cartridge door. 2. Remove the print cartridge. 3. Mark the drive gear on the cartridge with a felt-tipped marker. Note the position of the mark. 4. Install the print cartridge and - HP 1018 | Service Manual - Page 118
points (callout 1) on the end of the print cartridge. If they are dirty or corroded, clean the connection. If they are damaged, replace the print cartridge. NOTE Use a dry cloth to clean the connections. Figure 6-4 Print-cartridge high-voltage contacts 110 Chapter 6 Troubleshooting ENWW - HP 1018 | Service Manual - Page 119
high-voltage points on the print cartridge. Verify that the pins are not dirty or corroded and that the spring-loading action is functional. If the pins are dirty or obstructed, clean them. If they are damaged, replace the printer. Figure 6-5 Printer high-voltage contacts ENWW Functional checks - HP 1018 | Service Manual - Page 120
) 41.0 mm (1.61 inches) Transfer roller 46.3 mm (1.82 inches) Paper-pickup assembly 55.2 mm (2.17 inches) Fuser (fixing assembly) 56.5 mm (2.22 inches) Print cartridge 76.3 mm (3.00 inches) Figure 6-6 Repetitive-image-defect ruler 112 Chapter 6 Troubleshooting ENWW - HP 1018 | Service Manual - Page 121
/CLK /STRB GND J904 9 7 5 3 1 8642 J905 4 3 2 1 J909 4 3 2 1 13579 J801 2 4 6 8 Laser Drive PCB BD sensor Laser / Scanner unit 1234 J002 1 2 3 4 M 12 34 Scanner motor 1234 J001 1 2 3 4 M 12 34 Main motor J902 + CNT0 GND +5V /BDI GND /DEC /ACC +24VR /MB MB /MA MA Troubleshooting tools 113 - HP 1018 | Service Manual - Page 122
Figure 6-8 Solenoid, sensors, switches, and motor 1 The door switch detects whether or not the print-cartridge door is closed. Printing cannot continue until the printcartridge door is closed. 2 Power switch 3 The and the top of the media. 6 Solenoid 7 Motor 114 Chapter 6 Troubleshooting ENWW - HP 1018 | Service Manual - Page 123
chapter provides an exploded view that shows the replaceable parts of the printer, tables of replaceable parts, and links to other resources. ● Ordering parts and supplies ● Accessories and consumables ● Printer exchange/parts ● Major components ● Alphabetical parts list ● Numerical parts list ENWW - HP 1018 | Service Manual - Page 124
http://www.hp.com/go/support http://hp.com/go/onlinelearning http://www.hp.com/go/hpparts Parts that wear The parts that wear on the product are listed in chapter 3 of this manual. Parts are available directly from Hewlett-Packard at the following websites: ● HP Parts Store: http://www.hp.com/buy - HP 1018 | Service Manual - Page 125
Exchange number Replacement print cartridge 2,000-page cartridge N/A Q2612A Cables and Toner cloth Ideal for wiping up N/A toner spills and cleaning the printer 5090-3379 CD ROM N/A CB419-60101 CD-Service and Support Training N/A Q2460-60106 Service Manual, HP LJ 1018 printer - HP 1018 | Service Manual - Page 126
cannot be ordered. Failure of a part that is not listed as replaceable and is not included with a listed FRU requires replacement of the entire printer. While looking for a part number, pay careful attention to the voltage listed in the description column to make sure that the part number selected - HP 1018 | Service Manual - Page 127
Printer exchange/parts Figure 7-1 HP LJ 1018 product ENWW Printer exchange/parts 119 - HP 1018 | Service Manual - Page 128
Qty HP LJ 1018-110V printer (replacement) CB419-60056 1 HP LJ 1018-110V printer (exchange engine with formatter) CB419-69056 1 HP LJ 1018-110V printer (exchange engine without formatter) CB419-67001 1 HP LJ 1018-220V printer (replacement) CB419-60055 1 HP LJ 1018-220V printer (exchange - HP 1018 | Service Manual - Page 129
ENWW Printer exchange/parts 121 - HP 1018 | Service Manual - Page 130
Major components Figure 7-2 Major components (HP LJ 1010 series shown) 122 Chapter 7 Parts and diagrams ENWW - HP 1018 | Service Manual - Page 131
) 110V to 127V 5 Fuser (fixing assembly) 220V to 240V 6 Engine power supply 110V to 127V 6 Engine power supply 220V to 240V 7 Laser/scanner assembly 8 Engine control assembly 9 Transfer roller assembly 10 Paper pickup assembly 12 Door Link Clip (Stopper) Part number Qty RM1-2079 - HP 1018 | Service Manual - Page 132
with formatter) CB419-69055 HP LJ 1018-220V printer (replacement) CB419-60055 HP LJ 1018-110V printer (exchange engine without formatter) CB419-67001 HP LJ 1018-220V printer (exchange engine without formatter) CB419-67002 HP LJ 1018 formatter CB440-60001 Laser/scanner assembly RM1-2084 - HP 1018 | Service Manual - Page 133
Table 7-5 Alphabetical parts list (continued) Description Separation pad assembly Transfer roller assembly Part number RM1-0648-000CN RM1-2093-000CN Table and page Major components on page 123 Major components on page 123 ENWW Alphabetical parts list 125 - HP 1018 | Service Manual - Page 134
120 HP LJ 1018 formatter Printer exchange/parts on page 120 Roller, pickup Major components on page 123 Separation pad assembly Major components on page 123 Delivery tray assembly Major components on page 123 Paper pickup tray assembly Major components on page 123 Laser/scanner assembly - HP 1018 | Service Manual - Page 135
Table 7-6 Numerical parts list (continued) Part number Description RM1-2316-000CN Engine power supply 220V to 240V RM1-1957-000CN Door Link Clip (Stopper) Table and page Major components on page 123 Major components on page 123 ENWW Numerical parts list 127 - HP 1018 | Service Manual - Page 136
128 Chapter 7 Parts and diagrams ENWW - HP 1018 | Service Manual - Page 137
44 classes, HP Technical Training 116 cleaning high-voltage connection points 111 high-voltage contacts 110 outside of printer 25 pickup roller 29 print cartridge area 26 print path 26 cleaning stage, image formation process 47 clipped pages, troubleshooting 94 cloth, toner 117 Coldfire processor - HP 1018 | Service Manual - Page 138
18 environmental specifications 6, 14 errors, control panel lights HP LaserJet 1018 printer 88 ESD (electrostatic discharge), precautions for 54 exchange, printer 119 exit rollers, fuser assembly 47 extended service plan 9 F faded areas, troubleshooting 103 fasteners, types of 118 features firmware - HP 1018 | Service Manual - Page 139
17 life expectancies extending print cartridge 39 recycling used print cartridges 10 supplies 24 lift plate operations 47 lights, control panel HP LaserJet 1018 patterns 88 locating 15 lines, troubleshooting 97, 102 loading media 21 loose toner, troubleshooting 98 LSTR (Last Rotation Period - HP 1018 | Service Manual - Page 140
white stripes 102 wrinkled pages 103 printer drivers, ordering 116 printer exchange 119 printer separation pad life expectancy 24 locating 4 operations 47 part number 123, 125, 126 replacing 33, 60 printing loading media 21 troubleshooting 87 printing, troubleshooting 105 priority feed slot capacity - HP 1018 | Service Manual - Page 141
, image formation process 46 serial number 5 service plan extended 9 signals, VIDEO 51 size margins, minimum 94 printer 6, 14 sizes media 16 skew, troubleshooting 101, 105 smears troubleshooting 98 smears, toner 98 software installation, troubleshooting 87 ordering 116 solenoid (SL001) locating 50 - HP 1018 | Service Manual - Page 142
areas 103 feeding problems 105 half self-test 107 jams, clearing 90 lines 97 loose toner 98 media 17 multifeeds 106 print cartridges 93 print quality 93 printing 87 repetitive image defect ruler 112 scattered toner 102 skewed pages 101, 105 smeared toner 98 smears 98 software installation 87 specks - HP 1018 | Service Manual - Page 143
- HP 1018 | Service Manual - Page 144
© 2006 Hewlett-Packard Development Company, L.P. www.hp.com *CB419-90938* *CB419-90938* CB419-90938
-
 1
1 -
 2
2 -
 3
3 -
 4
4 -
 5
5 -
 6
6 -
 7
7 -
8
-
9
-
10
-
11
-
12
-
13
-
14
-
15
-
16
-
17
-
18
-
19
-
20
-
21
-
22
-
23
-
24
-
25
-
26
-
27
-
28
-
29
-
30
-
31
-
32
-
33
-
34
-
35
-
36
-
37
-
38
-
39
-
40
-
41
-
42
-
43
-
44
-
45
-
46
-
47
-
48
-
49
-
50
-
51
-
52
-
53
-
54
-
55
-
56
-
57
-
58
-
59
-
60
-
61
-
62
-
63
-
64
-
65
-
66
-
67
-
68
-
69
-
70
-
71
-
72
-
73
-
74
-
75
-
76
-
77
-
78
-
79
-
80
-
81
-
82
-
83
-
84
-
85
-
86
-
87
-
88
-
89
-
90
-
91
-
92
-
93
-
94
-
95
-
96
-
97
-
98
-
99
-
100
-
101
-
102
-
103
-
104
-
105
-
106
-
107
-
108
-
109
-
110
-
111
-
112
-
113
-
114
-
115
-
116
-
117
-
118
-
119
-
120
-
121
-
122
-
123
-
124
-
125
-
126
-
127
-
128
-
129
-
130
-
131
-
132
-
133
-
134
-
135
-
136
-
137
-
138
-
139
-
140
-
141
-
142
-
143
-
144
 |
 |

HP LaserJet 1018
Service Manual