HP 1018 Service Manual - Page 102
Troubleshooting, Table 6-3
 |
UPC - 882780435094
View all HP 1018 manuals
Add to My Manuals
Save this manual to your list of manuals |
Page 102 highlights
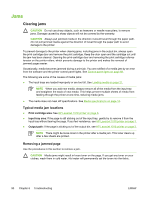
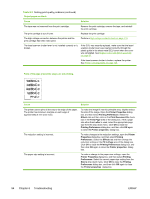
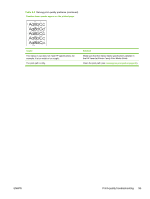
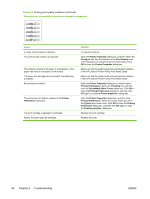
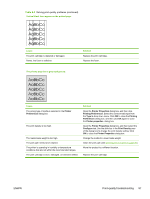
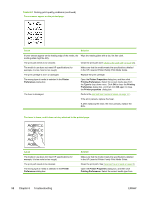
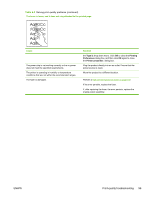
Table 6-3 Solving print-quality problems (continued) Output pages are blank. Cause Solution The tape was not removed from the print cartridge. Remove the print cartridge, remove the tape, and reinstall the print cartridge. The print cartridge is out of toner. Replace the print cartridge The high-voltage connection between the printer and the print cartridge has been interrupted. Perform a High-voltage-contacts check on page 110. The laser/scanner shutter lever is not installed correctly or is broken. If the ECU was recently replaced, make sure that the laser/ scanner shutter lever was inserted correctly through the plastic guide in the sheet-metal ECU cover when the cover was reinstalled. See Engine control unit (ECU) assembly on page 80. If the laser/scanner shutter is broken, replace the printer. See Printer exchange/parts on page 120. Parts of the page around the edges are not printing. Cause Solution The printer cannot print all the way to the edge of the paper. The printer has minimum margins on each edge of approximately 6 mm (0.25 inch). To make the image fit into this printable area, slightly reduce the size of the image. Open the Printer Properties dialog box, and then select Printing Preferences. Select the Effects tab and then click on the Print Document On check box in the Fit to Page area of the dialog box. if the a page size other than Letter is used, select the appropriate page size from the drop down menu. Click OK to close the Printing Preferences dialog box, and then click OK again to close the Printer properties dialog box. The reduction setting is incorrect. To make changes to the reduction settings, open the Printer Properties dialog box, and then select Printing Preferences. Select the Effects tab and then change the reduction settings in the Fit to Page area of the dialog box. Click OK to close the Printing Preferences dialog box, and then click OK again to close the Printer properties dialog box. The paper-size setting is incorrect. To make a change to the paper-size settings, open the Printer Properties dialog box, and then select Printing Preferences. Select the correct paper-size setting from the Size is drop down menu. Click OK to close the Printing Preferences dialog box, and then click OK again to close the Printer properties dialog box. 94 Chapter 6 Troubleshooting ENWW
-
 1
1 -
2
-
3
-
4
-
5
-
6
-
7
-
8
-
9
-
10
-
11
-
12
-
13
-
14
-
15
-
16
-
17
-
18
-
19
-
20
-
21
-
22
-
23
-
24
-
25
-
26
-
27
-
28
-
29
-
30
-
31
-
32
-
33
-
34
-
35
-
36
-
37
-
38
-
39
-
40
-
41
-
42
-
43
-
44
-
45
-
46
-
47
-
48
-
49
-
50
-
51
-
52
-
53
-
54
-
55
-
56
-
57
-
58
-
59
-
60
-
61
-
62
-
63
-
64
-
65
-
66
-
67
-
68
-
69
-
70
-
71
-
72
-
73
-
74
-
75
-
76
-
77
-
78
-
79
-
80
-
81
-
82
-
83
-
84
-
85
-
86
-
87
-
88
-
89
-
90
-
91
-
92
-
93
-
94
-
95
-
96
-
 97
97 -
 98
98 -
 99
99 -
 100
100 -
 101
101 -
 102
102 -
 103
103 -
 104
104 -
 105
105 -
 106
106 -
 107
107 -
108
-
109
-
110
-
111
-
112
-
113
-
114
-
115
-
116
-
117
-
118
-
119
-
120
-
121
-
122
-
123
-
124
-
125
-
126
-
127
-
128
-
129
-
130
-
131
-
132
-
133
-
134
-
135
-
136
-
137
-
138
-
139
-
140
-
141
-
142
-
143
-
144
 |
 |