HP 2133 Drives - Windows XP
HP 2133 - Mini-Note - C7-M 1.6 GHz ULV Manual
 |
UPC - 884420156444
View all HP 2133 manuals
Add to My Manuals
Save this manual to your list of manuals |
HP 2133 manual content summary:
- HP 2133 | Drives - Windows XP - Page 1
Drives User Guide - HP 2133 | Drives - Windows XP - Page 2
© Copyright 2008 Hewlett-Packard Development Company, L.P. Windows is a U.S. registered trademark of Microsoft Corporation. The information contained herein is subject to change without notice. The only warranties for HP products and services are set forth in the express warranty statements - HP 2133 | Drives - Windows XP - Page 3
Product notice This user guide describes features that are common to most models. Some features may not be available on your computer. iii - HP 2133 | Drives - Windows XP - Page 4
iv Product notice - HP 2133 | Drives - Windows XP - Page 5
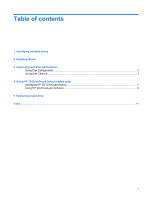
1 Identifying installed drives 2 Handling drives 3 Improving hard drive performance Using Disk Defragmenter ...3 Using Disk Cleanup ...3 4 Using HP 3D DriveGuard (select models only) Identifying HP 3D DriveGuard status 5 Using HP 3D DriveGuard software ...6 5 Replacing a hard drive Index ...11 - HP 2133 | Drives - Windows XP - Page 6
vi - HP 2133 | Drives - Windows XP - Page 7
1 Identifying installed drives To view the drives installed on the computer, select Start > My Computer. 1 - HP 2133 | Drives - Windows XP - Page 8
a drive bay. Do not type on the keyboard or move the computer while the optical drive is writing to a disc. The write process is sensitive to vibration. When the battery is the only source of power, be sure that the battery is sufficiently charged before writing to media. Avoid exposing a drive to - HP 2133 | Drives - Windows XP - Page 9
3 Improving hard drive performance Using Disk Defragmenter As you use the computer, files on the hard drive for unnecessary files that you can safely delete to free up disk space and help the computer to run more efficiently. To run Disk Cleanup: 1. Select Start > All Programs > Accessories - HP 2133 | Drives - Windows XP - Page 10
the following conditions: ● You drop the computer. ● You move the computer with the display closed while the computer is running on battery power. A short time after the end of one of these events, HP 3D DriveGuard returns the hard drive to normal operation. NOTE: Hard drives that are in an optional - HP 2133 | Drives - Windows XP - Page 11
or Hibernation, except as described in the following Note. NOTE: If the computer is running on battery power and reaches a critical battery level, HP 3D DriveGuard allows the computer to initiate Hibernation. ● The computer will not activate battery alarms set on the Alarms tab in Power Options - HP 2133 | Drives - Windows XP - Page 12
Using HP 3D DriveGuard software The HP 3D DriveGuard software enables you to perform the following tasks: ● Enable and disable HP 3D DriveGuard. NOTE: Depending on your user privileges, you may not be able to enable or disable HP 3D DriveGuard. ● Determine whether a drive in the system is supported. - HP 2133 | Drives - Windows XP - Page 13
the power cord from the AC outlet. 5. Turn the computer upside down on a flat surface, with the battery bay toward you. 6. Remove the battery from the computer. 7. Remove the 3 screws from the back edge of the computer . 8. Turn the computer display-side up, with the front toward you, and open - HP 2133 | Drives - Windows XP - Page 14
9. Lift the top edge of the keyboard up (1) and remove the keyboard from the computer (2) to expose the hard drive. 10. Release the zero insertion force (ZIF) connector (1) to which the hard drive cable is attached, and then disconnect the - HP 2133 | Drives - Windows XP - Page 15
4. Insert and tighten the 3 hard drive screws (4). 5. Insert the front of the keyboard into the keyboard tray (1), and then press the keyboard into place (2). 6. Close the computer display and turn the computer upside down on a flat surface. 9 - HP 2133 | Drives - Windows XP - Page 16
7. Replace the 3 screws on the back edge of the computer. 8. Replace the battery. 10 Chapter 5 Replacing a hard drive - HP 2133 | Drives - Windows XP - Page 17
Cleanup software 3 Disk Defragmenter software 3 disk performance 3 drive light 5 drives caring for 2 hard 7, 8 See also hard drive; optical drive H hard disk drive HP 3D DriveGuard 4 installing 8 replacing 7 hard drive HP 3D DriveGuard 4 installing 8 replacing 7 HP 3D DriveGuard 4 L light, drive - HP 2133 | Drives - Windows XP - Page 18
-
 1
1 -
 2
2 -
 3
3 -
 4
4 -
 5
5 -
 6
6 -
 7
7 -
8
-
9
-
10
-
11
-
12
-
13
-
14
-
15
-
16
-
17
-
18
 |
 |

Drives
User Guide