HP 2500c Service Manual - Page 161
Replacement of LED PCA
 |
View all HP 2500c manuals
Add to My Manuals
Save this manual to your list of manuals |
Page 161 highlights
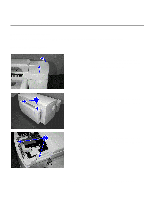
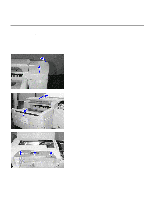
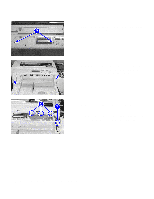
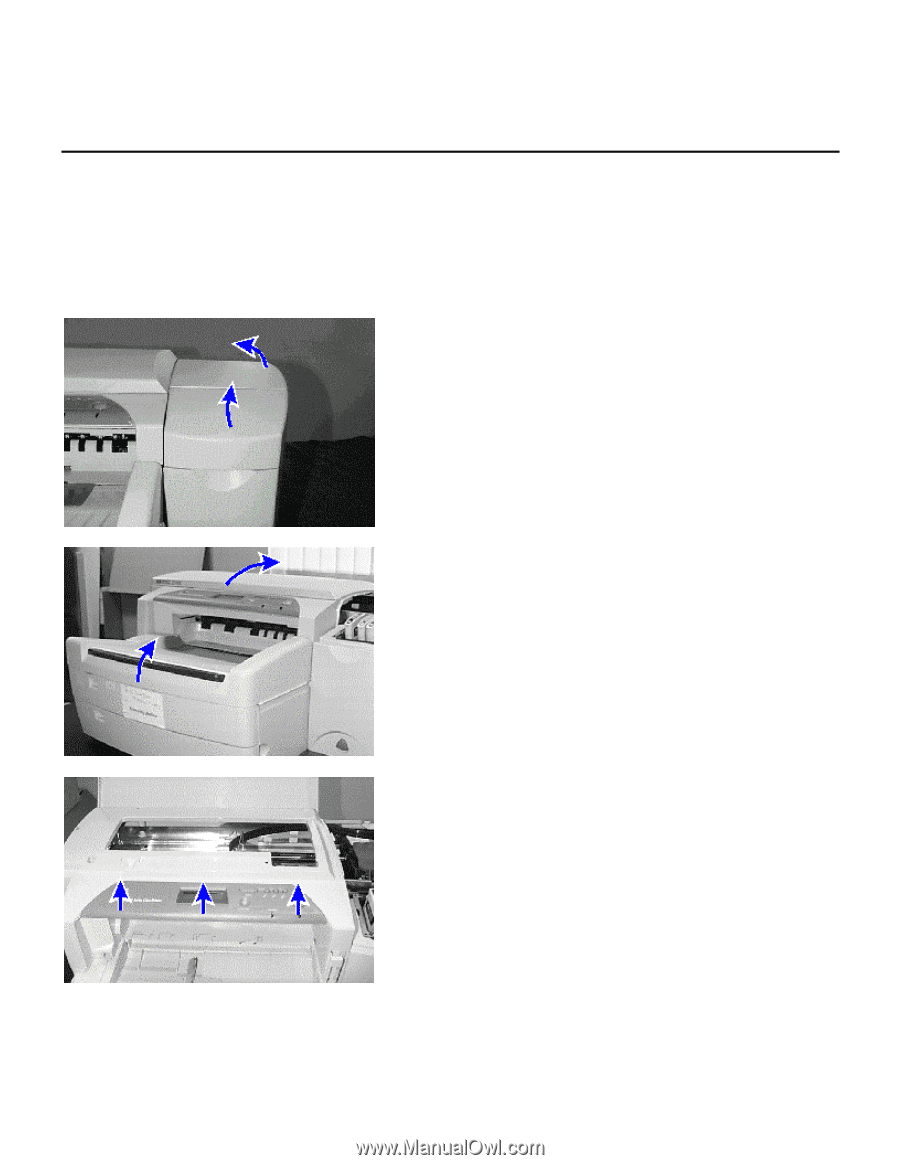
Replacement of Parts Replacement of LED PCA You will be removing the LED PCA from the printer and installing a new LED PCA. Removing the LED Panel Step 1. Remove the printhead access cover by opening the ink cartridge door and tilting the access cover to the side. Step 2. Remove the output tray (Tray 1). Step 3. Open the top cover of the printer. Step 4. Remove the LCD cover by unsnapping three catches, pushing it upward from the left side first, then the right. Set the cover aside. Removal and Replacement of Parts (without Calibration) 7-11
-
 1
1 -
2
-
3
-
4
-
5
-
6
-
7
-
8
-
9
-
10
-
11
-
12
-
13
-
14
-
15
-
16
-
17
-
18
-
19
-
20
-
21
-
22
-
23
-
24
-
25
-
26
-
27
-
28
-
29
-
30
-
31
-
32
-
33
-
34
-
35
-
36
-
37
-
38
-
39
-
40
-
41
-
42
-
43
-
44
-
45
-
46
-
47
-
48
-
49
-
50
-
51
-
52
-
53
-
54
-
55
-
56
-
57
-
58
-
59
-
60
-
61
-
62
-
63
-
64
-
65
-
66
-
67
-
68
-
69
-
70
-
71
-
72
-
73
-
74
-
75
-
76
-
77
-
78
-
79
-
80
-
81
-
82
-
83
-
84
-
85
-
86
-
87
-
88
-
89
-
90
-
91
-
92
-
93
-
94
-
95
-
96
-
97
-
98
-
99
-
100
-
101
-
102
-
103
-
104
-
105
-
106
-
107
-
108
-
109
-
110
-
111
-
112
-
113
-
114
-
115
-
116
-
117
-
118
-
119
-
120
-
121
-
122
-
123
-
124
-
125
-
126
-
127
-
128
-
129
-
130
-
131
-
132
-
133
-
134
-
135
-
136
-
137
-
138
-
139
-
140
-
141
-
142
-
143
-
144
-
145
-
146
-
147
-
148
-
149
-
150
-
151
-
152
-
153
-
154
-
155
-
 156
156 -
 157
157 -
 158
158 -
 159
159 -
 160
160 -
 161
161 -
 162
162 -
 163
163 -
 164
164 -
 165
165 -
 166
166 -
167
-
168
-
169
-
170
-
171
-
172
-
173
-
174
-
175
-
176
-
177
-
178
-
179
-
180
-
181
-
182
-
183
-
184
-
185
-
186
-
187
-
188
-
189
-
190
-
191
-
192
-
193
-
194
-
195
-
196
-
197
-
198
-
199
-
200
-
201
-
202
-
203
-
204
-
205
-
206
-
207
-
208
-
209
-
210
-
211
-
212
-
213
-
214
-
215
-
216
-
217
-
218
-
219
-
220
-
221
-
222
-
223
-
224
-
225
 |
 |
Removal and Replacement of Parts (without Calibration)
7-11
Replacement of Parts
Replacement of LED PCA
You will be removing the LED PCA from the printer and installing a new LED PCA.
Removing the LED Panel
Step 1.
Remove the printhead access cover by
opening the ink cartridge door and tilting
the access cover to the side.
Step 2.
Remove the output tray (Tray 1).
Step 3.
Open the top cover of the printer.
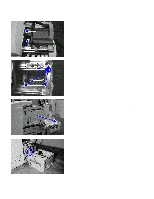
Step 4.
Remove the LCD cover by unsnapping
three catches, pushing it upward from the
left side first, then the right. Set the cover
aside.