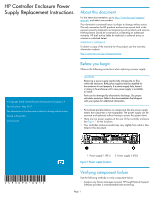
HP 4400 HP Controller Enclosure Power Supply Replacement Instructions (593096- - Page 2
Removing a power supply, Installing a power supply, Verifying proper operation - installation
 |
View all HP 4400 manuals
Add to My Manuals
Save this manual to your list of manuals |
Page 2 highlights
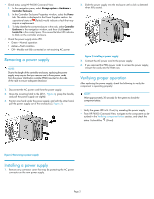
• Check status using HP P6000 Command View: 1. In the navigation pane, select Storage system > Hardware > Controller Enclosure. 2. In the Controller Enclosure Properties window, select the Power tab. The status is displayed in the Power Supplies section. An operational state of (Failed) would indicate a fault that may require a replacement. 3. To help identify the correct enclosure in the rack, select Controller Enclosure in the navigation window, and then click Locate > Locate On in the content pane. This causes the blue UID indicator to blink on the controller enclosure. • Check the power supply status LED. • Green-Normal operation • Amber-Fault condition • Off-Module not fully connected or not receiving AC power Removing a power supply NOTE: Due to the length of the controller enclosure, replacing the power supply may require that you remove one to three power cords from the power distribution module (PDM) mounted on the side of the rack to ensure adequate clearance. 1. Disconnect the AC power cord from the power supply. 2. Move the mounting latch to the left (1, Figure 2), grasp the handle, and pull the power supply out slightly. 3. Position one hand under the power supply, and with the other hand, pull the power supply out of the enclosure (2, Figure 2). 2. Slide the power supply into the enclosure until a click is detected when fully seated. Figure 3 Installing a power supply . 3. Connect the AC power cord to the power supply. 4. If you removed the PDM power cords to access the power supply, reinsert the cords into the PDM now. Verifying proper operation After replacing the power supply, check the following to verify the component is operating properly: NOTE: Wait approximately 30 seconds for the system to check the component status. • Verify the green LED is lit. If not, try reseating the power supply. • From HP P6000 Command View, navigate to the component as de- scribed in the Verifying component failure section, and check the status. It should be (Good). Figure 2 Removing a power supply . Installing a power supply 1. Remove any connector cover that may be protecting the AC power connector on the new power supply. Page 2
-
 1
1 -
 2
2
 |
 |
