HP A3550A Storage Processor (SP) Installation Guide - Not Orderable
HP A3550A - High Availability Disk Arrays Model 20 Storage Enclosure Manual
 |
View all HP A3550A manuals
Add to My Manuals
Save this manual to your list of manuals |
HP A3550A manual content summary:
- HP A3550A | Storage Processor (SP) Installation Guide - Not Orderable - Page 1
Hewlett-Packard Storage Processor (SP) Installation Guide Hewlett-Packard SPs are customer installable and replaceable. A replacement SP must be the same type as the SP being replaced. The locations of the SPs - HP A3550A | Storage Processor (SP) Installation Guide - Not Orderable - Page 2
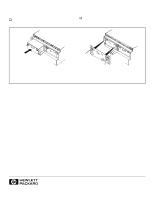
array is operating, the SP activates automatically when it is installed in the array. Ejector Ejector A. Engage the edge of the SP in the board guides, and slide it into the chassis until the ejectors engage with the chassis edge. B. Press both ejectors until they lock and the SP seats
-
 1
1 -
 2
2
 |
 |
Hewlett-Packard Storage Processor (SP)
Installation Guide
Hewlett-Packard SPs are customer installable and replaceable. A replacement SP must be the same type as the SP being
replaced.
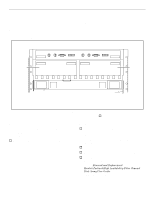
The locations of the SPs in the 30-slot disk arrays are shown in Figure 1.
.
Figure 1.
Install an SP by performing the following steps. Place a check in the appropriate
o
as the step is completed.
Step 1:
Observe antistatic precautions
An SP is shipped with an ESD kit containing:
–
ESD wrist strap
–
ESD conductive sheet
o
Ground the ESD wrist strap to the metal edge above the
rear retaining screws and fasten the strap to your wrist.
Step 2:
Prepare to install the SP
o
Remove the replacement SP from its shipping carton
and place it on a suitable antistatic work surface or the
ESD conductive sheet.
Array power can be left on during SP removal and
replacement.
o
Remove the failed SP.
o
Remove the memory modules from the failed SP.
o
Insert memory modules in the SIMM connectors on the
SP to be installed.
See the
2EMOVAL±AND±2EPLACEMENT
chapter in the
(EWLETT²0ACKARD±(IGH±!VAILABILITY±&IBRE±#HANNEL±
$ISK±!RRAY±5SER±’UIDE
for more information about
SIMM removal and replacement.
SP-A
SP-B
Rear view, top of the disk array