HP A440 User Guide - Page 7
Front view open, Rear of printer, Input tray, Input tray extension - camera
 |
UPC - 808736862721
View all HP A440 manuals
Add to My Manuals
Save this manual to your list of manuals |
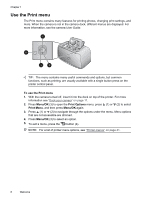
Page 7 highlights
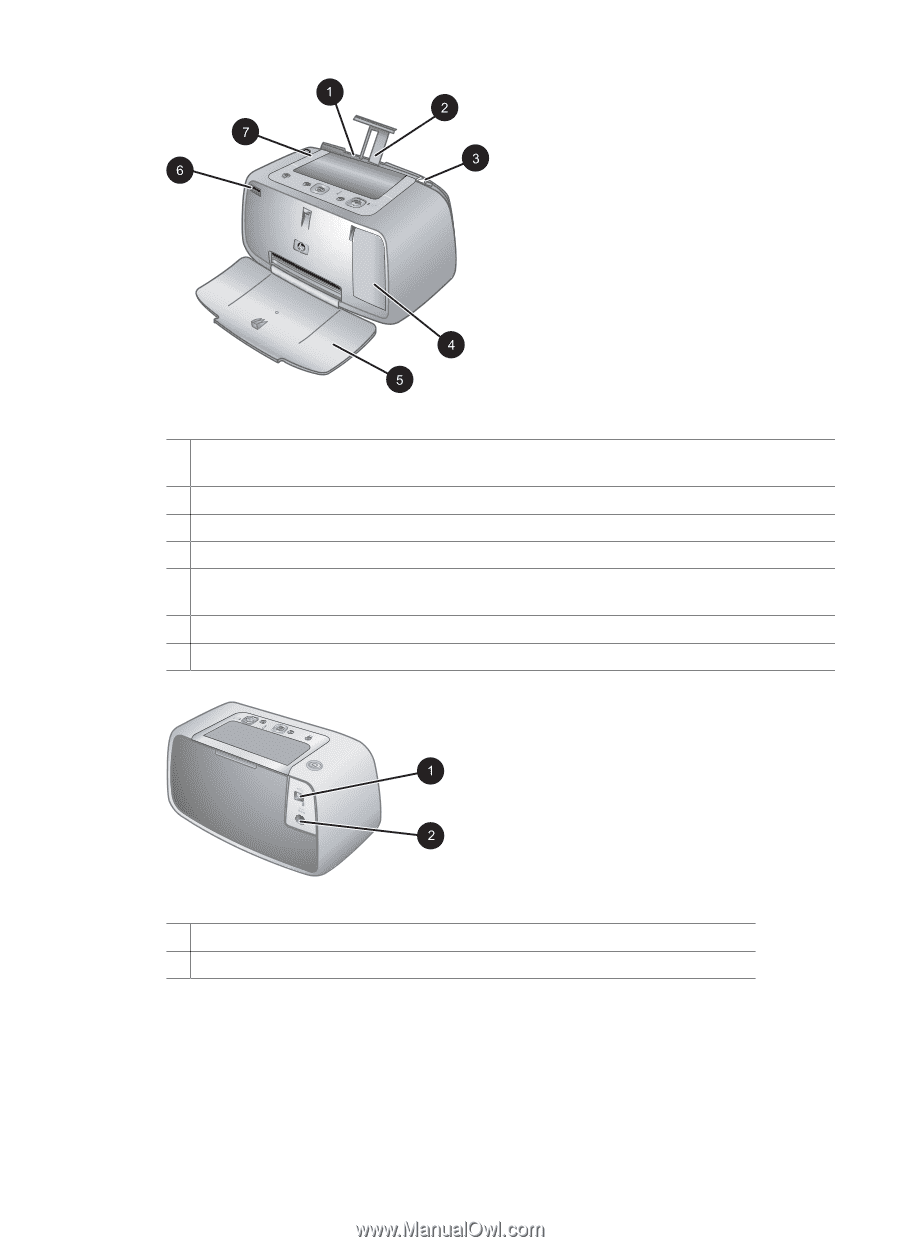
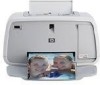
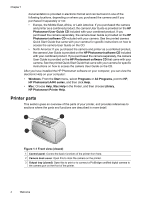
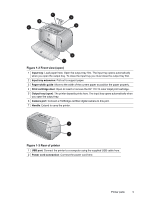
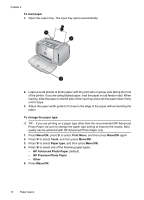
Figure 1-2 Front view (open) 1 Input tray: Load paper here. Open the output tray first. The input tray opens automatically when you open the output tray. To close the input tray you must close the output tray first. 2 Input tray extension: Pull out to support paper. 3 Paper-width guide: Move to the width of the current paper to position the paper properly. 4 Print cartridge door: Open to insert or remove the HP 110 Tri-color Inkjet print cartridge. 5 Output tray (open): The printer deposits prints here. The input tray opens automatically when you open the output tray. 6 Camera port: Connect a PictBridge-certified digital camera to this port. 7 Handle: Extend to carry the printer. Figure 1-3 Rear of printer 1 USB port: Connect the printer to a computer using the supplied USB cable here. 2 Power cord connection: Connect the power cord here. Printer parts 5
-
 1
1 -
 2
2 -
 3
3 -
 4
4 -
 5
5 -
 6
6 -
 7
7 -
 8
8 -
 9
9 -
 10
10 -
 11
11 -
 12
12 -
13
-
14
-
15
-
16
-
17
-
18
-
19
-
20
-
21
-
22
-
23
-
24
-
25
-
26
-
27
-
28
-
29
-
30
-
31
-
32
-
33
-
34
-
35
-
36
-
37
-
38
-
39
-
40
-
41
-
42
-
43
-
44
-
45
-
46
-
47
-
48
-
49
-
50
 |
 |