HP C5580 Setup Guide - Page 6
côté brillant, vers le bas, satinada orientada hacia abajo, glossy side
 |
UPC - 883585914500
View all HP C5580 manuals
Add to My Manuals
Save this manual to your list of manuals |
Page 6 highlights
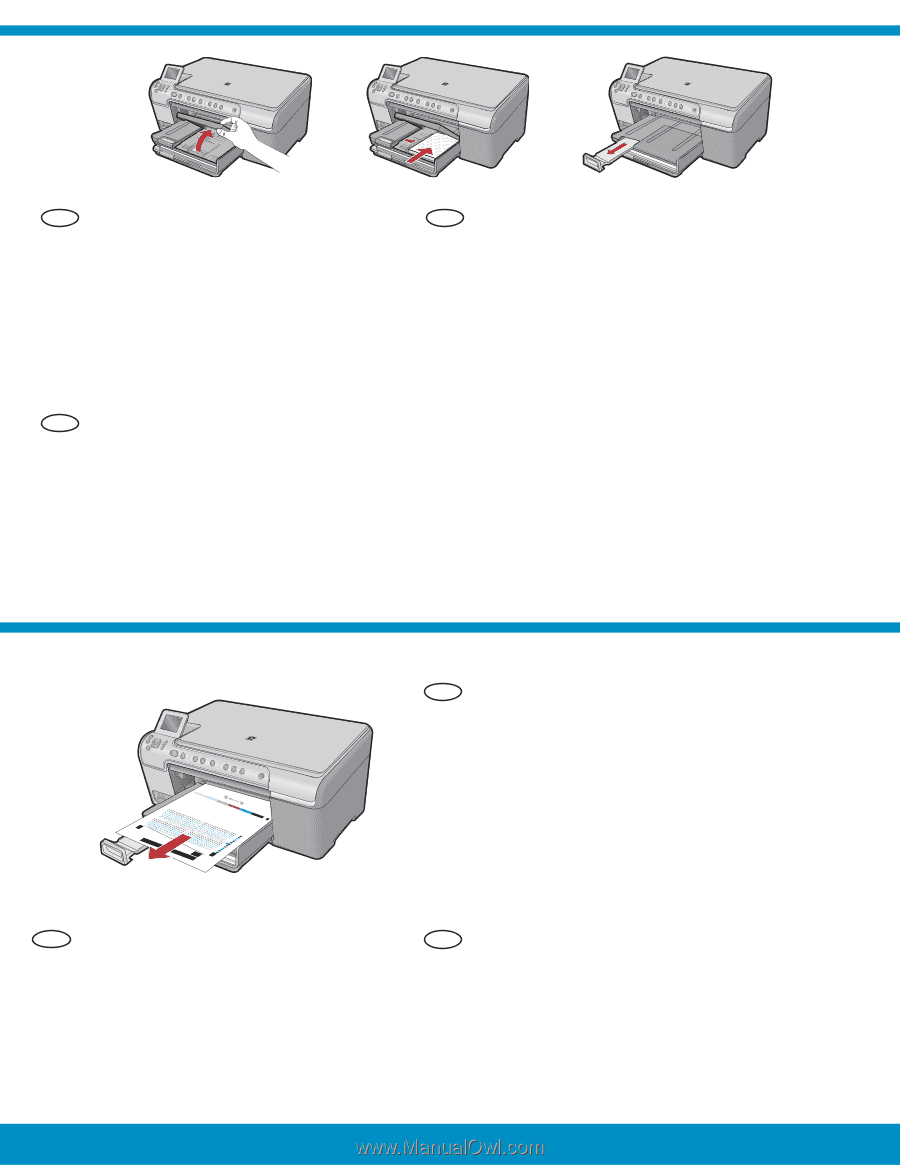
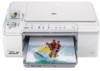
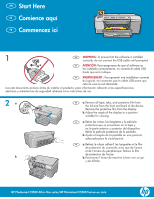
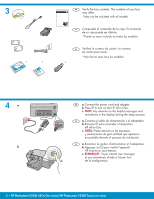
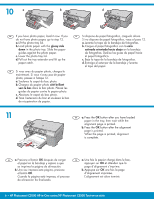
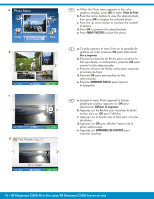
10 a b d EN If you have photo paper, load it now. If you do not have photo paper, go to step 12. a. Lift the photo tray lid. b. Load photo paper with the glossy side down in the photo tray. Slide the paper guides against the photo paper. c. Lower the photo tray lid. d. Pull out the tray extender and lift up the paper catch. FR Si vous avez du papier photo, chargez-le maintenant. Si vous n'avez pas de papier photo, passez à l'étape 12. a. Soulevez le capot du bac photo. b. Chargez du papier photo côté brillant vers le bas dans le bac photo. Placez les guides du papier contre le papier photo. c. Abaissez le capot du bac photo. d. Tirez l'extension du bac et soulevez le bac de récupération de papier. ES Si dispone de papel fotográfico, cárguelo ahora. Si no dispone de papel fotográfico, vaya al paso 12. a. Levante la tapa de la bandeja de fotografías. b. Cargue el papel fotográfico con la cara satinada orientada hacia abajo en la bandeja de fotografías. Deslice las guías de papel hacia el papel fotográfico. c. Baje la tapa de la bandeja de fotografías. d. Extraiga el extensor de la bandeja y levante el tope del papel. 11 EN a. Press the OK button after you have loaded paper in the tray, then wait while the alignment page is printed. b. Press the OK button after the alignment page is printed. When the page is printed, alignment is complete. ES a. Presione el botón OK después de cargar FR a. Une fois le papier chargé dans le bac, el papel en la bandeja y espere a que appuyez sur OK et attendez que la se imprima la página de alineación. page d'alignement s'imprime. b. Una vez impresa esta página, presione b. Appuyez sur OK une fois la page el botón OK. d'alignement imprimée. Cuando la página está impresa, el proceso L'alignement est alors terminé. de alineación ha finalizado. 6 • HP Photosmart C5500 All-in-One series/HP Photosmart C5500 Tout-en-un série
-
 1
1 -
 2
2 -
 3
3 -
 4
4 -
 5
5 -
 6
6 -
 7
7 -
 8
8 -
 9
9 -
 10
10 -
 11
11 -
 12
12
 |
 |