HP C6737A HP OfficeJet G Series - (English) User Guide for Windows - Page 9
Set up for network printing using Windows sharing, Use your HP OfficeJet with Windows 2000, Set
 |
UPC - 088698409725
View all HP C6737A manuals
Add to My Manuals
Save this manual to your list of manuals |
Page 9 highlights
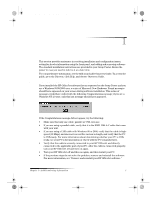
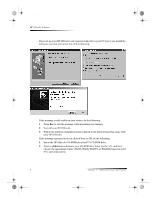
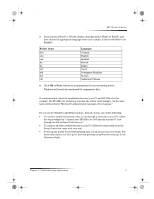
AvPrn.book Page 5 Monday, February 28, 2000 11:13 AM HP OfficeJet G Series Set up for network printing using Windows sharing For the latest information regarding networking, visit the HP Web site at: www.hp.com/go/all-in-one If your PC is on a network, and another PC on the network has an HP OfficeJet connected to it, you can use that unit as your printer. You can only access print features in this configuration; other network features are only supported if you use an HP JetDirect Print Server. For more information, see “Install your HP JetDirect Print Server later (models G55, G55xi, G85, and G85xi).” For more information, see “Set up for network printing using Windows sharing” in the Onscreen Guide. Use your HP OfficeJet with Windows 2000 For the latest information regarding networking, visit the HP Web site at: www.hp.com/go/all-in-one For model G95, if the Networked option is unavailable on the Setup Type dialog box that appears during software installation, click Help for more information. For all other models, install the software as outlined in the Setup Poster, and insert the Windows 2000 CD that came with your Windows operating system if a message appears that asks you to do so. Set basic fax settings using the front panel We recommend that you use the Fax Setup Wizard in the HP OfficeJet software to configure all your basic fax settings; however, you can also access these settings from the front panel. In the U.S., regulations require that your name and number appear on every fax. The minimum settings that we recommend are described in the following topics. Set the date and time Follow these steps to set the date and time manually. 1 On the front panel, press Menu. 2 Press 5, and then press 1. 3 After Enter date appears, enter the date and time using the keypad. Use only the last two digits for the year. After you are done, the date and time appear on the display. Chapter 1—Additional setup information 5
-
 1
1 -
2
-
3
-
 4
4 -
 5
5 -
 6
6 -
 7
7 -
 8
8 -
 9
9 -
 10
10 -
 11
11 -
 12
12 -
 13
13 -
 14
14 -
15
-
16
-
17
-
18
-
19
-
20
-
21
-
22
-
23
-
24
-
25
-
26
-
27
-
28
-
29
-
30
-
31
-
32
-
33
-
34
-
35
-
36
-
37
-
38
-
39
-
40
-
41
-
42
-
43
-
44
-
45
-
46
-
47
-
48
-
49
-
50
-
51
-
52
-
53
-
54
-
55
-
56
-
57
-
58
 |
 |