HP Designjet 3D HP Designjet 3D Removal System - User's Guide: English
HP Designjet 3D Manual
 |
View all HP Designjet 3D manuals
Add to My Manuals
Save this manual to your list of manuals |
HP Designjet 3D manual content summary:
- HP Designjet 3D | HP Designjet 3D Removal System - User's Guide: English - Page 1
HP Designjet 3D Removal System User Guide - HP Designjet 3D | HP Designjet 3D Removal System - User's Guide: English - Page 2
to change without notice. The only warranties for HP Products and services are set forth in the express warranty statement accompanying such products and services. Nothing herein should be construed as constituting an additional warranty. HP shall not be liable for technical or editorial errors - HP Designjet 3D | HP Designjet 3D Removal System - User's Guide: English - Page 3
and cleaning the strainer 13 Cleaning ...13 Model bag ...13 6 Troubleshooting...14 Troubleshooting ...14 7 Support ...16 Introduction...16 HP Professional Services 16 Contact HP Support 17 8 System Specifications ...18 Physical specifications 18 Facility specifications 18 Power specifications - HP Designjet 3D | HP Designjet 3D Removal System - User's Guide: English - Page 4
9 Supplemental Information ...20 HP Limited Warranty Statement 20 Declaration of conformity 23 Regulatory and Environmental Information 24 Glossary ...26 Glossary of terms 26 2 - HP Designjet 3D | HP Designjet 3D Removal System - User's Guide: English - Page 5
the HP Designjet 3D Removal System. This guide provides information on the following topics: • Troubleshooting information • Important safety notices and regulatory information • Information about the cleaning agent • Detailed user instructions • You can also find more information at HP's support - HP Designjet 3D | HP Designjet 3D Removal System - User's Guide: English - Page 6
removal of support material from models built with HP Designjet 3D printers. How it works The system removes support material by immersing models in a bath of water with a specific amount of cleaning agent bags added to the cleaning agent receptacle. The system heats and circulates solution - HP Designjet 3D | HP Designjet 3D Removal System - User's Guide: English - Page 7
Overview Startup kit contents Figure 2 Startup Kit Contents 1 2 3 4 5 1 Inlet hose - 1.52 m (5 ft.) 2 Power cord Euro - 1.52 m (5 ft.) 3 Power cord UK - 1.52 m (5 ft.) 4 Drain hose - 1.52 m (5 ft.) 5 Hose clamp Startup kit contents 3 - HP Designjet 3D | HP Designjet 3D Removal System - User's Guide: English - Page 8
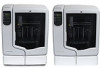
Overview Major components Figure 3 Major components 5 4 6 3 2 1 7 8 1 Cleaning Agent Receptacle 2 Cleaning Tank 3 Strainer 4 Model Basket 5 Model Bag 6 Lid 7 Control Panel 8 On/Off Switch and Power Cord Receptacle 4 Chapter 2 Overview - HP Designjet 3D | HP Designjet 3D Removal System - User's Guide: English - Page 9
Overview Control panel Figure 4 Control Panel 1 2 4 6 5 9 10 3 8 7 11 1 Cleaning tank level button 2 Full cleaning tank level LED 3 Half cleaning tank level LED 4 Cycle length button 5 Long cycle length LED. 6 Medium cycle length LED. 7 Short cycle length LED. 8 Progress LEDs 9 Process - HP Designjet 3D | HP Designjet 3D Removal System - User's Guide: English - Page 10
system must be placed on a flat and stable surface able to support 36 kg (80 lbs.) to avoid the risk of falling. • The work area for unpacking the system • Consult your area's requirements regarding the disposal of the HP Designjet 3D Removal System effluent prior to use. A permit or form of pre - HP Designjet 3D | HP Designjet 3D Removal System - User's Guide: English - Page 11
on the water and make sure there are no leaks. Figure 6 Water hose connections Plug in the system Securely plug one end of the supplied power cord into the receptacle at the back of the system and the other end of the power cord into a grounded receptacle. Only use the power cord - HP Designjet 3D | HP Designjet 3D Removal System - User's Guide: English - Page 12
the On/Off switch above the power cord receptacle on the back of the system. Add models All models must be placed in the model basket and the model lid adjusted. The model basket lid ensures the models remain submerged - HP Designjet 3D | HP Designjet 3D Removal System - User's Guide: English - Page 13
than the specified amount of cleaning agent bags. Doing so will exceed pH levels for wastewater disposal. Add cleaning agent bag Follow the instructions below for adding the contents of the cleaning agent bag(s) to the cleaning agent receptacle. 1. Dry hands before opening the cleaning agent bag - HP Designjet 3D | HP Designjet 3D Removal System - User's Guide: English - Page 14
the contents of the cleaning agent bag. After adding all the contents of the cleaning agent bag(s), properly dispose of bag(s) and close the system lid. Cycle Length Select one of the three cycle lengths by pressing the cycle length button. Each press of the cycle length button increases from - HP Designjet 3D | HP Designjet 3D Removal System - User's Guide: English - Page 15
support removal process to take longer such as model geometry, small support filled crevices, small blind holes, or low water temperature coming into the system . Remove the models Let the solution drain off of the models for a few minutes then remove the models, wash off any remaining solution and - HP Designjet 3D | HP Designjet 3D Removal System - User's Guide: English - Page 16
14 for details. A red process error LED indicates that the system is experiencing a system error. See "Troubleshooting" on page 14 for details. Turning the system off Once the cleaning cycle is complete and the models have been removed, the system should be turned off by toggling the power switch on - HP Designjet 3D | HP Designjet 3D Removal System - User's Guide: English - Page 17
should be cleaned before every use of the system to maintain optimal system performance. Remove the strainer from the cleaning tank and rinse under back panel of the system may damage the system and void the warranty. Model bag The model bag should be replaced after 40 cycles. Replace the bag if the - HP Designjet 3D | HP Designjet 3D Removal System - User's Guide: English - Page 18
then turn it on again. If you still experience problems, call Customer Service. The HP Designjet 3D Removal System has been designed to allow the end user to resolve most operating problems. When a problem is encountered, read through this troubleshooting section. If a resolution is not found here - HP Designjet 3D | HP Designjet 3D Removal System - User's Guide: English - Page 19
of the drain hose is higher than the system discharge. Power cycle the ON/Off switch at the back of the system to reset. Call Customer Service if the problem persists. Power cycle the ON/Off switch at the back of the system to reset. Call Customer Service if the problem persists. Troubleshooting 15 - HP Designjet 3D | HP Designjet 3D Removal System - User's Guide: English - Page 20
services and resources to ensure you always get the best performance from you HP Designjet 3D products and solutions. Join the HP community at the Knowledge Center for 24x7 access to: • Multimedia tutorials. • Step-by-step how-to guides. • Technical support - online troubleshooting, customer - HP Designjet 3D | HP Designjet 3D Removal System - User's Guide: English - Page 21
What to do before you call: • Review the troubleshooting suggestions in this guide. • If you call one of the Hewlett-Packard offices, please have the following information available to help us answer your questions more quickly: • The HP Designjet 3D Removal System you are using (the product number - HP Designjet 3D | HP Designjet 3D Removal System - User's Guide: English - Page 22
~ 9A 50 Hz 1200W Ecological specifications This product complies with European Union WEEE and RoHS Directives. For the up-to-date ecological specifications of your HP Designjet 3D Removal System, please go to http://www.hp.com/ and search for "ecological specifications". 18 Chapter - HP Designjet 3D | HP Designjet 3D Removal System - User's Guide: English - Page 23
Environmental specifications Temperature range 15°C to 30°C (59°F to 86°F) Relative humidity range 20% to 80% Heat emission 2500 BTU/hr typical Acoustic specifications Operating sound pressure at bystander 60 dB (A) System Specifications Environmental specifications 19 - HP Designjet 3D | HP Designjet 3D Removal System - User's Guide: English - Page 24
preventive maintenance kit and HP service engineer visits), are not covered by HP's Limited Warranty. 5. For HP Designjet 3D Removal System, the use of a refilled or non-original HP consumable product (cleaning agent bag) does not affect either HP's Limited Warranty to you or any HP support contract - HP Designjet 3D | HP Designjet 3D Removal System - User's Guide: English - Page 25
HP Technical Support Center and a technician will help you over the phone. HP specifies in the materials shipped with a replacement CSR part whether a defective part must be returned to HP efforts to support and cooperate with HP or a HP authorized service provider in resolving the problem remotely, - HP Designjet 3D | HP Designjet 3D Removal System - User's Guide: English - Page 26
SYSTEM'S HARD DISK OR OTHER STORAGE DEVICES. HP IS NOT RESPONSIBLE FOR THE RECOVERY OF LOST FILES OR DATA. B. Limitation of warranty TO THE EXTENT ALLOWED BY LOCAL LAW, NEITHER HP STATUTORY RIGHTS APPLICABLE TO THE SALE OF THIS PRODUCT TO YOU. Rev. 05/09 22 - HP Designjet 3D | HP Designjet 3D Removal System - User's Guide: English - Page 27
name and model: Regulatory Model Number(1): Product options: HP Designjet 3D Removal System BCLAA-0904 All conforms to the following product specifications the product numbers. Local contacts for regulatory topics only http://www.hp.com/go/certificates/ EMEA contact: Hewlett-Packard GmBH, HQ-TRE, - HP Designjet 3D | HP Designjet 3D Removal System - User's Guide: English - Page 28
regulatory number should not be confused with the marketing name (such as HP Designjet 3D Removal System) or product numbers (such as Z####X, where Z and X are any and, if not installed and used in accordance with the instructions, may cause harmful interference to radio communications. Operation of - HP Designjet 3D | HP Designjet 3D Removal System - User's Guide: English - Page 29
Safety Data Sheet) You can obtain current Material Safety Data Sheets for the HP Designjet 3D Removal Cleaning Agent Bag used in the system by mailing a request to this address: Hewlett-Packard Customer Information Center, 19310 Pruneridge Avenue, Dept. MSDS,Cupertino, CA 95014, U.S.A. There - HP Designjet 3D | HP Designjet 3D Removal System - User's Guide: English - Page 30
cleaning agent to facilitate support removal from models produced with HP Designjet 3D printers. Strainer A filter to prevent larger pieces of waste materials from passing into the drain outlet. Tank Level/Tank Load The amount of water added to the HP Designjet 3D Removal System to fully submerge
-
 1
1 -
 2
2 -
 3
3 -
 4
4 -
 5
5 -
 6
6 -
 7
7 -
8
-
9
-
10
-
11
-
12
-
13
-
14
-
15
-
16
-
17
-
18
-
19
-
20
-
21
-
22
-
23
-
24
-
25
-
26
-
27
-
28
-
29
-
30
 |
 |

HP Designjet 3D Removal System
User Guide