HP Designjet 3D HP Designjet 3D Removal System - User's Guide: English - Page 15
Other information, Start cycle, Remove the models, Progress LEDs
 |
View all HP Designjet 3D manuals
Add to My Manuals
Save this manual to your list of manuals |
Page 15 highlights
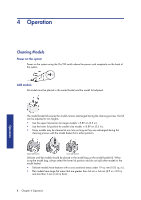
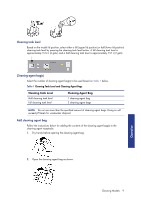
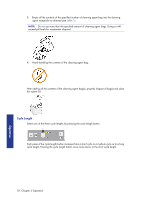
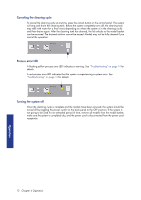
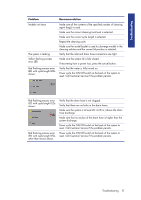
Table 2 should also be used as a general guideline for selecting cycle lengths for most models.There are some factors that cause the support removal process to take longer such as model geometry, small support filled crevices, small blind holes, or low water temperature coming into the system. Table 2 Cycle Length Settings Combined Build Times ≤ 4 hrs. 4 to 12 hrs. > 12 hrs. Cycle Selection Short Medium Long Approximate Cycle Times 3 hrs. 6 hrs. 12 hrs. NOTE: When placing more than one model in the same cleaning cycle, use the combined build times of all the models to determine the correct cycle length setting. Combined build time means the sum of the individual build times of each model put into the model basket. Start cycle When the proper cleaning tank level and cycle length are set, press the start cycle button. The system locks the lid and begins the process of filling the cleaning tank, heating the solution, and starts the cleaning of models inside the cleaning tank. After the initial cleaning of the models, the system drains and then refills with clean water for a final rinse and drain cycle. When the cleaning cycle completes, the left-hand progress LED will turn from yellow to green and the lid unlocks. Remove the models Let the solution drain off of the models for a few minutes then remove the models, wash off any remaining solution and dry with a clean cloth or paper towel. Other information Progress LEDs When the cleaning cycle is started, all the progress LEDs are illuminated in yellow. Each progress LED from right to left will turn off as the cycle time progresses. When the cleaning cycle is complete, the left-hand progress LED will turn from yellow to green. Operation Cycle complete Other information 11
-
 1
1 -
2
-
3
-
4
-
5
-
6
-
7
-
8
-
9
-
 10
10 -
 11
11 -
 12
12 -
 13
13 -
 14
14 -
 15
15 -
 16
16 -
 17
17 -
 18
18 -
 19
19 -
 20
20 -
21
-
22
-
23
-
24
-
25
-
26
-
27
-
28
-
29
-
30
 |
 |
