HP Designjet 820 HP Designjet 820mfp Series - Quick Reference Guide (English) - Page 18
Scan heavyweight paper or cardboard
 |
View all HP Designjet 820 manuals
Add to My Manuals
Save this manual to your list of manuals |
Page 18 highlights
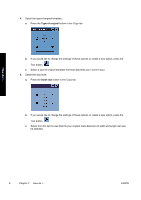
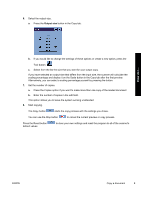
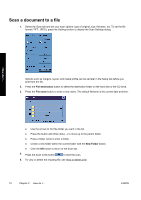
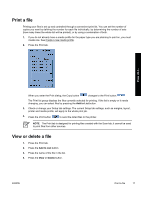
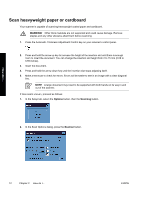
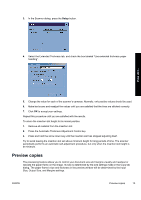
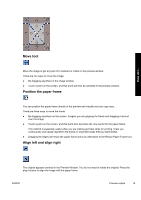
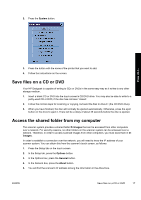
How do I... Scan heavyweight paper or cardboard Your scanner is capable of scanning heavyweight coated paper and cardboard. WARNING! Other thick materials are not supported and could cause damage. Remove staples and any other abrasive attachment before scanning. 1. Press the Automatic Thickness Adjustment Control key on your scanner's control panel. 2. Press and hold the arrow up key to increase the height of the insertion slot until there is enough room to insert the document. You can change the insertion slot height from 2 to 15 mm (0.08 to 0.59 inches). 3. Insert the document. 4. Press and hold the arrow down key until the insertion slot stops adjusting itself. 5. Make a test scan to check for errors. Errors will be easier to see in an image with a clear diagonal line. NOTE A large document may need to be supported with both hands on its way in and out of the scanner. If lines seem uneven, proceed as follows: 1. In the Setup tab, select the Options button, then the Scanning button. 2. In the Scan Options dialog, press the Scanner button. 12 Chapter 2 How do I... ENWW
-
 1
1 -
2
-
3
-
4
-
5
-
6
-
7
-
8
-
9
-
10
-
11
-
12
-
 13
13 -
 14
14 -
 15
15 -
 16
16 -
 17
17 -
 18
18 -
 19
19 -
 20
20 -
 21
21 -
 22
22 -
 23
23 -
24
-
25
-
26
-
27
-
28
-
29
-
30
-
31
-
32
-
33
-
34
-
35
-
36
-
37
-
38
-
39
-
40
-
41
-
42
-
43
-
44
-
45
-
46
 |
 |