HP L7010t User Guide
HP L7010t Manual
 |
View all HP L7010t manuals
Add to My Manuals
Save this manual to your list of manuals |
HP L7010t manual content summary:
- HP L7010t | User Guide - Page 1
User Guide - HP L7010t | User Guide - Page 2
HP products and services are set forth in the express warranty statements accompanying such products and services. Nothing herein should be construed as constituting an additional warranty. HP guide, go to http://www.hp.com/support. Select Find your product, and then follow the on-screen instructions - HP L7010t | User Guide - Page 3
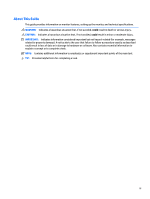
About This Guide This guide provides information on monitor features, setting up the monitor, and technical specifications. WARNING! Indicates a hazardous situation that, if not avoided, could result in death or serious injury. CAUTION: Indicates a hazardous situation that, if not - HP L7010t | User Guide - Page 4
iv About This Guide - HP L7010t | User Guide - Page 5
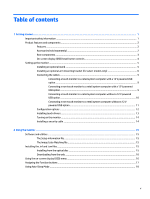
a retail system computer without a 12 V powered USB option ...11 Configuration options ...12 Installing touch drivers ...13 Turning on the monitor ...14 Installing a security cable ...14 2 Using the monitor ...15 Software and utilities ...15 The Setup information file ...15 The Image Color Matching - HP L7010t | User Guide - Page 6
Solving common problems ...19 Touch screen tips and troubleshooting ...20 Touch screen tips ...20 Touch screen troubleshooting ...20 Button lockouts ...20 Product support ...21 Preparing to call technical support ...21 Locating the serial number and product number 22 4 Maintaining the monitor ...23 - HP L7010t | User Guide - Page 7
To reduce the risk of serious injury, read the Safety and Comfort Guide. It describes proper workstation, setup, posture, and health and work and correctly sized furniture designed to properly support your HP LCD monitor. WARNING! LCD monitors that are inappropriately situated on dressers, bookcases - HP L7010t | User Guide - Page 8
settings and enabling theft deterrence feature (refer to the HP Display Assistant User Guide on the optical disc included with your monitor or at http://www.hp.com/ support). ● Software and documentation disc that includes monitor drivers and product documentation ● Energy saver feature to meet - HP L7010t | User Guide - Page 9
cable and USB/power "Y" cable kit for 25.7 cm (10.1-inch), 35.6 cm (14-inch), and 39.6 cm (15.6-inch) touch monitors ● HP 300 cm DisplayPort cable and USB power cable kit for the 35.6 cm (14-inch) non-touch monitor ● HP 300 cm DisplayPort cable and USB B-A cable kit for 25.7 cm (10.1-inch), 35 - HP L7010t | User Guide - Page 10
the most commonly used operations. See Assigning the Function buttons on page 17 for more information. NOTE: To view an OSD menu simulator, visit the HP Customer Self Repair Services Media Library at http://www.hp.com/go/sml. 4 Chapter 1 Getting started - HP L7010t | User Guide - Page 11
Installing an optional stand The HP retail stands are sold separately. Follow the directions below to install the stand. 1. Lay the monitor face down on a flat surface covered by a soft clean cloth. 2. Place the stand mounting plate onto the rear of the monitor (1), and then install the two screws - HP L7010t | User Guide - Page 12
stand to cover the cables (3). Installing an optional arm mounting bracket (for select models only) The HP arm mounting bracket, sold separately, attaches a 25.7 cm (10.1-inch) or 35.6 cm (14-inch) monitor model to the base of a retail system computer for use as a customer-facing display solution - HP L7010t | User Guide - Page 13
off the routing cover on the front of the arm (1) and attach the cables to the rear I/O on the monitor. Route the cables through the center retainer on the arm (2) and then through the bottom retainer (3), and then base (1), and then secure the bracket with the screw (2). Setting up the monitor 7 - HP L7010t | User Guide - Page 14
6. Route the cables from the monitor's arm mounting bracket up through the center hole in the base of the retail system computer and connect the cables to the retail system computer's - HP L7010t | User Guide - Page 15
your video input and power port configuration. The cables for your configuration are sold separately and are available from HP. See Configuration options on page 12 for more information. Connecting a touch monitor to a retail system computer with a 12 V powered USB option If you are mounting a touch - HP L7010t | User Guide - Page 16
to a retail system computer without a 12 V powered USB option If you are using a touch monitor as a stand-alone display connected to a retail system computer or HP desktop computer that does not have a 12 V powered USB port, connect the following cables. ● DisplayPort cable - Connect one end of - HP L7010t | User Guide - Page 17
to a retail system computer without a 12 V powered USB option If you are using a non-touch monitor as a stand-alone display connected to a retail system computer or HP desktop computer that does not have a 12 V powered USB port, connect the following cables. ● DisplayPort cable - Connect one end - HP L7010t | User Guide - Page 18
the accessories below for your monitor, go to http://www.hp.com/support. Select Find your product and follow the instructions. Configuration Required accessories 25.7 cm (10.1-inch) touch monitor and 35.6 cm (14-inch) touch and non-touch monitors mounted to an HP retail system computer with a 12 - HP L7010t | User Guide - Page 19
install the HP touch driver. The driver may be included on the disc provided with the monitor or you can download the latest driver from the HP support website. To download the touch driver, go to http://www.hp.com/support. Select Find your product and follow the on-screen instructions to download - HP L7010t | User Guide - Page 20
the monitor to turn it on. IMPORTANT: Burn-in image damage may occur on monitors that on the monitor screen, you should always activate a screen saver application or turn off the monitor when it on all LCD screens. Monitors with a "burned-in image" are not covered under the HP warranty. NOTE: If - HP L7010t | User Guide - Page 21
matching from monitor screen to printer, or from scanner to monitor screen. This file is activated from within graphics programs that support this 2. View the HP Monitor Software Information file. 3. Select Install Monitor Driver Software. 4. Follow the on-screen instructions. 5. Ensure that - HP L7010t | User Guide - Page 22
you can download the latest version of .inf and .icm files from the HP monitors support web site. 1. Go to http://www.hp.com/support 2. Select Get software and drivers. 3. Follow the on-screen instructions to select your monitor and download the software. Using the on-screen display (OSD) menu Use - HP L7010t | User Guide - Page 23
Assigning the Function buttons Pressing one of the four OSD bezel buttons activates the buttons and displays the button icons on the screen. The factory default button icons and functions are shown below. Button (1) Menu (2) Color Control (Function button 1 assignable) (3) Information (Function - HP L7010t | User Guide - Page 24
Using Auto-Sleep Mode The monitor supports an OSD (on-screen display) menu option called Auto-Sleep Mode that allows you to enable or disable a reduced power state for the monitor. When Auto-Sleep Mode is enabled (enabled by default), the monitor will enter a reduced power state when the host - HP L7010t | User Guide - Page 25
and troubleshooting Solving common problems The following table lists problems, the possible cause of each problem, and the recommended solutions. Problem Possible Cause Solution Screen is blank or video is flashing. Power cord is disconnected. Power button is turned off. Connect the monitor - HP L7010t | User Guide - Page 26
screen troubleshooting Problem Solution Computer does not recover from sleep mode when the touch screen is touched. Sleep mode recovery is not supported by the touch screen. Use the keyboard or mouse to recover from sleep mode. The USB cable is quickly removed from the monitor and reinserted - HP L7010t | User Guide - Page 27
. ● Locate an HP service center Preparing to call technical support If you cannot solve a problem using the troubleshooting tips in this section, you may need to call technical support. Have the following information available when you call: ● Monitor model number ● Monitor serial number ● Purchase - HP L7010t | User Guide - Page 28
Locating the serial number and product number The serial number and product number are located on a label on the rear of the display head. You may need these numbers when contacting HP about the monitor model. 22 Chapter 3 Support and troubleshooting - HP L7010t | User Guide - Page 29
this product yourself. Adjust only those controls that are covered in the operating instructions. If the monitor is not operating properly or has been dropped or damaged, contact an authorized HP dealer, reseller, or service provider. ● Use only a power source and connection appropriate for this - HP L7010t | User Guide - Page 30
guide might have changed between the time of manufacturing and delivery of your product. For the latest specifications or additional specifications on this product, go to http://www.hp.com/go/ quickspecs/ and search for your monitor to 140°F 35.6 cm/14-inch model Technical specifications Display - HP L7010t | User Guide - Page 31
Technical specifications Dimensions (display head only): Height Depth Width Maximum graphic resolution Optimum graphic resolution Environmental requirements: Operating Temperature Nonoperating Temperature Power source Power supply output rating Input terminal 39.6 cm/15.6-inch model Technical - HP L7010t | User Guide - Page 32
power adapter Product HP Part Number used modes and are set as defaults. The monitor automatically recognizes these preset modes, and they will appear Vert freq (Hz) 59.940 70.087 60.317 60.004 60.000 59.810 35.6 cm/14-inch and 39.6 cm/15.6-inch models Preset 1 2 3 4 5 6 7 8 Pixel format - HP L7010t | User Guide - Page 33
. Energy saver feature The monitors support a reduced power state. The reduced power state is initiated if the monitor detects the absence of either warm-up period before the monitor returns to its normal operating mode. Refer to the computer manual for instructions on setting energy saver features - HP L7010t | User Guide - Page 34
to the monitor to locate more information about assistive features. NOTE: For additional information about a particular assistive technology product, contact customer support for that product. Contacting support We are constantly refining the accessibility of our products and services and welcome
-
 1
1 -
 2
2 -
 3
3 -
 4
4 -
 5
5 -
 6
6 -
 7
7 -
8
-
9
-
10
-
11
-
12
-
13
-
14
-
15
-
16
-
17
-
18
-
19
-
20
-
21
-
22
-
23
-
24
-
25
-
26
-
27
-
28
-
29
-
30
-
31
-
32
-
33
-
34
 |
 |

User Guide