HP LaserJet Pro 400 HP LaserJet Pro 300 and 400 Color M351 and M451 - User Gui - Page 55
Set the color options with Mac, HP EasyColor, Print, Color/Quality Options, Advanced
 |
View all HP LaserJet Pro 400 manuals
Add to My Manuals
Save this manual to your list of manuals |
Page 55 highlights
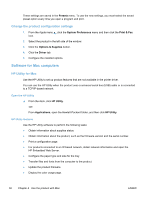
6. Go to the product, and remove any blank paper that is in Tray 1. 7. Insert the printed stack face-up with the bottom edge feeding into the printer first in Tray 1. You must print the second side from Tray 1. 8. If prompted, press the appropriate control-panel button to continue. Set the color options with Mac If you are using the HP Postscript printer driver for Mac, HP EasyColor technology scans all documents and automatically adjusts all photographic images with the same improved photographic results. In the following example, the images on the left were created without using the HP EasyColor option. The images on the right show the enhancements that result from using the HP EasyColor option. The HP EasyColor option is enabled by default in the HP Mac Postscript printer driver, so you do not need to make manual color adjustments. To disable the option so you can manually adjust the color settings, use the following procedure. 1. On the File menu, click the Print option. 2. Select the driver. 3. Open the Color/Quality Options menu, and then click the HP EasyColor check box to clear it. 4. Open the Advanced menu, or select the appropriate tab. 5. Adjust the individual settings for text, graphics, and photographs. ENWW Basic print tasks with Mac 37
-
 1
1 -
2
-
3
-
4
-
5
-
6
-
7
-
8
-
9
-
10
-
11
-
12
-
13
-
14
-
15
-
16
-
17
-
18
-
19
-
20
-
21
-
22
-
23
-
24
-
25
-
26
-
27
-
28
-
29
-
30
-
31
-
32
-
33
-
34
-
35
-
36
-
37
-
38
-
39
-
40
-
41
-
42
-
43
-
44
-
45
-
46
-
47
-
48
-
49
-
 50
50 -
 51
51 -
 52
52 -
 53
53 -
 54
54 -
 55
55 -
 56
56 -
 57
57 -
 58
58 -
 59
59 -
 60
60 -
61
-
62
-
63
-
64
-
65
-
66
-
67
-
68
-
69
-
70
-
71
-
72
-
73
-
74
-
75
-
76
-
77
-
78
-
79
-
80
-
81
-
82
-
83
-
84
-
85
-
86
-
87
-
88
-
89
-
90
-
91
-
92
-
93
-
94
-
95
-
96
-
97
-
98
-
99
-
100
-
101
-
102
-
103
-
104
-
105
-
106
-
107
-
108
-
109
-
110
-
111
-
112
-
113
-
114
-
115
-
116
-
117
-
118
-
119
-
120
-
121
-
122
-
123
-
124
-
125
-
126
-
127
-
128
-
129
-
130
-
131
-
132
-
133
-
134
-
135
-
136
-
137
-
138
-
139
-
140
-
141
-
142
-
143
-
144
-
145
-
146
-
147
-
148
-
149
-
150
-
151
-
152
-
153
-
154
-
155
-
156
-
157
-
158
-
159
-
160
-
161
-
162
-
163
-
164
-
165
-
166
-
167
-
168
-
169
-
170
-
171
-
172
-
173
-
174
-
175
-
176
-
177
-
178
-
179
-
180
-
181
-
182
-
183
-
184
-
185
-
186
-
187
-
188
-
189
-
190
-
191
-
192
-
193
-
194
-
195
-
196
-
197
-
198
-
199
-
200
-
201
-
202
-
203
-
204
-
205
-
206
-
207
-
208
-
209
-
210
-
211
-
212
-
213
-
214
-
215
-
216
-
217
-
218
-
219
-
220
-
221
-
222
-
223
-
224
-
225
-
226
-
227
-
228
-
229
-
230
-
231
-
232
-
233
-
234
-
235
-
236
-
237
-
238
-
239
-
240
-
241
-
242
 |
 |
