HP Media Center m390n HP Media Center Desktop PCs - Creating DVDs and CDs With - Page 7
Storing Files on a DVD, or CD
 |
View all HP Media Center m390n manuals
Add to My Manuals
Save this manual to your list of manuals |
Page 7 highlights
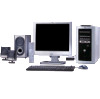
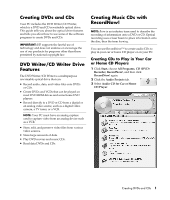
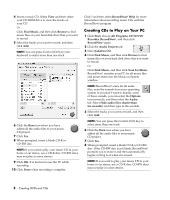
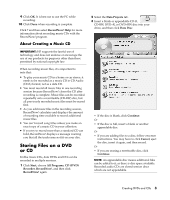
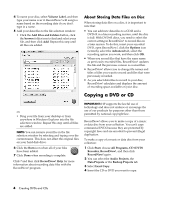
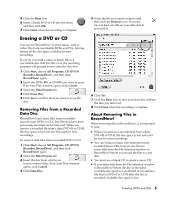
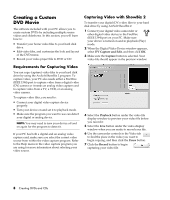
9 Click OK. It is best not to use the PC while recording. 10 Click Done when recording is complete. Click ? and then select RecordNow! Help for more information about recording music CDs with the RecordNow! program. About Creating a Music CD IMPORTANT: HP supports the lawful use of technology and does not endorse or encourage the use of our products for purposes other than those permitted by national copyright law. When recording music files, it is important to note that: • To play your music CD in a home or car stereo, it needs to be recorded as a music CD in CD Audio (CDA) format, not as a data CD. • You must record all music files in one recording session because RecordNow! closes the CD after recording is complete. Music files can be recorded repeatedly onto a rewriteable (CD-RW) disc, but all previously recorded music files must be erased first. • As you add music files in the recording session, RecordNow! calculates and displays the amount of recording time available to record additional music files. • You can't record song titles unless you make an exact copy of a music CD in your collection. • If you try to record more than a standard CD can hold, RecordNow! displays a message warning you that all the tracks may not fit on your disc. Storing Files on a DVD or CD Unlike music CDs, data DVDs and CDs can be recorded in multiple sessions. 1 Click Start, choose All Programs, CD (DVD) Recorder, RecordNow!, and then click RecordNow! again. 2 Select the Data Projects tab. 3 Insert a blank or appendable CD-R, CD-RW, DVD+R, or DVD+RW disc into your drive, and then click Data Disc. • If the disc is blank, click Continue. Or • If the disc is full, insert a blank or another appendable disc. Or • If you are adding files to a disc, follow onscreen instructions. You may have to click Cancel, eject the disc, insert it again, and then record. Or • If you are erasing a rewriteable disc, click Continue. NOTE: An appendable disc means additional files can be added to it, as there is disc space available. Recorded audio CDs are closed session discs which are not appendable. Creating DVDs and CDs 3
-
 1
1 -
 2
2 -
 3
3 -
 4
4 -
 5
5 -
 6
6 -
 7
7 -
 8
8 -
 9
9 -
 10
10 -
 11
11 -
 12
12 -
13
-
14
-
15
-
16
-
17
-
18
-
19
-
20
-
21
-
22
-
23
-
24
 |
 |