HP N7710 User Guide - Page 32
Scanner has stopped working correctly, Scanner operation problems - scanjet troubleshooting
 |
UPC - 882780998599
View all HP N7710 manuals
Add to My Manuals
Save this manual to your list of manuals |
Page 32 highlights
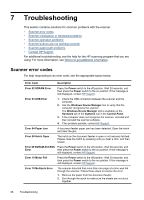
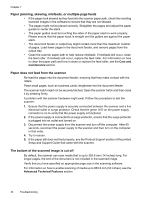
Chapter 7 Scanner has stopped working correctly If the scanner stops scanning, follow these steps. After each step, start a scan to see if the scanner is working. If the problem persists, proceed with the next step. 1. A cable might be loose. Ensure that both the USB cable and power supply are properly connected. Use the cable that was included with the scanner. Another USB cable might not be compatible with the scanner. 2. Ensure that the scanner is receiving power. a. Check that the green LED on the power supply cable connector is on. b. If the green LED is not on, ensure that power is available to the power outlet or surge protector that the AC cable is plugged into. c. If power is available to the power outlet or surge protector but the green LED is still not on, the power supply might be defective. Contact HP Support for assistance. 3. Unplug the power cable from the power source, wait 60 seconds, and then plug it back in. 4. Restart your computer. 5. Use the Add/Remove tool (in Windows Vista, the Programs and Features tool) from the Control Panel to uninstall the following applications: • HP Scanjet N7710 Document ISIS/TWAIN • HP Scanjet N7710 Utilities 6. Reinstall using the HP Scanning Software CD that came with your scanner. When you insert the CD, an installation dialog box launches automatically. Scanner operation problems • Scanner will not turn on • Scanner lamp stays on • Scanner does not scan right away • Scanner scans only one side of a double-sided page • Scanned image is fuzzy • Scanned pages are out of order at the scan destination • Scanner is scanning items very slowly • The scan is completely black or completely white • Scanned images are not straight • Vertical white stripes appear on the printed page • Scan files are too large 30 Troubleshooting
-
 1
1 -
2
-
3
-
4
-
5
-
6
-
7
-
8
-
9
-
10
-
11
-
12
-
13
-
14
-
15
-
16
-
17
-
18
-
19
-
20
-
21
-
22
-
23
-
24
-
25
-
26
-
 27
27 -
 28
28 -
 29
29 -
 30
30 -
 31
31 -
 32
32 -
 33
33 -
 34
34 -
 35
35 -
 36
36 -
 37
37 -
38
-
39
-
40
-
41
-
42
 |
 |
