HP Officejet 4350 User Guide
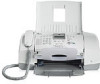
HP Officejet 4350 - All-in-One Printer Manual
 |
View all HP Officejet 4350 manuals
Add to My Manuals
Save this manual to your list of manuals |
HP Officejet 4350 manual content summary:
- HP Officejet 4350 | User Guide - Page 1
HP Officejet 4300 All-in-One series User Guide - HP Officejet 4350 | User Guide - Page 2
HP Officejet 4300 All-in-One series User Guide - HP Officejet 4350 | User Guide - Page 3
where no one can step on or trip over the power cord, and where the power cord will not be damaged. 8. If you have problems during setup, see Troubleshooting in the last section of the Setup Guide, or see Troubleshooting information in this User Guide. 9. No operator-serviceable parts inside - HP Officejet 4350 | User Guide - Page 4
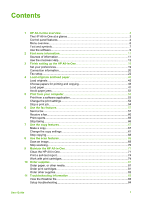
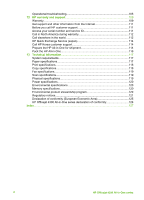
features 69 Scan an image...69 Stop scanning...70 9 Maintain the HP All-in-One 71 Clean the HP All-in-One 71 Print a self-test report 74 Work with print cartridges 74 10 Order supplies...81 Order paper, or other media 81 Order print cartridges 81 Order other supplies 82 11 Troubleshooting - HP Officejet 4350 | User Guide - Page 5
specifications 120 Memory specifications 120 Environmental product stewardship program 120 Regulatory notices 121 Declaration of conformity (European Economic Area 125 HP Officejet 4300 All-in-One series declaration of conformity 126 Index...127 2 HP Officejet 4300 All-in-One series - HP Officejet 4350 | User Guide - Page 6
The HP All-in-One at a glance ● Control panel features ● Menu overview ● Text and symbols ● Use the software The HP All-in-One at a glance Label 1 2 3 4 5 6 7 8 Description Document feeder tray Control panel display (also referred to as the display) Paper guides Control panel Print cartridge door - HP Officejet 4350 | User Guide - Page 7
a fax number. Lighter / Darker: Lightens or darkens black-and-white faxes being sent. Fax Resolution: Adjusts the resolution for black-and-white faxes being sent. 4 HP Officejet 4300 All-in-One series - HP Officejet 4350 | User Guide - Page 8
Fax Menu. Press Fax repeatedly to scroll through the options in the Fax Menu. Scan: Places the HP All-in-One in scan mode and presents the Scan To menu for selecting a scan destination. Copy: Places the HP All-in-One in copy mode and presents the Copy Menu. Press Copy repeatedly to scroll through - HP Officejet 4350 | User Guide - Page 9
Number Resolution Lighter / Darker How to Fax Set New Defaults Scan To menu When you press the Scan button, a list of software applications installed on your computer appears in the menu. HP Photosmart Microsoft PowerPoint Adobe Photoshop HP Photosmart Share 6 HP Officejet 4300 All-in-One series - HP Officejet 4350 | User Guide - Page 10
appears on your computer screen. 1. How Do I 2. Error Messages 3. Print Cartridges 4. Load Originals and Load Paper 5. General Troubleshooting 6. Fax Troubleshooting 7. Use Fax Features 8. Use Scan Features 9. Get Support 0. Product Overview Text and symbols You can use the control panel keypad to - HP Officejet 4350 | User Guide - Page 11
Overview Chapter 1 ● Enter text using the keypad on the control panel ● Available symbols for dialing fax numbers Enter text using Available when entering Fax header name, speed dial names, speed dial numbers, fax or phone numbers, and monitor dial entries 8 HP Officejet 4300 All-in-One series - HP Officejet 4350 | User Guide - Page 12
Use the software You can use the HP Photosmart Software (Windows) or HP Photosmart Mac Software (Mac) to access many features not available from the control panel. The software is installed on your computer when you set up the HP All-in-One. For further information, see the Setup Guide that came - HP Officejet 4350 | User Guide - Page 13
bar, click Devices. The HP Device Manager window appears. 3. In the Select Device area, click the icon for the HP All-in-One. From here, you can scan, make copies, and perform maintenance procedures such as checking the ink levels for the print cartridges. 10 HP Officejet 4300 All-in-One series - HP Officejet 4350 | User Guide - Page 14
Help The onscreen Help provides detailed instructions on features of your HP All-in-One that are not described in this User Guide, including features that are only available using the software you installed with your HP All-in-One. HP Photosmart Software Help (Windows) ● The Get the most out - HP Officejet 4350 | User Guide - Page 15
the onscreen Help that came with your device for information on all the features that the HP All-in-One supports. Note The onscreen Help also provides troubleshooting topics to assist you in resolving any issues you might encounter with the HP All-in-One. 12 HP Officejet 4300 All-in-One series - HP Officejet 4350 | User Guide - Page 16
search, and index features in the Help system to find the specific information you need. To access the HP Photosmart Software Help on a Windows computer 1. In the HP Solution Center, click the tab for the HP All-in-One. 2. In the Device Support area, click Onscreen Guide or Troubleshooting. - If you - HP Officejet 4350 | User Guide - Page 17
features available from the control panel of the HP All-in-One, open the 4300 series Help book near the bottom of the list. - For troubleshooting information about the HP All-in-One, open the Troubleshooting and support book, and then open the 4300 series Troubleshooting system for specific words, - HP Officejet 4350 | User Guide - Page 18
window displays the Help topic you select from one of the tabs on the left. Help topics include descriptive text, step-bystep instructions animated videos that show you how to use a particular feature. These animations are identified by a video camera icon, HP Photosmart Software Help. User Guide 15 - HP Officejet 4350 | User Guide - Page 19
the specific information you need. To access the HP Photosmart Mac Help ➔ On the Help menu in the HP Photosmart Studio, choose HP Photosmart Mac Help. The HP Photosmart Mac Help appears. The following diagram highlights features for finding your way around the Help. 16 HP Officejet 4300 All-in-One - HP Officejet 4350 | User Guide - Page 20
related to your HP All-in-One and software. ● For information on tasks and features available from the control panel of the HP All-in-One, double-click the 4300 series Help section. ● For troubleshooting information about the HP All-in-One, double-click the 4300 series Troubleshooting section. ● The - HP Officejet 4350 | User Guide - Page 21
that show you how to use a particular feature. These animations are identified by a video icon, the animation runs in a new window. Help toolbar The Help toolbar, shown below to search the entire Help system for specific words, such as "borderless print". After HP Officejet 4300 All-in-One series - HP Officejet 4350 | User Guide - Page 22
you have completed the steps in your Setup Guide, refer to this section to help you finish setting up the HP All-in-One. This section contains important setup-related information for your device, including information on setting preferences. ● Set your preferences ● Connection information ● Fax - HP Officejet 4350 | User Guide - Page 23
equipped with a USB port so you can connect directly to a computer using a USB cable. You can also share your printer over an existing Ethernet network using a computer as a print server. ● Supported connection types ● Connect using a USB cable Finish setup 20 HP Officejet 4300 All-in-One series - HP Officejet 4350 | User Guide - Page 24
computers for best performance Supported software Setup instructions features One computer connected with a USB cable to the rear USB 1.1 full speed peripheral connection port on the HP All-inOne. All features are supported. Follow the Setup Guide for detailed instructions. Five. The host - HP Officejet 4350 | User Guide - Page 25
box to Share this printer with other computers, and then select the printer to share. Fax setup After completing all the steps in the Setup Guide, use the instructions in this section to complete "2-EXT" port on the back of the HP All-in-One. Finish setup 22 HP Officejet 4300 All-in-One series - HP Officejet 4350 | User Guide - Page 26
), check with your telephone company. Choose the correct fax setup for your home or office To fax successfully, you need to know what types of equipment and services (if any) share the same phone line with the HP All-in-One. This is important because you might need to connect some of your existing - HP Officejet 4350 | User Guide - Page 27
telephone company at the same phone number you will use for fax calls on the HP All-in-One? ❑ Yes, I have a voice mail service. ❑ No. After you have completed answering the questions, proceed to the next section to select your fax setup case. Finish setup 24 HP Officejet 4300 All-in-One series - HP Officejet 4350 | User Guide - Page 28
equipment and services that share the phone line with the HP All-in-One, you are ready to choose the best setup case for your home or office. From of the HP All-in-One. If you use another phone cord, you might experience problems sending and receiving faxes. Other equipment/ services sharing your - HP Officejet 4350 | User Guide - Page 29
up modem, and voice mail line with computer dial-up service modem and voice mail (You answered Yes to questions 4, For additional fax setup information, in specific countries/regions, see the Fax HP All-in-One as described in this section. Finish setup 26 HP Officejet 4300 All-in-One series - HP Officejet 4350 | User Guide - Page 30
office. 2. Set the Answer Mode to Fax. 3. (Optional) Change the Rings to Answer setting to the lowest setting (two rings). 4. Run a fax test. When the phone rings, the HP All-in-One up the HP All-in-One with DSL If you have a DSL service through your telephone company, use the instructions in this - HP Officejet 4350 | User Guide - Page 31
other office equipment or services attached to this phone line, such as a distinctive ring service, answering specific phone equipment. For example, you might have assigned one port for telephone and Group 3 fax and another port for multiple purposes. If you 28 HP Officejet 4300 All-in-One series - HP Officejet 4350 | User Guide - Page 32
problems HP All-in-One. Refer to the documentation that came with your PBX phone system for instructions on HP All-in-One. If you do not, you might not be able to fax successfully. This special phone cord is different from the phone cords you might already have in your home or office. If the supplied - HP Officejet 4350 | User Guide - Page 33
telephone wall jack, then connect the other end to the port labeled 1LINE on the back of the HP All-in-One. Note If you do not use the supplied cord to connect from the telephone wall jack to the HP All-in-One, you might not be able to fax successfully. 30 HP Officejet 4300 All-in-One series - HP Officejet 4350 | User Guide - Page 34
is different from the phone cords you might already have in your home or office. 2. Now you need to decide how you want the HP All-in-One to answer calls, automatically or manually: - If you set up the HP All-in-One to answer calls automatically, it answers all incoming calls and receives faxes. The - HP Officejet 4350 | User Guide - Page 35
line with the HP All-in-One, you will not be able to use both your modem and the HP All-in-One simultaneously. For example, you cannot use the HP All-in-One for faxing if you are using your computer dial-up modem to send an e-mail or access the Internet. 32 HP Officejet 4300 All-in-One series - HP Officejet 4350 | User Guide - Page 36
HP All-in-One. Note If you do not use the supplied cord to connect from the telephone wall jack to the HP All-in-One, you might not be able to fax successfully. This special phone cord is different from the phone cords you might already have in your home or office. 4. If your modem software - HP Officejet 4350 | User Guide - Page 37
e-mail or access the Internet. There are two different ways to set up the HP All-in-One with your computer based on the number of phone ports on your computer. Before computer has two phone ports, set up the HP All-in-One as described below. Finish setup 34 HP Officejet 4300 All-in-One series - HP Officejet 4350 | User Guide - Page 38
HP All-in-One. Note If you do not use the supplied cord to connect from the telephone wall jack to the HP All-in-One, you might not be able to fax successfully. This special phone cord is different from the phone cords you might already have in your home or office. 5. If your modem software - HP Officejet 4350 | User Guide - Page 39
of the HP All-in-One 1 Telephone wall jack 2 "IN" port on your answering machine 3 "OUT" port on your answering machine 4 Telephone (optional) 5 Answering machine 6 Use the phone cord supplied in the box with the HP All-in-One to connect to the "1-LINE" port 36 HP Officejet 4300 All-in-One series - HP Officejet 4350 | User Guide - Page 40
supplied cord to connect from the telephone wall jack to the HP All-in-One, you might not be able to fax successfully. This special phone cord is different from the phone cords you might already have in your home or office on the HP All-in-One to the maximum number of rings supported by your device - HP Officejet 4350 | User Guide - Page 41
-One 1 Telephone wall jack 2 "IN" phone port on your computer 3 "OUT" phone port on your computer 4 Telephone (optional) 5 Answering machine 6 Computer with modem 7 Use the phone cord supplied in the box with the HP All-in-One to connect to the "1- LINE" port 38 HP Officejet 4300 All-in-One series - HP Officejet 4350 | User Guide - Page 42
supplied cord to connect from the telephone wall jack to the HP All-in-One, you might not be able to fax successfully. This special phone cord is different from the phone cords you might already have in your home or office reception setting in your modem software, the HP All-in-One will not be able - HP Officejet 4350 | User Guide - Page 43
HP All-in-One as described in this section. Note You cannot receive faxes automatically if you have a voice mail service at the same phone number you use for fax calls. You must receive faxes manually set up the HP All-in-One as described below. Finish setup 40 HP Officejet 4300 All-in-One series - HP Officejet 4350 | User Guide - Page 44
HP All-in-One. Note If you do not use the supplied cord to connect from the telephone wall jack to the HP All-in-One, you might not be able to fax successfully. This special phone cord is different from the phone cords you might already have in your home or office. 5. If your modem software - HP Officejet 4350 | User Guide - Page 45
on the HP All-in-One. If you are unsure which setting to choose for a specific fax option, HP All-in-One will not answer calls. You will need to receive faxes manually. AnswerMachine The HP All-in-One HP All-inOne automatically answers the incoming call. 42 HP Officejet 4300 All-in-One series - HP Officejet 4350 | User Guide - Page 46
ringing feature that allows you to have several phone numbers on one phone line. When you subscribe to this service, each number will have a different ring pattern. You can set up the HP All-in-One to answer incoming calls that have a specific ring pattern. If you connect the HP All-in-One to - HP Officejet 4350 | User Guide - Page 47
review the report for information on how to fix the problem and rerun the test. To test your fax setup from the control panel 1. Set up the HP All-in-One for faxing according to your particular home or office setup instructions. 2. Insert the print cartridges 44 HP Officejet 4300 All-in-One series - HP Officejet 4350 | User Guide - Page 48
HP All-in-One, including letter or A4 paper, photo paper, transparencies, and envelopes. By default, the HP Allin-One Automatic setting, you can manually set the paper size paper jams Load originals You can copy, scan, or fax a single- or multiple indicating that the HP All-in-One detected the pages - HP Officejet 4350 | User Guide - Page 49
information. ● Paper with cutouts or perforations (unless specifically designed for use with HP inkjet devices). ● Highly textured stock, such as linen. It might not print evenly, and the ink can bleed into these papers. 46 HP Officejet 4300 All-in-One series Load originals and load paper - HP Officejet 4350 | User Guide - Page 50
, or coated papers not specifically designed for the HP All-in-One. They can jam the HP All-in-One or repel the ink. ● Multi-part forms, such as duplicate and triplicate forms. They can wrinkle or get stuck, and the ink is more likely to smear. ● Envelopes with clasps or windows. They can get stuck - HP Officejet 4350 | User Guide - Page 51
. 4. Slide the paper-width guide inward until it stops at the edge of the paper. Do not overload the input tray; make sure the stack of paper fits within the input tray and is no higher than the top of the paper-width guide. Load originals and load paper 48 HP Officejet 4300 All-in-One series - HP Officejet 4350 | User Guide - Page 52
the HP All-inOne. For the best results, use 10 x 15 cm (4 x 6 inch) HP Premium Plus Photo Paper or HP Premium Photo Paper with tab. Note For borderless printing, the HP All-in-One only supports printing paper, refer to the guides engraved in the base of the input tray for loading photo paper. 3. - HP Officejet 4350 | User Guide - Page 53
cards forward until it stops. 3. Slide the paper-width guide inward against the stack of cards until it stops. Do one or more envelopes into the input tray of the HP All-in-One. Do not use shiny or embossed envelopes or envelopes that have clasps or windows. 50 HP Officejet 4300 All-in-One series - HP Officejet 4350 | User Guide - Page 54
specific details on how to format text for printing on envelopes, consult the help files in your word processing software. For best results, consider using a label for the return address on envelopes. To load envelopes 1. Remove all paper from the input tray. 2. Insert one paper-width guide. Load - HP Officejet 4350 | User Guide - Page 55
to fit snugly against all paper. Make sure the paper-width guide does not bend the paper in the input tray. ● Do not force paper too far forward in the input tray. ● Use paper types that are recommended for the HP All-in-One. Load originals and load paper 52 HP Officejet 4300 All-in-One series - HP Officejet 4350 | User Guide - Page 56
on specific types of paper or transparency film, or use special features. To print from a software application (Windows) 1. Make sure you have paper loaded in the input tray. 2. On the File menu in your software application, click Print. 3. Make sure the HP All-in-One is the selected printer. 4. If - HP Officejet 4350 | User Guide - Page 57
the selected printer. 3. Make changes to the print settings, and click Print to print the job. Stop a print job Although you can stop a print job from either the HP All-in-One or the computer, HP recommends you stop it from the HP All-in-One for best results. 54 HP Officejet 4300 All-in-One series - HP Officejet 4350 | User Guide - Page 58
To stop a print job from the HP All-in-One ➔ Press Cancel on the control panel. If the print job does not stop, press Cancel again. It can take a few moments for printing to be cancelled. Print User Guide 55 - HP Officejet 4350 | User Guide - Page 59
Chapter 5 Print 56 HP Officejet 4300 All-in-One series - HP Officejet 4350 | User Guide - Page 60
setup, by using either the control panel or the software that came with the HP All-in-One. You can verify the fax is set up correctly faxes. Tip You can also send a fax manually from a phone or by using monitor dialing. These features allow you to control the pace of your appears. User Guide 57 - HP Officejet 4350 | User Guide - Page 61
fax you sent, you can try changing the resolution or contrast of your fax. Send a fax manually Sending a fax manually allows you to make a phone call and talk with the recipient before you send the fax. This on their fax machine after they hear fax tones. 58 HP Officejet 4300 All-in-One series - HP Officejet 4350 | User Guide - Page 62
on the line until the fax transmission is complete. To send a fax manually from a phone using the attached handset (handset model only) 1. Load your enough, the HP All-in-One might start sending fax tones too soon and cause your PIN not to be recognized by the calling card service. If this Guide 59 - HP Officejet 4350 | User Guide - Page 63
referred to as manual faxing. Use the instructions in this section to receive a manual fax. Note If the HP All-in-One has a handset HP All-in-One answers. Or, press Answer Mode repeatedly until the Tel mode appears so the HP All-in-One manually receives a fax. 60 HP Officejet 4300 All-in-One series - HP Officejet 4350 | User Guide - Page 64
, printed faxes as it receives new faxes. If the memory becomes full of unprinted faxes, the HP All-in-One will stop answering incoming fax calls. Note 2 If you receive a fax that is too large, such a very detailed color photo, it might not be stored in memory due to memory limitations. ● On Error - HP Officejet 4350 | User Guide - Page 65
Cancel. To delete all the faxes in memory from the control panel ➔ Turn off the HP All-in-One by pressing the On button. All faxes stored in memory will be deleted from memory when This selects Advanced Fax Setup and then selects Fax Forwarding Black Only. 62 HP Officejet 4300 All-in-One series - HP Officejet 4350 | User Guide - Page 66
HP All-in-One. Note If the HP All-in-One HP Allin-One will print the fax. If you set up the HP All-in-One the HP All-in-One while service through your phone provider, you can block specific fax numbers, so the HP All-in-One feature is not supported in all countries/regions. If it is not supported - HP Officejet 4350 | User Guide - Page 67
step 4 for each number you want to block. - If you are done, press 2 to select No. To manually enter a number to block 1. Press Setup. 2. Press 4, and then press 6. This selects Basic Fax Setup and then and then selects Junk Fax Blocker Set Up. 3. Press 2. 64 HP Officejet 4300 All-in-One series - HP Officejet 4350 | User Guide - Page 68
manually print system reports as you need them; these reports provide useful system information about the HP All-in-One. By default, the HP All-in-One is set to print a report only if there is a problem were successfully sent, follow these instructions to enable fax confirmation before Guide 65 - HP Officejet 4350 | User Guide - Page 69
Receive, and scan your fax to HP All-in-One prints any pages it has already started printing and then cancels the remainder of the fax. This can take a few moments. To cancel a number you are dialing ➔ Press Cancel to cancel a number you are currently dialing. 66 HP Officejet 4300 All-in-One series - HP Officejet 4350 | User Guide - Page 70
features The HP All-in-One enables you to produce high-quality color and black-and-white copies on a variety of paper types, including transparencies. You can enlarge or reduce the size of an original to fit a specific paper size, adjust the darkness of the copy, and use special features Guide 67 - HP Officejet 4350 | User Guide - Page 71
7 - Enhancements - Set New Defaults 2. Press until the appropriate setting appears. 3. Do one of the following: - To change more settings, press Copy. This selects the current setting . Stop copying To stop copying ➔ Press Cancel on the control panel. Copy 68 HP Officejet 4300 All-in-One series - HP Officejet 4350 | User Guide - Page 72
your computer or from the HP All-in-One. This section explains how to scan from the control panel of the HP All-in-One only. To use the scan features, the HP All-in-One and computer must be connected and turned on. The HP Photosmart Software (Windows) or HP Photosmart Mac Software (Mac) must also be - HP Officejet 4350 | User Guide - Page 73
application, and then press OK. Tip To force the scan to be in black and white, press Start Black instead of pressing OK. The HP All-in-One sends the scan to the selected application. Stop scanning To stop scanning ➔ Press Cancel on the control panel. Scan 70 HP Officejet 4300 All-in-One series - HP Officejet 4350 | User Guide - Page 74
section provides instructions for keeping the HP All-in-One in top working condition. Perform these simple maintenance procedures as necessary. ● Clean the HP All-in-One ● Print a self-test report ● Work with print cartridges Clean the HP All-in-One To ensure that your copies and scans remain clear - HP Officejet 4350 | User Guide - Page 75
, and unplug the power cord. Note Depending how long the HP All-in-One is unplugged, the date and time might be erased. You might need to reset the date and time later, when you plug the power cord back in. 2. Lift the cover of the automatic document feeder. 72 HP Officejet 4300 All-in-One series - HP Officejet 4350 | User Guide - Page 76
HP All-in-One or exterior of the HP All-in-One, as this might damage then turn on the HP All-in-One. Caution Make sure HP All-in-One does not require cleaning. Keep fluids away from the control panel and the interior of the HP All-in-One. Caution To avoid damage to the exterior of the HP All-in-One - HP Officejet 4350 | User Guide - Page 77
maintenance procedures and, when prompted by a message on the display, replace the print cartridges. ● Handle the print cartridges ● Replace the print cartridges ● Align the print cartridges ● Clean the print cartridges ● Clean the print cartridge contacts 74 HP Officejet 4300 All-in-One series - HP Officejet 4350 | User Guide - Page 78
problems, or even permanent damage. Replace the print cartridges Follow these instructions when the ink level is low. Note When the ink level for the print cartridge is low, a message appears on the display. You can also check the ink levels by using the software installed with the HP All-in-One - HP Officejet 4350 | User Guide - Page 79
free of charge. For more information, go to the following website: www.hp.com/recycle 6. Remove the new print cartridge from its packaging and, being careful to touch only the black plastic, gently remove the plastic tape by using the pink pull tab. 76 HP Officejet 4300 All-in-One series - HP Officejet 4350 | User Guide - Page 80
Maintain the HP All-in-One 1 Copper-colored contacts 2 Plastic tape with pink pull tab (must be removed before installing) 3 Ink nozzles under tape Caution Do not touch the copper-colored contacts or ink nozzles. Touching these parts can result in clogs, ink failure, and bad electrical connections. - HP Officejet 4350 | User Guide - Page 81
HP Support. Go to www.hp.com/support. If prompted, choose your country/region, and then click Contact HP for information on calling for technical support. 2. Press Setup. 3. Press 6, then press 2. This selects Tools and then selects Align Print Cartridge. 78 HP Officejet 4300 All-in-One series - HP Officejet 4350 | User Guide - Page 82
first in the center of the document feeder tray, and then press OK. The HP All-in-One aligns the print cartridges. Recycle or discard the print cartridge alignment sheet. Clean the print cartridges Use this feature when the self-test report shows streaking, white lines through any of the lines of - HP Officejet 4350 | User Guide - Page 83
the print cartridge back into the slot. Push the print cartridge forward until it clicks into place. 9. Repeat if necessary for the other print cartridge. 10. Gently close the print cartridge door and plug the power cord into the back of the HP All-in-One. 80 HP Officejet 4300 All-in-One series - HP Officejet 4350 | User Guide - Page 84
this device. 2. Click the Estimated Ink Levels tab. 3. Click Print Cartridge Ordering Information. The print cartridge reorder numbers appear. 4. Click Order Online. HP sends detailed printer information, including model number, serial number, and ink supply levels, to an authorized online reseller - HP Officejet 4350 | User Guide - Page 85
11 8061030 1-800-HP-INVENT (1-800-474-6836) To order supplies in other countries/regions not listed in the table, go to www.hp.com/ support. If prompted, choose your country/region, and then click Contact HP for information on calling for technical support. 82 HP Officejet 4300 All-in-One series - HP Officejet 4350 | User Guide - Page 86
pointing to Programs or All Programs, pointing to HP, pointing to OfficeJet AllIn-One 4300 series, and then clicking Readme. ● From a Mac, you can access the Readme file by double-clicking the icon located in the top-level folder of the HP All-in-One software CD-ROM. Troubleshooting User Guide 83 - HP Officejet 4350 | User Guide - Page 87
with hardware, software, and fax setup. Hardware setup troubleshooting Use this section to solve any problems you might encounter while setting up the HP All-in-One hardware. The HP All-in-One will not turn on Cause The HP All-in-One is not properly connected to a power supply. Solution ● Make - HP Officejet 4350 | User Guide - Page 88
You can connect to any USB port on the back of your computer. Troubleshooting For more information on installing the software and connecting the USB cable, see the Setup Guide that came with the HP All-in-One. I received a message on the display to attach the control panel faceplate Solution This - HP Officejet 4350 | User Guide - Page 89
Chapter 11 Troubleshooting For more information on attaching the control panel faceplate, see the Setup Guide that came with the HP All-in-One. The display shows the wrong language Solution You can change the input tray, and then try the alignment again. 86 HP Officejet 4300 All-in-One series - HP Officejet 4350 | User Guide - Page 90
blocking the print carriage, including any packing materials. Turn the HP All-in-One off and then turn it on again. ● Check that the HP All-in-One print queue is not paused (Windows) or stopped (Mac). If it is, choose the appropriate setting to resume printing. For Troubleshooting User Guide 87 - HP Officejet 4350 | User Guide - Page 91
computer is USB ready. Some operating systems, such as Windows 95 and Windows NT, do not support USB connections. Check the documentation that came with your operating inside the HP All-in-One. Look inside the device, including the print cartridge door. 88 HP Officejet 4300 All-in-One series - HP Officejet 4350 | User Guide - Page 92
solution. If you encounter a hardware problem during setup, see Hardware setup troubleshooting. During a normal installation of the HP All-in-One software, the following events occur: 1. The HP All-in-One software CD-ROM runs automatically. 2. The software installs. 3. Files are copied to your - HP Officejet 4350 | User Guide - Page 93
, open the HP Solution Center and check for the essential icons (Scan Picture, Scan Document, and Send a Fax). If the essential icons do not appear, remove the software and then reinstall it. For more information, see Uninstall and reinstall the software. 90 HP Officejet 4300 All-in-One series - HP Officejet 4350 | User Guide - Page 94
taskbar by clicking Start, pointing to Programs or All Programs, HP, OfficeJet All-In-One 4300 series, and then clicking Product Registration. The HP Digital Imaging Monitor does not appear in the system tray (Windows) Solution If the HP Digital Imaging Monitor does not appear in the system tray - HP Officejet 4350 | User Guide - Page 95
that the software is properly installed, double-click the HP Solution Center icon on the desktop. If the HP Solution Center shows the essential icons (Scan Picture, Scan Document, and Send a Fax), the software has been properly installed. Troubleshooting 92 HP Officejet 4300 All-in-One series - HP Officejet 4350 | User Guide - Page 96
Disconnect the HP All-in-One from your Mac. 2. Double-click the Applications:Hewlett-Packard folder. 3. Double-click HP Uninstaller. Follow the onscreen instructions. 4. After the software is uninstalled, disconnect the HP All-in-One, and then restart your computer. Troubleshooting User Guide 93 - HP Officejet 4350 | User Guide - Page 97
not be a problem. ● If you are running the test from the Fax Setup Wizard (Windows) or Fax Setup Utility (Mac), make sure the HP All-in-One is not busy completing another task, such as receiving a fax or making a copy. Check the display for Troubleshooting 94 HP Officejet 4300 All-in-One series - HP Officejet 4350 | User Guide - Page 98
have them check the line. ● Try to send or receive a test fax. If you can send or receive a fax successfully, there might not be a problem. After you resolve any problems found, run the fax test again to make sure it passes and the HP All-in-One is ready for faxing. Troubleshooting User Guide 95 - HP Officejet 4350 | User Guide - Page 99
cord supplied in the box with the HP All-in- One to connect to the telephone wall jack. One end of the phone cord should be connected to the port labeled 1-LINE on the back of the HP All-in-One and the other end to your telephone wall jack, as shown below. 96 HP Officejet 4300 All-in-One series - HP Officejet 4350 | User Guide - Page 100
Troubleshooting 1 Telephone wall jack 2 Use the phone cord supplied in the box with the HP All-in-One to connect to the "1-LINE" port If the supplied phone cord is not long enough, you can extend it. For information, see The phone cord that came with my HP All-in-One is not long enough. ● Check the - HP Officejet 4350 | User Guide - Page 101
equipment is causing a problem, disconnect everything from the phone line, and then run the test again. - If the Fax Line Condition Test passes without the other equipment, then one or more pieces of the equipment is causing problems; try Troubleshooting 98 HP Officejet 4300 All-in-One series - HP Officejet 4350 | User Guide - Page 102
time, until you identify which piece of equipment is causing the problem. - If the Fax Line Condition Test fails without the other equipment, connect the HP All-in-One to a working phone line and continue reviewing the troubleshooting information in this section. ● If you are using a phone splitter - HP Officejet 4350 | User Guide - Page 103
make sure the HP All-in-One is connected to the correct port and the terminal adapter is set to the correct switch type for your country/region, if possible. For more information, see Case C: Set up the HP All-in-One with a PBX phone system or an ISDN line. 100 HP Officejet 4300 All-in-One series - HP Officejet 4350 | User Guide - Page 104
connected directly to the HP All-in-One. To send a fax manually, the telephone must be connected directly to the port labeled 2-EXT on the HP All-in-One, as shown below. Troubleshooting 1 Telephone wall jack 2 Use the phone cord supplied in the box with the HP All-in-One to connect to the "1-LINE - HP Officejet 4350 | User Guide - Page 105
All-in-One to receive faxes automatically, see Set the answer mode. - Make sure the Rings to Answer setting is set to a greater number of rings than the answering machine. For more information, see Set the number of rings before answering. Troubleshooting 102 HP Officejet 4300 All-in-One series - HP Officejet 4350 | User Guide - Page 106
problem the HP All-in-One shares service through your telephone company), make sure that the Distinctive Ring feature on the HP All-in-One is set to match. For more information, see Change the answer ring pattern for distinctive ringing. Troubleshooting The HP All-in-One is having problems. To check - HP Officejet 4350 | User Guide - Page 107
All-in-One, connect one end to the coupler, then connect the other end to the port labeled 1-LINE on the back of the HP All-in-One. 2. Connect another phone cord to the open port on the coupler and to the telephone wall jack, as shown below. Troubleshooting 104 HP Officejet 4300 All-in-One series - HP Officejet 4350 | User Guide - Page 108
wall jack 2 Coupler 3 Use the phone cord supplied in the box with the HP All-in-One to connect to the "1-LINE" port Operational troubleshooting This section contains information on paper and print cartridge troubleshooting. The troubleshooting section in the onscreen Help contains more complete - HP Officejet 4350 | User Guide - Page 109
wheels for torn pieces of paper that might be remaining inside the device. If you do not remove all the pieces of paper from the HP All-in-One, more paper jams are likely to occur. 3. Close the cover of the automatic document feeder. 106 HP Officejet 4300 All-in-One series - HP Officejet 4350 | User Guide - Page 110
or ink can build heavy with ink. ● If Load one or problem persists, or the automatic document feeder does not pick up the plain paper, you can clean the rollers and separator pad manually Troubleshooting 1 Automatic document feeder cover 2 Rollers 3 Separator pad 3. Lightly dampen a clean lint-free - HP Officejet 4350 | User Guide - Page 111
problems with printing, determine which print cartridge is experiencing the problem and replace it. For more information, see: ● Replace the print cartridges ● Print a self-test report ● Clean the print cartridges ● Clean the print cartridge contacts 108 HP Officejet 4300 All-in-One series - HP Officejet 4350 | User Guide - Page 112
your country/ region, contact your nearest authorized HP dealer for help. Warranty To obtain HP repair service, you must first contact an HP service office or an HP Customer Support Center for basic troubleshooting. See Before you call HP customer support for steps to take before calling Customer - HP Officejet 4350 | User Guide - Page 113
maintenance or modification; b. Software, media, parts, or supplies not provided or supported by HP; c. Operation outside the product's specifications; d. Unauthorized modification or misuse. 4. For HP printer products, the use of a non-HP ink cartridge or a refilled ink cartridge does not affect - HP Officejet 4350 | User Guide - Page 114
specific name of the HP All-in-One, as it appears on the control panel, available. b. Print a self-test report. c. Make a color copy to have available as a sample printout. d. Be prepared to describe your problem in detail. e. Have your serial number and service ID ready. 5. Call HP Customer Support - HP Officejet 4350 | User Guide - Page 115
HP at the phone number provided in this guide. As part of our constant efforts to improve our phone support service, we advise you to check our website on a regular basis for new information regarding service features and delivery. HP warranty and support 112 HP Officejet 4300 All-in-One series - HP Officejet 4350 | User Guide - Page 116
210 6073603 801 11 75400 800 9 2654 Guatemala 1-800-711-2884 2802 4098 Magyarország 06 40 200 629 India 1600 425 7737 Indonesia +62 (21) 350 3408 Ireland 1 890 923 902 1-700-503-048 Italia 848 -177 58-212-278-8666 0-800-474-68368 +84 88234530 HP warranty and support User Guide 113 - HP Officejet 4350 | User Guide - Page 117
to send the HP All-in-One in for service, make sure you remove and keep the following items before returning your device: ● The print cartridges ● The control panel faceplate ● The power cord, USB cable, and any other cable connected to the HP All-in-One 114 HP Officejet 4300 All-in-One series - HP Officejet 4350 | User Guide - Page 118
then manually slide the print carriage to the far right side to remove the print cartridges. 4. Place the print cartridges in an airtight plastic container so they will not dry out, and put them aside. Do not send them with the HP All-in-One unless the HP customer support call agent instructs you - HP Officejet 4350 | User Guide - Page 119
symptoms for service personnel (samples of print quality problems are helpful). - A copy of the sales slip or other proof of purchase to establish the warranty coverage period. - Your name, address, and a phone number where you can be reached during the day. 116 HP Officejet 4300 All-in-One series - HP Officejet 4350 | User Guide - Page 120
specifications and international regulatory information for the HP All-in-One are provided in this section. System requirements Software system requirements are located in the Readme file. Paper specifications of paper and the amount of ink you are using. HP recommends emptying the output tray - HP Officejet 4350 | User Guide - Page 121
(LIDIL) ● Duty cycle: 1000 pages per month Copy specifications ● Digital image processing ● Up to 99 copies from original (varies by model) ● Digital zoom: from 25 to 400% (varies by model) Mode Best Type Black Scan resolution (dpi)* up to 600 x 1200 118 HP Officejet 4300 All-in-One series - HP Officejet 4350 | User Guide - Page 122
Manual fax send and receive. ● Automatic busy redial up to five times (varies by model). ● Automatic no-answer redial one (dpi) 196 x 98 200 x 200 Scan specifications ● Image editor included ● Integrated OCR software automatically converts scanned text to editable text ● Twain-compliant interface - HP Officejet 4350 | User Guide - Page 123
information from the HP website. Go to www.hp.com/support. Memory specifications Memory specifications: 2MB ROM, supply qualify for ENERGY STAR, which is a voluntary program established to encourage the development of energy-efficient office products. 120 HP Officejet 4300 All-in-One series - HP Officejet 4350 | User Guide - Page 124
drop off your waste equipment for recycling, please contact your local city office, your household waste disposal service, or the shop where you purchased the product. Regulatory notices The HP All-in-One meets product requirements from regulatory agencies in your country/region. Regulatory model - HP Officejet 4350 | User Guide - Page 125
service. If you experience trouble with this equipment, please contact the manufacturer, or look elsewhere in this manual or late evening. Note For HP Officejet 4300 All-in-One series models that include a telephone complete the steps described in the software. FCC statement The United States Federal - HP Officejet 4350 | User Guide - Page 126
in accordance with the instructions, might cause harmful to try to correct the interference by one or more of the following measures: Problems. This booklet is available from the U.S. Government Printing Office, Canada Terminal Equipment Technical Specifications. This is confirmed by Guide 123 - HP Officejet 4350 | User Guide - Page 127
product support event of problems with loop HP fax product can be used as a single device and/or in combination (in serial connection) with other approved terminal equipment. Geräuschemission LpA < 70 dB am Arbeitsplatz im Normalbetrieb nach DIN 45635 T. 19 124 HP Officejet 4300 All-in-One series - HP Officejet 4350 | User Guide - Page 128
to users in Korea Declaration of conformity (European Economic Area) The Declaration of Conformity in this document complies with ISO/IEC Guide 22 and EN 45014. It identifies the product, manufacturer's name and address, and applicable specifications recognized in the European community. User - HP Officejet 4350 | User Guide - Page 129
Chapter 13 HP Officejet 4300 All-in-One series declaration of conformity Technical information 126 HP Officejet 4300 All-in-One series - HP Officejet 4350 | User Guide - Page 130
troubleshoot 99 confirmation reports, fax 65 connection problems fax 99, 101, 102, 103 HP All-in-One does not turn on 84 connection types supported printer sharing 21 USB 21 control panel buttons 4 enter text and symbols 7 features 4 copy button 5 cancel 68 make a copy 67 menu 6 specifications 118 - HP Officejet 4350 | User Guide - Page 131
choose 46 incompatible types 46 jams 52, 88, 105 load 47 order 81 paper sizes 117 recommended types 46 specifications 117 troubleshoot 105 paper tray capacities 117 parallel phone system 23 PBX system, set up with fax 28 PC modem. See computer modem phone 128 HP Officejet 4300 All-in-One series - HP Officejet 4350 | User Guide - Page 132
margin specifications 118 print quality 71 lines 71 streaks 71 printer sharing Mac 21 R Readme file 83 receive fax auto answer mode 42 automatically 60 block numbers 63 forward calls 62 manually 60 rings to answer 42 troubleshoot problems 99 recycle HP All-in-One 121 print cartridges 121 Redial - HP Officejet 4350 | User Guide - Page 133
setup 84 software installation 89 USB cable 85 two-wire phone cord 99, 104 U uninstall software 92 USB cable installation 85 USB port speed 21 V voice mail set up with fax 31, 40 volume, adjust 20 W wall jack test, fax 95 warranty 109 white strip, clean 72 130 HP Officejet 4300 All-in-One series
-
 1
1 -
 2
2 -
 3
3 -
 4
4 -
 5
5 -
 6
6 -
 7
7 -
8
-
9
-
10
-
11
-
12
-
13
-
14
-
15
-
16
-
17
-
18
-
19
-
20
-
21
-
22
-
23
-
24
-
25
-
26
-
27
-
28
-
29
-
30
-
31
-
32
-
33
-
34
-
35
-
36
-
37
-
38
-
39
-
40
-
41
-
42
-
43
-
44
-
45
-
46
-
47
-
48
-
49
-
50
-
51
-
52
-
53
-
54
-
55
-
56
-
57
-
58
-
59
-
60
-
61
-
62
-
63
-
64
-
65
-
66
-
67
-
68
-
69
-
70
-
71
-
72
-
73
-
74
-
75
-
76
-
77
-
78
-
79
-
80
-
81
-
82
-
83
-
84
-
85
-
86
-
87
-
88
-
89
-
90
-
91
-
92
-
93
-
94
-
95
-
96
-
97
-
98
-
99
-
100
-
101
-
102
-
103
-
104
-
105
-
106
-
107
-
108
-
109
-
110
-
111
-
112
-
113
-
114
-
115
-
116
-
117
-
118
-
119
-
120
-
121
-
122
-
123
-
124
-
125
-
126
-
127
-
128
-
129
-
130
-
131
-
132
-
133
 |
 |

HP Officejet 4300 All-in-One series
User Guide