HP Photosmart 850 HP Photosmart 850 digital camera - (English) User Guide - Page 23
Using the diopter control, Taking still pictures, Using still mode
 |
View all HP Photosmart 850 manuals
Add to My Manuals
Save this manual to your list of manuals |
Page 23 highlights
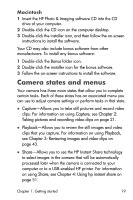
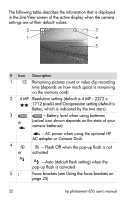
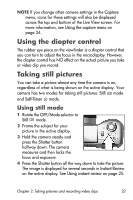
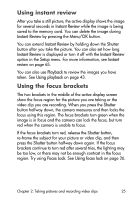
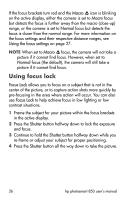
NOTE If you change other camera settings in the Capture menu, icons for those settings will also be displayed across the top and bottom of the Live View screen. For more information, see Using the capture menu on page 34. Using the diopter control The rubber eye piece on the viewfinder is a diopter control that you can turn to adjust the focus in the microdisplay. However, the diopter control has NO effect on the actual picture you take or video clip you record. Taking still pictures You can take a picture almost any time the camera is on, regardless of what is being shown on the active display. Your camera has two modes for taking still pictures: Still mode and Self-Timer mode. Using still mode 1 Rotate the OFF/Mode selector to Still mode. 2 Frame the subject for your picture in the active display. 3 Hold the camera steady and press the Shutter button halfway down. The camera measures and then locks the focus and exposure. 4 Press the Shutter button all the way down to take the picture. The image is displayed for several seconds in Instant Review on the active display. See Using instant review on page 25. Chapter 2: Taking pictures and recording video clips 23
-
 1
1 -
2
-
3
-
4
-
5
-
6
-
7
-
8
-
9
-
10
-
11
-
12
-
13
-
14
-
15
-
16
-
17
-
 18
18 -
 19
19 -
 20
20 -
 21
21 -
 22
22 -
 23
23 -
 24
24 -
 25
25 -
 26
26 -
 27
27 -
 28
28 -
29
-
30
-
31
-
32
-
33
-
34
-
35
-
36
-
37
-
38
-
39
-
40
-
41
-
42
-
43
-
44
-
45
-
46
-
47
-
48
-
49
-
50
-
51
-
52
-
53
-
54
-
55
-
56
-
57
-
58
-
59
-
60
-
61
-
62
-
63
-
64
-
65
-
66
-
67
-
68
-
69
-
70
-
71
-
72
-
73
-
74
-
75
-
76
-
77
-
78
-
79
-
80
-
81
-
82
-
83
-
84
-
85
-
86
-
87
-
88
-
89
-
90
-
91
-
92
-
93
-
94
-
95
-
96
-
97
-
98
-
99
-
100
-
101
-
102
-
103
-
104
-
105
-
106
-
107
-
108
-
109
-
110
-
111
-
112
 |
 |