HP Photosmart M22 HP Photosmart M22/23 Digital Camera with HP Instant Share - - Page 67
Using the Playback Menu
 |
View all HP Photosmart M22 manuals
Add to My Manuals
Save this manual to your list of manuals |
Page 67 highlights
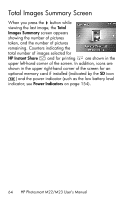
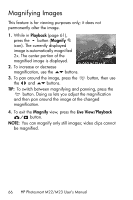
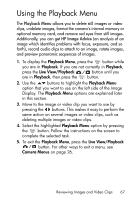
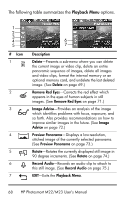
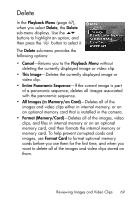
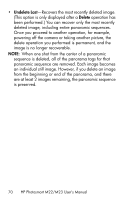
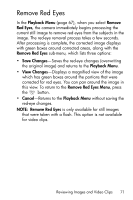
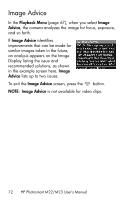
Using the Playback Menu The Playback Menu allows you to delete still images or video clips, undelete images, format the camera's internal memory or optional memory card, and remove red eyes from still images. Additionally, you can get HP Image Advice (an analysis of an image which identifies problems with focus, exposure, and so forth), record audio clips to attach to an image, rotate images, and preview panoramic sequences of images. 1. To display the Playback Menu, press the button while you are in Playback. If you are not currently in Playback, press the Live View/Playback button until you are in Playback, then press the button. 2. Use the buttons to highlight the Playback Menu option that you want to use on the left side of the Image Display. The Playback Menu options are explained later in this section. 3. Move to the image or video clip you want to use by pressing the buttons. This makes it easy to perform the same action on several images or video clips, such as deleting multiple images or video clips. 4. Select the highlighted Playback Menu option by pressing the button. Follow the instructions on the screen to complete the selected task. 5. To exit the Playback Menu, press the Live View/Playback button. For other ways to exit a menu, see Camera Menus on page 26. Reviewing Images and Video Clips 67
-
 1
1 -
2
-
3
-
4
-
5
-
6
-
7
-
8
-
9
-
10
-
11
-
12
-
13
-
14
-
15
-
16
-
17
-
18
-
19
-
20
-
21
-
22
-
23
-
24
-
25
-
26
-
27
-
28
-
29
-
30
-
31
-
32
-
33
-
34
-
35
-
36
-
37
-
38
-
39
-
40
-
41
-
42
-
43
-
44
-
45
-
46
-
47
-
48
-
49
-
50
-
51
-
52
-
53
-
54
-
55
-
56
-
57
-
58
-
59
-
60
-
61
-
 62
62 -
 63
63 -
 64
64 -
 65
65 -
 66
66 -
 67
67 -
 68
68 -
 69
69 -
 70
70 -
 71
71 -
 72
72 -
73
-
74
-
75
-
76
-
77
-
78
-
79
-
80
-
81
-
82
-
83
-
84
-
85
-
86
-
87
-
88
-
89
-
90
-
91
-
92
-
93
-
94
-
95
-
96
-
97
-
98
-
99
-
100
-
101
-
102
-
103
-
104
-
105
-
106
-
107
-
108
-
109
-
110
-
111
-
112
-
113
-
114
-
115
-
116
-
117
-
118
-
119
-
120
-
121
-
122
-
123
-
124
-
125
-
126
-
127
-
128
-
129
-
130
-
131
-
132
-
133
-
134
-
135
-
136
-
137
-
138
-
139
-
140
-
141
-
142
-
143
-
144
-
145
-
146
-
147
-
148
-
149
-
150
-
151
-
152
-
153
-
154
-
155
-
156
-
157
-
158
-
159
-
160
-
161
-
162
-
163
-
164
-
165
-
166
-
167
-
168
-
169
-
170
-
171
-
172
-
173
-
174
-
175
-
176
-
177
-
178
-
179
-
180
 |
 |