HP ProBook 6360b HP ProtectTools Getting Started - Windows 7 and Windows Vista - Page 29
Smart card, Face, Erase HP ProtectTools data only - webcam
 |
View all HP ProBook 6360b manuals
Add to My Manuals
Save this manual to your list of manuals |
Page 29 highlights
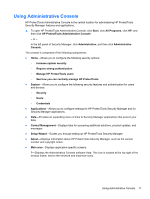
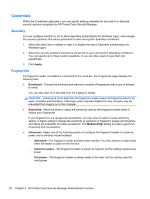
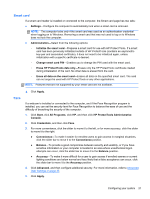
Smart card If a smart card reader is installed or connected to the computer, the Smart card page has two tabs: ● Settings-Configure the computer to automatically lock when a smart card is removed. NOTE: The computer locks only if the smart card was used as an authentication credential when logging on to Windows. Removing a smart card that was not used to log on to Windows does not lock the computer. ● Administration-Select from the following options: ◦ Initialize the smart card-Prepares a smart card for use with HP Protect Tools. If a smart card has been previously initialized outside of HP ProtectTools (contains an asymmetric key-pair and associated certificate), it does not need to be initialized again, unless initialization with a specific certificate is desired. ◦ Change smart card PIN-Enables you to change the PIN used with the smart card. ◦ Erase HP ProtectTools data only-Erases only the HP ProtectTools certificate created during initialization of the card. No other data is erased from the card. ◦ Erase all data on the smart card-Erases all data on the specified smart card. The card can no longer be used with HP ProtectTools or any other applications. NOTE: Features that are not supported by your smart card are not available. ▲ Click Apply. Face If a webcam is installed or connected to the computer, and if the Face Recognition program is installed, you can set the security level for Face Recognition to balance the ease of use and the difficulty of breaching the security of the computer. 1. Click Start, click All Programs, click HP, and then click HP ProtectTools Administrative Console. 2. Click Credentials, and then click Face. 3. For more convenience, click the slider to move it to the left, or for more accuracy, click the slider to move it to the right. ● Convenience-To make it easier for enrolled users to gain access in marginal situations, click the slider bar to move it to the Convenience position. ● Balance-To provide a good compromise between security and usability, or if you have sensitive information or your computer is located in an area where unauthorized logon attempts can occur, click the slider bar to move it to the Balance position. ● Accuracy-To make it more difficult for a user to gain access if enrolled scenes or current lighting conditions are below normal and less likely that a false acceptance can occur, click the slider bar to move it to the Accuracy position. 4. Click Advanced, and then configure additional security. For more information, refer to Advanced User Settings on page 37. 5. Click Apply. Configuring your system 21
-
 1
1 -
2
-
3
-
4
-
5
-
6
-
7
-
8
-
9
-
10
-
11
-
12
-
13
-
14
-
15
-
16
-
17
-
18
-
19
-
20
-
21
-
22
-
23
-
 24
24 -
 25
25 -
 26
26 -
 27
27 -
 28
28 -
 29
29 -
 30
30 -
 31
31 -
 32
32 -
 33
33 -
 34
34 -
35
-
36
-
37
-
38
-
39
-
40
-
41
-
42
-
43
-
44
-
45
-
46
-
47
-
48
-
49
-
50
-
51
-
52
-
53
-
54
-
55
-
56
-
57
-
58
-
59
-
60
-
61
-
62
-
63
-
64
-
65
-
66
-
67
-
68
-
69
-
70
-
71
-
72
-
73
-
74
-
75
-
76
-
77
-
78
-
79
-
80
-
81
-
82
-
83
-
84
-
85
-
86
-
87
-
88
-
89
-
90
-
91
-
92
-
93
-
94
-
95
-
96
-
97
-
98
-
99
-
100
-
101
-
102
-
103
-
104
-
105
-
106
-
107
-
108
-
109
-
110
-
111
-
112
-
113
-
114
-
115
-
116
-
117
-
118
-
119
-
120
-
121
-
122
-
123
-
124
 |
 |
