HP Q7840A User Manual
HP Q7840A Manual
 |
View all HP Q7840A manuals
Add to My Manuals
Save this manual to your list of manuals |
HP Q7840A manual content summary:
- HP Q7840A | User Manual - Page 1
HP LaserJet M5025/M5035 MFP User Guide - HP Q7840A | User Manual - Page 2
- HP Q7840A | User Manual - Page 3
HP LaserJet M5025 and HP LaserJet M5035 Series MFP User Guide - HP Q7840A | User Manual - Page 4
are set forth in the express warranty statements accompanying such products and services. Nothing herein should be construed as constituting an additional warranty. HP shall not be liable for technical or editorial errors or omissions contained herein. Part number: Q7829-90925 Edition 1, 10/2006 - HP Q7840A | User Manual - Page 5
...3 Walkaround ...5 Device parts ...5 Interface ports ...8 Device software ...9 Supported operating systems 9 Supported printer drivers ...9 Select the correct printer driver 10 Universal printer drivers 10 Driver Autoconfiguration 10 Update Now ...11 HP Driver Preconfiguration 11 Priority for - HP Q7840A | User Manual - Page 6
menu ...44 Print Quality menu ...48 Troubleshooting menu ...50 Resets menu ...54 Service menu ...54 3 I/O Configuration USB configuration ...56 Network configuration ...57 Configure TCP/IPv4 parameters 57 Set an IP address 57 Set the subnet mask 58 Set the default gateway 58 Configure TCP/IPv6 - HP Q7840A | User Manual - Page 7
multiple pages on one sheet of paper 105 Print on both sides of the paper 106 Use automatic duplex printing 106 Print on both sides manually 107 Layout options for printing on both sides 107 Use the Services tab ...108 Use features in the Macintosh printer driver 109 Create and use presets - HP Q7840A | User Manual - Page 8
Basic copy instructions ...116 Copy from the scanner glass 116 Copy from the document feeder 116 Adjust the copy settings ...117 Change the copy-collation setting ...118 Copy two-sided documents ...119 Copying two-sided documents manually 119 Copy two-sided documents automatically (duplex models - HP Q7840A | User Manual - Page 9
cartridges 155 Print-cartridge authentication 156 HP fraud hotline and Web site 156 Replace supplies and parts ...157 Supply replacement guidelines 157 Change the print cartridge 157 Perform preventive maintenance 160 Preventive maintenance for the print engine 160 The ADF maintenance kit - HP Q7840A | User Manual - Page 10
from the optional duplexer 197 Clear jams from the print-cartridge area 198 problems associated with jams 208 Image defect examples ...208 Light print (partial page 210 Light print (entire page 210 Specks ...211 Dropouts ...211 Lines ...212 Gray background ...212 Toner smear ...213 Loose toner - HP Q7840A | User Manual - Page 11
Printer Care software 236 Part numbers ...237 Accessories ...237 Supplies and maintenance kits 237 Memory ...237 Cables and interfaces ...238 Print media ...238 Appendix B Service and support Hewlett-Packard limited warranty statement 241 Customer self repair warranty service 242 Print cartridge - HP Q7840A | User Manual - Page 12
HP LaserJet print supplies 256 HP print supplies returns and recycling program information 256 Paper ...256 Material restrictions ...257 Disposal of waste equipment by users in private households in the European Union .... 257 Material Safety Data Sheet printer memory ...265 To install printer - HP Q7840A | User Manual - Page 13
1 Basics ● Device comparison ● Features comparison ● Walkaround ● Device software ENWW 1 - HP Q7840A | User Manual - Page 14
feeder (ADF) HP LaserJet M5035X MFP HP LaserJet M5035XS MFP HP LaserJet M5035 MFP, plus: HP LaserJet M5035X MFP, plus: ● Automatic 2-sided (duplex) printing, receiving faxes, and ● Two 500-sheet input trays (trays 5 and 6) replace the copying. HP LaserJet M5035X MFP storage cabinet ● V.34 - HP Q7840A | User Manual - Page 15
) ● Optional duplexer (standard on the HP LaserJet M5035X MFP and the HP LaserJet M5035XS MFP) ● Automatic 30-page stapler with a 500-sheet output bin (HP LaserJet M5035XS MFP only) ● 100-pin 133 MHz dual inline memory modules (DIMMs) ● Modes for text, graphics, and mixed text and graphics formats - HP Q7840A | User Manual - Page 16
page contains information about toner level, page count, and estimated pages remaining. ● The device checks for and authentic HP print cartridge at cartridge installation. ● Internet-enabled supply-ordering capabilities (using HP Easy Printer Care software) ● The online user guide is compatible with - HP Q7840A | User Manual - Page 17
using the device, familiarize yourself with the parts of the device. Figure 1-1 HP LaserJet M5025 MFP and HP LaserJet M5035 MFP 1 On/off switch 2 Power connection 3 Jam access door (for access to printer jams) 4 ADF top cover (for access to ADF jams) 5 ADF input tray (for fax/copy/scan documents - HP Q7840A | User Manual - Page 18
Figure 1-2 HP LaserJet M5035X MFP 1 On/off switch 2 Power connection 3 Automatic duplexer 4 Jam access door (for access to printer jams) 5 ADF top cover (for access to ADF jams) 6 ADF input tray (for fax/copy/scan documents) 7 Control panel 8 Output bin 9 Tray 2 10 Tray 3 11 - HP Q7840A | User Manual - Page 19
Figure 1-3 HP LaserJet M5035XS MFP 1 On/off switch 2 Power connection 3 Automatic duplexer 4 Jam access door (for access to printer jams) 5 Upper- 15 Stapler output bin 16 Upper-right door (for access to the print cartridge) 17 Interface ports (see Interface ports) 18 Tray 1 (pull to open) 19 - HP Q7840A | User Manual - Page 20
Interface ports The device has one EIO slot and three ports for connecting to a computer or a network. 1 EIO slot 2 "Heartbeat" LED 3 Hi-Speed USB 2.0 connection 4 USB accessory connection 5 Foreign interface harness (FIH) port 6 Network connection 7 Fax connection (for connecting to an optional - HP Q7840A | User Manual - Page 21
Macs are supported. Supported printer drivers Operating system Windows PCL 5 PCL 6 Postscript level 3 emulation Mac OS X V10.2.8, V10.3, V10.4 and later Linux1 1 For Linux, download the postscript level 3 emulation driver from www.hp.com/go/linuxprinting. The printer drivers include online - HP Q7840A | User Manual - Page 22
Autoconfiguration The HP LaserJet PCL 5, PCL 6, and PS level 3 emulation drivers for Windows 2000 and Windows XP feature automatic discovery and driver configuration for device accessories at the time of installation. Some accessories that the Driver Autoconfiguration supports are the duplexing unit - HP Q7840A | User Manual - Page 23
(IT) administrators can preconfigure the printing and default settings for HP printer drivers before installing the drivers in the network environment. For more information, see the HP Driver Preconfiguration Support Guide, which is available at www.hp.com/go/hpdpc_sw. Priority for print settings - HP Q7840A | User Manual - Page 24
Open the printer drivers Operating System To change the settings for all print jobs until the software program is closed To change the default settings To change the device for all print jobs configuration settings Windows 2000, XP, 1. On the File menu in the and Server 2003 software program - HP Q7840A | User Manual - Page 25
printer driver that comes with the computer. ● HP Printer Utility Use the HP Printer Utility to set up device features that are not available in the printer driver: ● Name the device. ● Assign the device to a zone on the network. ● Assign an internet protocol (IP) address to the device. ● Download - HP Q7840A | User Manual - Page 26
-based management tool for HP Jetdirect-connected printers within your intranet, and it should be be installed only on the network administrator's computer. To download a current version of HP Web Jetadmin and for the latest list of supported host systems, visit www.hp.com/go/webjetadmin. When - HP Q7840A | User Manual - Page 27
access to troubleshooting and maintenance tools You can view the HP Easy Printer Care software when the device is directly connected to your computer or when it is connected to a network. To download the HP Easy Printer Care software, go to www.hp.com/go/easyprintercare. Supported operating systems - HP Q7840A | User Manual - Page 28
16 Chapter 1 Basics ENWW - HP Q7840A | User Manual - Page 29
2 Control panel ● Use the control panel ● Use the Administration menu ENWW 17 - HP Q7840A | User Manual - Page 30
error message on the touchscreen. 2 Data light The Data light indicates that the device is receiving data. 3 Ready light The Ready button. 8 Reset button Resets the job settings to factory or user-defined default values. 9 Stop button Stops the active job. While stopped, the control - HP Q7840A | User Manual - Page 31
features. After you sign out, the device restores all options to the default settings. Touch Network Address to find information about the network connection. The can select the format that the device uses to show the date and time, for example 12-hour format or 24-hour format. ENWW Use the - HP Q7840A | User Manual - Page 32
message also has instructions for solving the problem. Warning button. The warning button appears when the device has a problem but can continue screens, the Help opens to a global menu where you can search for specific topics. You can browse through the menu structure by touching the buttons in - HP Q7840A | User Manual - Page 33
Use the Administration menu Use the administration menu to set up default device behavior and other global settings, such as the language and the format for date and time. Navigate the Administration menu From the Home screen, touch Administration to open the menu structure. You might need to scroll - HP Q7840A | User Manual - Page 34
the status of supplies such as cartridges, maintenance kits, and staples. Fax Reports Usage Page File Directory Fax Activity Log Fax Call Report Print (button) Print (button) Print (button) Fax Call Report Print (button) Thumbnail on Report Yes No (default) When to Print Report Never auto - HP Q7840A | User Manual - Page 35
scan originals. Select Portrait if the short edge is at the top or select Landscape if the long edge is at the top. Manually Adjust (default) Text Photograph Darkness Background Cleanup Sharpness Use this setting to optimize the output for a particular type of original. You can optimize the output - HP Q7840A | User Manual - Page 36
places the pages in the correct order, one set at a time, rather than placing all copies of each page next to each other. Select the default output bin, if applicable, for copies. If the original document is printed close to the edges, use the Edge-To-Edge feature to avoid shadows - HP Q7840A | User Manual - Page 37
same PIN that is used to access the Fax Printing menu. Enabled Disabled (default) Use this option to add the date, time, sender's phone number, number to each page of the faxes that this device receives. Enabled (default) Disabled Use this feature to shrink faxes that are larger than Letter-size - HP Q7840A | User Manual - Page 38
Color/Black TIFF Version Values PDF (default) JPEG TIFF M-TIFF High (large file) Medium (default) Low (small file) 75 DPI 150 DPI (default) 200 DPI 300 DPI Color scan (default) Black/white scan TIFF 6.0 (default) TIFF (Post 6.0) Description Choose the file format for the e-mail. Choosing higher - HP Q7840A | User Manual - Page 39
Options NOTE This menu appears only for the HP LaserJet M5035 MFP models. Use this menu to set default options for scan jobs sent to the computer. NOTE Values shown with "(default)" are the factory-default values. Some menu items have no default. Menu item Color/Black Document File Type TIFF - HP Q7840A | User Manual - Page 40
X Dimension Y Dimension Output Bin Print Sides 2-Sided Format Values Description Type a value. Use this feature to set the default number of copies for print jobs. (List of supported sizes.) Choose a paper size. Millimeters Inches Configure the default paper size that is used when the user - HP Q7840A | User Manual - Page 41
Use this feature to set the current date and time, and to set the date format and time format that are used to time-stamp outgoing faxes. 12 hour (AM/PM) (default) 24 hour 20 minutes 30 minutes (default) Use this feature to select the time interval that the device should remain inactive before - HP Q7840A | User Manual - Page 42
Table 2-7 Time/Scheduling menu (continued) Menu item Sub-menu item Sub-menu item Fax Printing Fax Printing Mode Change PIN Values Store all received faxes Print all received faxes Use Fax Printing Schedule Description If you have concerns about the security of private faxes, use this feature - HP Q7840A | User Manual - Page 43
stored on the device. 1 Day Sleep mode 1 Week Disable Use Sleep Delay (default) Use this feature to customize the sleep mode settings for this device. Select Supply Low/Order Threshold Select a value in the range. Replace Black Cartridge Stop at low Use this menu to carry out administrative - HP Q7840A | User Manual - Page 44
Method Values and Description Off: Disable the TCP/IP protocol. On (default): Enable the TCP/IP protocol. An alphanumeric string, up to 32 characters, used to identify the device. This name is listed on the HP Jetdirect configuration page. The default host name is NPIxxxxxx, where xxxxxx is the - HP Q7840A | User Manual - Page 45
which an idle TCP print data connection is closed (default is 270 seconds, 0 disables the timeout). Specify the IP address to default to when the print server is unable to obtain an IP address from the network during a forced TCP/IP reconfiguration (for example, when manually configured to use BootP - HP Q7840A | User Manual - Page 46
default): IPv6 is disabled. On: IPv6 is enabled. Use this item to manually configure an IPv6 address. Manual Settings: Use the Manual Settings menu to enable and manually Independent Service Provider (ISP) for the proxy server address. Type the port number used by the proxy server for client support. - HP Q7840A | User Manual - Page 47
page that contains the current security settings on the HP Jetdirect print server. No (default): A security settings page is not printed. For are reset to factory defaults. This menu provides tests to help diagnose network hardware or TCP/IP network connection problems. Embedded tests help to - HP Q7840A | User Manual - Page 48
All Tests Data Path Test Execution Time [H] Execute Values and Description CAUTION Running this embedded test will erase your TCP/IP configuration. select individual tests. This test helps to identify data path and corruption problems on an HP postscript level 3 emulation device. It sends a - HP Q7840A | User Manual - Page 49
Sub-menu item Ping Test Sub-menu item Dest Type Dest IP Packet Size Timeout Count Print Results Execute Values and Description This to print the test results. Select Yes to print results. If you select No (default), results are not printed. Specify whether to initiate the ping test. Select Yes to - HP Q7840A | User Manual - Page 50
link speed of the hub/switch port. (A 1000T half-duplex selection is not supported.) 10T Half: 10 Mbps, half-duplex operation. 10T Full: 10 Mbps, Full-duplex operation. 100TX Half: 100 Mbps, half-duplex operation. 100TX Full: 100 Mbps, full-duplex operation. 38 Chapter 2 Control panel ENWW - HP Q7840A | User Manual - Page 51
Sub-menu item Values and Description 100TX Auto: Limits auto-negotiation to a maximum link speed of 100 Mbps. 1000TX Full: 1000 Mbps, full-duplex operation. Use this item to print a page that lists the configuration of the following protocols: IPX/SPX, Novell NetWare, AppleTalk, DLC/LLC. ENWW - HP Q7840A | User Manual - Page 52
item Phone Number Company Name Values (Countries/regions listed) Description Configure the settings that are legally required for outgoing faxes. Disabled Enabled (default) Use this feature to enable or disable PC Fax Send. PC Fax Send enables users to send faxes through the device from their - HP Q7840A | User Manual - Page 53
the list. Use this feature to set the maximum baud rate for receiving faxes. This can be used as a diagnostic tool for troubleshooting fax problems. Tone (default) Pulse Select whether the device should use tone or pulse dialing. The range is between Type the number of times the device should - HP Q7840A | User Manual - Page 54
control the time between rings for incoming faxes. Off Set the volume for the fax ring-tone. Low (default) High Type the fax number to add. Select a fax number to remove. No (default) Use this feature to add or delete numbers from the blocked fax list. The blocked fax list can contain - HP Q7840A | User Manual - Page 55
Find Send Gateways SMTP Gateway Test Send Gateway Values On (default) Off Enter a value. Description This option enables the IP Address). NOTE This item appears only for the HP LaserJet M5035 MFP models. Allow Use of Digital Send Service NOTE This item appears only for the HP LaserJet M5035 MFP - HP Q7840A | User Manual - Page 56
whether you hear a sound when you touch the screen or press buttons on the control panel. Type a value between 10 and 300 seconds. The factory default is 60 seconds. Use this feature to specify the amount of time that elapses between any activity on the control panel and the device resetting - HP Q7840A | User Manual - Page 57
/Type Prompt Duplex Blank Pages Image Rotation Stapler/Stacker NOTE This item appears only if a stapler/ stacker is installed. Staple Staples Out Values Description Exclusively (default) First Use this feature to control how the device handles jobs that have specified a specific input tray - HP Q7840A | User Manual - Page 58
error page is printed when the device encounters a PDF error. Auto (default) PCL PDF PS Select the printer language that the device should use. Normally you should not change the language. If you change the setting to a specific language, the device does not automatically switch from one language - HP Q7840A | User Manual - Page 59
default is 60 lines. PCL is a set of printer commands that Hewlett-Packard developed to provide access to printer features. Portrait (default) is blank. Standard (default) Classic Use this feature to select and maintain input trays by number when you are not using the device driver, or when the - HP Q7840A | User Manual - Page 60
as the sheet feeds from top to bottom into the device. Configure the fuser mode associated with each media type. Restore (button) Restore the fuser modes to the default settings. Normal (default) Increased Off (default) Optimize print engine parameters to get the best possible print quality - HP Q7840A | User Manual - Page 61
on the HP LaserJet M5035X and HP LaserJet M5035XS MFP. Create Cleaning Page Create (button) Generate a page for cleaning excess toner off the pressure roller in the fuser. The page has instructions that guide you through the cleaning process. NOTE Not available when an automatic duplexer is - HP Q7840A | User Manual - Page 62
with "(default)" are the factory-default values. Some menu items have no default. Table 2-16 Troubleshooting menu Menu default) Diagnostic Use this feature to set loss levels to compensate for phone line signal loss. You should not modify this setting unless requested to do so by an HP service - HP Q7840A | User Manual - Page 63
to send the test page to all output bins or only to a specific bin. Off (default) On Select whether the duplexer should be included in the Paper Path test. 1 (default) 10 Select how many pages should be sent from the specified source as part of the Paper Path test. 50 100 500 ENWW Use the - HP Q7840A | User Manual - Page 64
Table 2-16 Troubleshooting menu (continued) Menu item Sub-menu item Sub-menu item Finishing Paper Path Stapling Test Finishing Options Media Size Stacking Media Type Copies Duplex Test Page Media Size Manual Sensor Test Component Test Media Type Copies Duplex Test Page Values Description - HP Q7840A | User Manual - Page 65
Troubleshooting menu (continued) Menu item Sub-menu item Sub-menu item Print/Stop Test Scanner Tests Control Panel LEDs Display Buttons Touchscreen Values Continuous value from 0 to 60,000 milliseconds. The default used by a service technician to diagnose potential problems with the device - HP Q7840A | User Manual - Page 66
to clear the Order Document Feeder Kit and Replace Document Feeder Kit warning messages. New Maintenance Kit (Yes/No) New Document Feeder Kit (Yes/ No) Notify the device that a new maintenance kit or document feeder kit has been installed. Service menu The Service menu is locked and requires - HP Q7840A | User Manual - Page 67
3 I/O Configuration ● USB configuration ● Network configuration ENWW 55 - HP Q7840A | User Manual - Page 68
USB configuration This device supports a USB 2.0 connection. You must use an A-to-B type USB cable for printing. Figure 3-1 USB connection 1 USB connector 2 USB port (type B) 56 Chapter 3 I/O Configuration ENWW - HP Q7840A | User Manual - Page 69
or HP LaserJet Utility for Macintosh) NOTE For more information about using the embedded Web server, see Use the embedded Web server For more information on supported networks and network configuration tools, see the HP Jetdirect Print Server Administrator's Guide. The guide comes with printers in - HP Q7840A | User Manual - Page 70
Scroll to and touch Initial Setup. 3. Touch Networking and I/O. 4. Touch Embedded Jetdirect. 5. Touch TCP/IP. 6. Touch IPV4 Settings. 7. Touch Config Method. 8. Touch Manual. 9. Touch Save. 10. Touch Manual Settings. 11. Touch Subnet Mask. 12. Touch the Subnet Mask text box. 13. Use the touchscreen - HP Q7840A | User Manual - Page 71
the HP Jetdirect Embedded Print Server Administrator's Guide. Disable network protocols (optional) By factory default, all supported network protocol-specific error and warning messages. Disable IPX/SPX NOTE Do not disable this protocol in Windows-based systems that print to the printer through - HP Q7840A | User Manual - Page 72
management by allowing you to connect a printer directly to your network at any location. HP Jetdirect print servers also support the Simple Network Management Protocol (SNMP), which provides remote printer management and troubleshooting through the HP Web Jetadmin software. NOTE Configure the card - HP Q7840A | User Manual - Page 73
4 Media and trays ● General guidelines for media ● Considerations for special media ● Select print media ● Printing and paper-storage environment ● Load media into the input trays ● Load documents for faxing, copying, and scanning ● Print on rotated media ● Print full-bleed images ● Print on custom- - HP Q7840A | User Manual - Page 74
conform to the specifications listed here or in the HP LaserJet Printer Family Print Media Guide can cause problems that require service. This service is not covered by the Hewlett-Packard warranty or service agreements. To download a copy of the guide, go to www.hp.com/support/ljpaperguide. Paper - HP Q7840A | User Manual - Page 75
General media specifications For complete paper specifications for all HP LaserJet devices, see the HP LaserJet Printer Family Print Media Guide (available at www.hp.com/support/ljpaperguide) . Category Acid content Caliper Curl in ream Cut edge conditions Fusing compatibility Grain Moisture - HP Q7840A | User Manual - Page 76
printer driver (see Select the correct printer driver the fuser. ● For the best print quality, position margins no labels specified for use with HP LaserJet printers. ● Prior to printing, sheets from the output bin as they are printed to prevent them from sticking together. ● Do not feed a sheet - HP Q7840A | User Manual - Page 77
sheet of labels becomes jammed in the device, see Clear jams. Transparencies NOTE Choose labels in the printer driver (see Open the printer drivers). ● Print transparencies from tray 1. ● Use only transparencies specified for use with HP LaserJet printers the media specification recommended for - HP Q7840A | User Manual - Page 78
the printer driver, set the type of paper for tray 1 to vellum or light, and select the media by type. Colored paper HP LaserJet problems. This device supports recycled paper. Recycled paper must meet the same specifications as standard paper. See the HP LaserJet Printer Family Print Media Guide - HP Q7840A | User Manual - Page 79
toner adhere better to the page, but transparencies need a lower fuser-mode setting to avoid damage to the device. The default setting generally provides the best mode setting improves the ability of the toner to adhere to paper, but it might cause other problems, such as excessive curl. The device - HP Q7840A | User Manual - Page 80
cut-sheet paper, including up to 100% recycled fiber content paper; envelopes; labels; transparencies; and custom-size paper. Properties such as weight, not meet HP specifications can cause problems for the device, requiring repair. This repair is not covered by the HP warranty or service agreements. - HP Q7840A | User Manual - Page 81
sizes of print media. Check the printer driver for supported sizes. 2 Capacity can vary depending on media weight and thickness, and environmental conditions. 3 Smoothness: 100 to 250 (Sheffield). Table 4-3 Tray 2 specifications Media type Dimensions1 Weight Capacity2 Paper Minimum: 148 x 210 - HP Q7840A | User Manual - Page 82
and 6: up to 500 sheets 1 The device supports a wide range of standard and custom sizes of print media. Check the printer driver for supported sizes. 2 Capacity can vary depending on the media weight and thickness, and environmental conditions. Table 4-7 Specifications for automatic stapling and - HP Q7840A | User Manual - Page 83
NOTE The automatic stapler can staple up to 30 sheets. 1 The device supports a wide range of standard and custom sizes of print media. Check the printer driver for supported sizes. 2 Capacity can vary depending on the media weight and thickness, and environmental conditions. ENWW Select print - HP Q7840A | User Manual - Page 84
moisture in paper to evaporate, while cold causes it to condense on the sheets. Heating systems and air conditioners remove most of the humidity from a room. too dry or too humid (due to the hygroscopic properties of paper). ● The best way to store an opened ream of paper is to rewrap it tightly in - HP Q7840A | User Manual - Page 85
to 50 sheets of labels, or up to 10 envelopes. 1. Open tray 1 by pulling the front cover down. 2. Slide out the plastic tray extender. If the media that is being loaded is longer than 229 mm (9 in), also flip open the additional tray extender. 3. Slide the media-width guides slightly wider than - HP Q7840A | User Manual - Page 86
media) with the short edge toward the device. 5. Slide the media-width guides inward until they lightly touch the media stack on both sides without bending it. Make sure that the media fits under the tabs on the media-width guides. NOTE Do not add media to tray 1 while the device is printing. - HP Q7840A | User Manual - Page 87
if you use tray 1 only to manually feed media, keep the default settings of the tray 1 size and type. The default settings for both the tray 1 size matches type and size settings that are selected in the software. In the printer driver, you can select media from any tray (including tray 1) by type, - HP Q7840A | User Manual - Page 88
5, and 6) Trays 2 and 3 (and optional trays 4, 5, and 6) support only paper. For supported paper sizes, see Select print media. NOTE To take advantage of automatic size- tray. 2. Press the tab on the paper-length guide and slide it so that the pointer matches the paper size that you are loading. - HP Q7840A | User Manual - Page 89
automatic 2-side printing, and make sure that it is flat at all four corners. Keep the paper below the height tabs on the paper-length guide in the rear of the tray. 4. Slide the tray into the device. ENWW Load media into the input trays 77 - HP Q7840A | User Manual - Page 90
guidelines for loading special media and configuring the printer driver. Use the correct media-type setting in the printer driver to obtain the best print quality. For some types of media, the device reduces the print speed. NOTE In the Windows printer driver, adjust the media type on the Paper tab - HP Q7840A | User Manual - Page 91
Load documents for faxing, copying, and scanning Load a document onto the scanner glass Use the scanner glass to copy, scan, or fax small, lightweight (less than 60 g/m2 or 16 lb), or irregularlysized originals such as receipts, newspaper clippings, photographs, or old or worn documents. 1. Open the - HP Q7840A | User Manual - Page 92
● For rotated letter- and A4-size documents, place the top left-hand corner of the document at the back, left corner of the scanner glass. Also use this orientation for B5-size media and for custom-size media that is less than 210 mm (8.25 inches) in width. NOTE Make sure that the media in the input - HP Q7840A | User Manual - Page 93
Load the automatic document feeder (ADF) Use the ADF to copy, scan, or fax a document that has up to 50 pages (depending on the thickness of the pages). 1. Load the document face up in the ADF as shown below: ● For letter- and A4-size documents, insert the long edge of the document into the ADF with - HP Q7840A | User Manual - Page 94
● For legal-size, 11 x 17, and A3-size documents, insert the short edge (the top of the document) into the ADF. 2. Slide the stack into the ADF until it does not move any farther. 3. Adjust the media guides until they are snug against the media. 82 Chapter 4 Media and trays ENWW - HP Q7840A | User Manual - Page 95
paper (especially when it is printed on both sides from the optional duplexer) or labels that do not stack flat. NOTE To print on rotated A5, Executive, or B5 media, configure the media size as Custom in the printer driver. Print from tray 1 1. Load media with the side to be printed facing - HP Q7840A | User Manual - Page 96
trim its edges to the desired size. CAUTION Never print directly to the edge of paper. This causes toner to accumulate inside the device, which may affect print quality and damage the device. Print on paper up 297 mm (11.7 in), do not use the optional duplexer. 84 Chapter 4 Media and trays ENWW - HP Q7840A | User Manual - Page 97
from any of the trays. For media specifications, see Media and trays. NOTE Very than one size of custom paper into the device. For best printing performance when you print large numbers of small or narrow ), the printer driver, or the control panel. NOTE All settings in the printer driver and software - HP Q7840A | User Manual - Page 98
tray). Load custom-size media into trays 2 and 3 (and optional trays 4, 5, and 6) 1. Pull open the tray and remove any media. 2. Press the tab on media guide in the front of the tray and slide it so that the pointer shows a size larger than the paper size. Also adjust the side media - HP Q7840A | User Manual - Page 99
make sure that it is flat at all four corners. Keep the stack below the height tabs on the paper-length guide in the rear of the tray. 4. On the paper-length guide, press the tab and slide it up against the edge of the stack. Also slide the side media-width - HP Q7840A | User Manual - Page 100
Control print jobs When a job is sent to the printer, the printer driver controls what paper tray is used to pull media through the printer. By default, the printer automatically selects the tray, but a specific tray can be chosen based on three user-specified settings: Source, Type, and Size. These - HP Q7840A | User Manual - Page 101
5 Device features ● Use the stapler ● Use job storage features ENWW 89 - HP Q7840A | User Manual - Page 102
is only available on the HP LaserJet M5035XS MFP. The optional stapler/stacker can staple jobs of up to 30 sheets of 75 g/m2 (20 lb) paper. The stapler can staple these sizes: A4, Letter, Legal, Executive (JIS), and 8.5x13. It can stack up to 500 sheets of paper. ● Paper weight can range from 60 to - HP Q7840A | User Manual - Page 103
holds 5,000 unformed staples. 1. Open the stapler door. 2. Lift up the green handle on the staple cartridge to dislodge it and then pull the cartridge out of the device. 3. Insert the staple cartridge into the opening inside the stapler door and then press the green handle down. ENWW Use the - HP Q7840A | User Manual - Page 104
4. Close the stapler door. 92 Chapter 5 Device features ENWW - HP Q7840A | User Manual - Page 105
(Mac) Select the stapler by creating a new preset in the printer driver. 1. Open the printer driver. See Open the printer drivers. Look for the column with the heading "To change the print job default settings," and follow the instructions for the operating system that you are using. 2. Create the - HP Q7840A | User Manual - Page 106
stop or continue when the staple cartridge is empty You can specify whether the MFP stops printing when the staple cartridge is empty or if it Select Stop to stop all printing until the staple cartridge is replaced. ● Select Continue to continue printing jobs without stapling them. 94 Chapter - HP Q7840A | User Manual - Page 107
hard disk. Storing the job allows you to print additional copies of the job later. ● Stored jobs: You can store a job such as a personnel form, time sheet In newer drivers: Select Job Storage in the pull-down menu in the Print dialog box. In older drivers, select Printer Specific Options. ENWW - HP Q7840A | User Manual - Page 108
needed for something else, select the Stored Job option in the driver. Create a proof and hold job CAUTION If the device needs additional use the following procedure to print the remaining copies of a job held on the hard disk. 1. From the Home screen, touch Job Storage. 2. Touch the Retrieve tab. - HP Q7840A | User Manual - Page 109
a 4-digit PIN by typing the PIN in the printer driver. The PIN is sent to the device as part of the print job. After you have sent the document. Delete a private job A private job is automatically deleted from the device hard disk after you release it for printing. If you want to delete the job - HP Q7840A | User Manual - Page 110
on the device hard disk. Additional copies of the job can be printed later. This feature can be turned off in the printer driver. The default number of different NOTE Stored QuickCopy jobs can be deleted at the control panel or in HP Web Jetadmin. 1. From the Home screen, touch Job Storage. 2. Touch - HP Q7840A | User Manual - Page 111
hard disk without printing it. You can then print the job at any time at the device control panel. For example, you might want to download a personnel form, calendar, time sheet see Print a stored job. Create a stored print job In the driver, select the Stored Job option, and then type a user name - HP Q7840A | User Manual - Page 112
) next to it, the job is a private job and requires a PIN. See Use the private job feature. Delete a stored job Jobs stored on the device hard disk can be deleted at the control panel. 1. From the Home screen, touch Job Storage. 2. Touch the Retrieve tab. 3. Scroll to and touch the job storage - HP Q7840A | User Manual - Page 113
6 Printing tasks ● Use features in the Windows printer driver ● Use features in the Macintosh printer driver ● Cancel a print job ENWW 101 - HP Q7840A | User Manual - Page 114
one sheet of paper ● Print on both sides of the paper ● Use the Services tab NOTE Settings in the printer driver and printer drivers). 2. Select the quick set that you want to use from the Print Task Quick Sets drop-down list. 3. Click OK. NOTE To use printer-driver default settings, select Default - HP Q7840A | User Manual - Page 115
scaling. Reduce or enlarge a document 1. On the File menu in the software program, click Print. 2. Select the driver, and then click Properties or Preferences. 3. On the Effects tab, next to % of Normal Size, type the not selected. 6. Click OK. ENWW Use features in the Windows printer driver 103 - HP Q7840A | User Manual - Page 116
size list for future use. Use different paper and printing covers Follow these instructions for printing a first page that is different from other pages in the print job. 1. Open the printer driver (see Open the printer drivers). 2. On the Paper or Paper/Quality tab, select the appropriate paper for - HP Q7840A | User Manual - Page 117
orientation, click the Finishing tab, and then click Portrait or Landscape. 6. Click OK. The product is now set to print the number of pages per sheet that you have selected. ENWW Use features in the Windows printer driver 105 - HP Q7840A | User Manual - Page 118
of a page by feeding the paper through the product a second time. NOTE In the printer driver, Print on Both Sides (manually) is available only when duplex printing is not available or when duplex printing does not support the type of print media being used. To configure the product for automatic or - HP Q7840A | User Manual - Page 119
printer driver (see Open the printer drivers). 3. On the Finishing tab, select Print on Both Sides (manually). 4. Click OK. 5. Send the print job to the product. Follow the instructions pages are read from top to bottom. This is the default setting, and the most common layout used. Every printed - HP Q7840A | User Manual - Page 120
tab If the product is connected to a network, use the Services tab to obtain product and supply-status information. Click the Device and Supplies status icon to open the Device Status page of the HP Embedded Web Server. This page shows the current status of the product, the percentage of life - HP Q7840A | User Manual - Page 121
multiple pages on one sheet of paper ● Print on both sides of the paper NOTE Settings in the printer driver and software program Open the printer driver (see Open the printer drivers). 2. In the Presets menu, select the preset that you want to use. NOTE To use printer-driver default settings, - HP Q7840A | User Manual - Page 122
the Cover Page Type. Print multiple pages on one sheet of paper You can print more than one page on a single sheet of paper. This feature provides a cost-effective way to print draft pages. 1. Open the printer driver (see Open the printer drivers). 2. Click the Layout pop-up menu. 3. Next to Pages - HP Q7840A | User Manual - Page 123
the printer drivers). 3. On the Finishing pop-up menu, select the Manual Duplex option. NOTE If the Manual Duplex option is not enabled, select Manually Print on 2nd Side. 4. Click Print. Follow the instructions in the pop-up window that appears on the computer screen before replacing the output - HP Q7840A | User Manual - Page 124
the software documentation for specific instructions about canceling a print request from the computer. If a print job is waiting in a print queue (computer memory) or print spooler (Windows 2000 or XP), delete the print job there. Click Start and then click Printers - HP Q7840A | User Manual - Page 125
the default copy options ● Basic copy instructions ● Adjust the copy settings ● Change the copy-collation setting ● Copy two-sided documents ● Copy mixed-size originals ● Copy photos and books ● Combine copy jobs by using Job Build ● Cancel a copy job It is recommended that you review - HP Q7840A | User Manual - Page 126
Use the Copy screen From the Home screen, touch Copy to view the Copy screen. The Copy screen is shown in Figure 7-1 Copy screen. Note that only the first six copy features are immediately visible. In order to view additional copy features, touch More Options. Figure 7-1 Copy screen 114 Chapter 7 - HP Q7840A | User Manual - Page 127
settings. 1. From the Home screen, scroll to and touch Administration. 2. Touch Default Job Options, and then touch Default Copy Options. 3. Several options are available. You can configure defaults for all options, or for only some options. For information about each option, see Adjust the copy - HP Q7840A | User Manual - Page 128
section provides the basic instructions for copying. Copy from the scanner glass Use the scanner Place the document into the document feeder with the pages facing up. To make copies by using the default copy options, use the numeric keypad on the control panel to select the number of copies, and - HP Q7840A | User Manual - Page 129
Text/Picture Pages per Sheet Original Size Booklet Format Edge-To-Edge Job the pages in sets of copies. If the optional HP Stapler/Stacker/Separator is not attached, the Collate option , or you can manually adjust the values. Use this feature to copy multiple pages onto one sheet of paper. Use - HP Q7840A | User Manual - Page 130
at a time. ● Turn off the automatic collation. The collation setting you select is in effect for all copies until you change the setting. The default setting for automatic copy collation is On. 1. On the control panel, touch Copy. 2. Touch Staple/Collate. 3. Touch Collate. 118 Chapter 7 Copy ENWW - HP Q7840A | User Manual - Page 131
be copied manually or automatically. Copying two-sided documents manually Copies resulting printed copies. Copy two-sided documents automatically (duplex models only) The default copy setting is one-sided to one-sided supported. 2. On the control panel, touch Copy. ENWW Copy two-sided documents - HP Q7840A | User Manual - Page 132
3. Touch Sides. 4. Touch 2-sided original, 2-sided output. 5. Touch OK. 6. Touch Start Copy. Make one-sided copies from two-sided documents 1. Load the documents to be copied into the document feeder with the first page facing up, and with the top of the page leading. 2. On the control panel, touch - HP Q7840A | User Manual - Page 133
and legal sizes, or you could combine A4 and A5 sizes. 1. Arrange the sheets in the original document so they all have the same width. 2. Place the sheets face-up into the document feeder, and adjust both paper guides against the document. 3. From the Home screen, touch Copy. 4. Touch Original Size - HP Q7840A | User Manual - Page 134
Copy photos and books Copy a photo NOTE Photos should be copied from the flatbed scanner, not from the document feeder. 1. Lift the lid and place the photo on the flatbed scanner with the picture-side down and the upperleft corner of the photo in the upper-left corner of the glass. 2. Gently close - HP Q7840A | User Manual - Page 135
Combine copy jobs by using Job Build Use the Job Build feature to build a single copy job from multiple scans. You can use either the document feeder or the scanner glass. The settings for the first scan are used for subsequent scans. 1. Touch Copy. 2. Scroll to and touch Job Build. 3. Touch Job - HP Q7840A | User Manual - Page 136
Cancel a copy job To cancel the copy job that is currently running, touch Stop on the control panel. This pauses the device. Then touch Cancel current job. NOTE If you cancel a copy job, clear the document from the flatbed scanner or from the automatic document feeder. 124 Chapter 7 Copy ENWW - HP Q7840A | User Manual - Page 137
8 Scan and send e-mail The device offers color-scanning and digital-sending capabilities. By using the control panel, you can scan black-and-white or color documents and send them to an e-mail address as an e-mail attachment. To use digital sending, the device must be connected to a local area - HP Q7840A | User Manual - Page 138
e-mailing. NOTE The instructions that follow are for configuring the device at the control panel. You can also perform these procedures by using the embedded Web server. For more information, see Embedded Web server. Supported protocols The HP LaserJet M5025 MFP models support Simple Mail Transfer - HP Q7840A | User Manual - Page 139
the e-mail, contact your network administrator or Internet service provider (ISP). ● Run the DISCOVER.EXE file. This program attempts to find the gateway. You can download the file from the HP Web site at www.hp.com/support/M5025mfp or www.hp.com/support/M5035mfp. Find gateways If you do not know - HP Q7840A | User Manual - Page 140
has configured the device to do so, this field might automatically insert a default address. 4 To: field Touch this field to open the keyboard, and then 7 Scroll bar Use the scroll bar to view and set up the CC:, BCC:, Message, and File Name fields. Touch any of those fields to open the - HP Q7840A | User Manual - Page 141
addresses as an e-mail attachment. Digital documents can be sent in several graphics formats, such as .TFF and .JPG, which allows recipients to manipulate the document file in various programs to meet their specific needs. Documents arrive in near-original quality, and then can be printed, stored - HP Q7840A | User Manual - Page 142
use default settings or change the scanning preferences and file formats. The following are the default settings: ● Color ● PDF (requires fields. Scroll down and complete the CC:, BCC:, and Message fields if appropriate. Your user name or other default information might appear in the From: field. If - HP Q7840A | User Manual - Page 143
Use the address book You can send e-mail to a list of recipients by using the address book feature of the device. See your system administrator for information about configuring address lists. NOTE You can also use the embedded Web server to create and manage the e-mail address book. For more - HP Q7840A | User Manual - Page 144
can be shared between devices that use the same server to gain access to the HP Digital Sending software. You can use the address book when you type e-mail addresses in the From:, To:, CC:, or BCC: fields. You can also add or delete addresses in the address book. To open the - HP Q7840A | User Manual - Page 145
Change e-mail settings for the current job Use the More Options button to change the following e-mail settings for the current print job: Button Description Document File Type Touch this button to change the type of file the device creates after scanning the document. Output Quality Touch this - HP Q7840A | User Manual - Page 146
Sending Software product and is supported for the HP LaserJet M5035 MFP models only. If the system specific information appear on the control-panel display. The system administrator can also designate a printer Text Field field, type the data that you want to accompany the file, and then touch Send - HP Q7840A | User Manual - Page 147
provides digital faxing services. For complete instructions for configuring the fax accessory and for using the fax features, see the HP LaserJet Analog Fax Accessory 300 User Guide. The guide is included with the HP LaserJet M5035X MFP and HP LaserJet M5035XS MFP. This chapter provides information - HP Q7840A | User Manual - Page 148
fax machine. The HP LaserJet M5035X MFP and HP LaserJet M5035XS MFP models come with an HP LaserJet analog fax accessory 300; already installed. For the HP LaserJet M5025 MFP and HP LaserJet M5035 MFP models, you can order this accessory as an option. See Order parts, accessories, and supplies - HP Q7840A | User Manual - Page 149
3. Open the formatter door. 4. Remove the fax accessory from its antistatic pouch. CAUTION The fax accessory contains parts that are sensitive to electrostatic discharge (ESD). When removing the fax accessory from its antistatic pouch and while installing it, use static protection, such as a - HP Q7840A | User Manual - Page 150
fax accessory. Also make sure that the connector at the other end of the cable is correctly fastened to the formatter. 7. Close the formatter door. 8. Replace the formatter cover. 138 Chapter 9 Fax ENWW - HP Q7840A | User Manual - Page 151
9. Reconnect the cables, and then turn on the device. ENWW Analog fax 139 - HP Q7840A | User Manual - Page 152
correctly. 1. Locate the phone cord that is included in the fax accessory kit. Connect one end of the phone cord to the fax-accessory phone jack , and for information about troubleshooting fax-accessory problems, see the HP LaserJet Analog Fax Accessory 300 User Guide, which is provided with the - HP Q7840A | User Manual - Page 153
Digital fax Digital faxing is available when you install the optional HP Digital Sending Software. For information about ordering this software, go to www.hp.com/go/lj5025_software or www.hp.com/go/ lj5035_software. With digital faxing, the device does not need to be connected directly to a phone - HP Q7840A | User Manual - Page 154
142 Chapter 9 Fax ENWW - HP Q7840A | User Manual - Page 155
● Use information pages ● Configure e-mail alerts ● Use the HP Easy Printer Care software ● Use the embedded Web server ● Use HP Web Jetadmin software ● Use the HP Printer Utility for Macintosh ● Manage supplies ● Replace supplies and parts ● Clean the device ● Calibrate the scanner ENWW 143 - HP Q7840A | User Manual - Page 156
current configuration. The table below provides the instructions for printing the information pages. Page HP Jetdirect print server or an optional hard disk drive, additional configuration pages print that provide information about those devices. Supplies status page Shows print-cartridge toner - HP Q7840A | User Manual - Page 157
Page description How to print the page memory cards, or hard disks, that are installed in the device. 4. Touch File Fax List ● Speed Dial List 5. Touch Print. For more information, see the fax guide that came with the device. Font lists 1. From the Home screen, touch Administration. Shows - HP Q7840A | User Manual - Page 158
alerts NOTE If your company does not have e-mail, this feature might not be available. You can use HP Web Jetadmin or the embedded Web server to configure the system to alert you of problems with the device. The alerts take the form of e-mail messages to the e-mail account(s) that you - HP Q7840A | User Manual - Page 159
up alerts. ● Gain access to troubleshooting and maintenance tools. You can use the HP Easy Printer Care software when the device is directly connected to your computer or when it is connected to a network. To download the HP Easy Printer Care software, go to www.hp.com/go/easyprintercare. NOTE You - HP Q7840A | User Manual - Page 160
An icon (if the View as drop-down box is set to Tiles, which is the default setting) Any current alerts for the device Support tab If you click a device in the list, the HP Easy Printer Care software opens the Overview tab for that device. ● Provides device information, including alerts for items - HP Q7840A | User Manual - Page 161
connected to a computer, use the HP Easy Printer Care software to view the device and change network configuration ● View support content that is specific to the current state of the to an IP-based network. The embedded Web server does not support IPX-based or AppleTalk printer connections. You - HP Q7840A | User Manual - Page 162
for each tray. To change the default settings, click Change Settings. ● Configuration HP supplies, with 0 percent indicating that a supply is empty. This page also provides supplies part device configuration and supplies to specific e-mail addresses. ● Security an IP-based network. This tab - HP Q7840A | User Manual - Page 163
to provide diagnostic and support information specific to your device. Order Supplies: Connects to the HP SureSupply Web site, where you will receive information on options for purchasing original HP supplies, such as print cartridges and paper. Product Support: Connects to the support site for the - HP Q7840A | User Manual - Page 164
troubleshooting network-connected peripherals. The intuitive browser interface simplifies cross-platform management of a wide range of devices, including HP and non-HP devices. Management is proactive, allowing network administrators the ability to resolve issues before users are affected. Download - HP Q7840A | User Manual - Page 165
Mac OS X V10.2.8 1. Open the Finder, and then click Applications. 2. Click Library, and then click Printers. 3. Click hp, and then click Utilities. 4. Double-click HP Printer Selector to open the HP Printer Selector. 5. Select the device that you want to configure, and then click Utility. Open the - HP Q7840A | User Manual - Page 166
print jobs that are stored on the device hard disk. Changes the default tray settings. Changes the device network settings and provides access to the embedded Web server. Provides the ability to turn on or off Bonjour support or change the device service name that is listed on a network. Provides - HP Q7840A | User Manual - Page 167
page count based on approximately 5% coverage. To order supplies online, go to www.hp.com/support/M5025mfp or www.hp.com/support/M5035mfp. Manage the print cartridge Print-cartridge storage Do not remove the print cartridge from its package until you are ready to use it. CAUTION To prevent damage - HP Q7840A | User Manual - Page 168
caused by a non-HP print cartridge is not covered under the HP warranty and service agreements. To install a new HP print cartridge, see Change the print cartridge. To recycle the used cartridge, follow the instructions included with the new cartridge. Print-cartridge authentication The device - HP Q7840A | User Manual - Page 169
.hp.com/support/M5025mfp or www.hp.com/support/M5035mfp. NOTE Hewlett-Packard recommends the use of HP products in this device. Use of nonHP products may cause problems requiring service that is not covered by the HP warranty or service agreements. Change the print cartridge When a print cartridge - HP Q7840A | User Manual - Page 170
from the bag. Place the used print cartridge in the bag for recycling. 4. Grasp both sides of the print cartridge and distribute the toner by gently rocking the print cartridge. CAUTION Do not touch the shutter or the surface of the roller. 5. Remove the shipping tape and the orange tab from - HP Q7840A | User Manual - Page 171
arrived. See the enclosed recycling guide for recycling instructions. 8. If you are using a non-HP print cartridge, check the device control panel for further instructions. For additional help, go to www.hp.com/support/M5025mfp or www.hp.com/support/M5035mfp. ENWW Replace supplies and parts 159 - HP Q7840A | User Manual - Page 172
automatic document feeder (ADF). Preventive maintenance for the print engine You should replace certain parts when a control-panel message alerts you to perform printer maintenance. When page count approaches 200,000 pages printed, the device alerts you to order a maintenance kit. The message can be - HP Q7840A | User Manual - Page 173
problems, such as toner specks or smearing (see Solve printquality problems). This product has a cleaning mode that can correct and prevent these types of problems acetone, benzene, ammonia, ethyl alcohol, or carbon tetrachloride on any part of the device; these can damage the device. Do not place - HP Q7840A | User Manual - Page 174
3. Clean the scanner strip by using a damp, lint-free cloth. Clean the scanner lid backing Minor debris can accumulate on the white document lid backing that is located underneath the scanner lid. 1. Open the scanner lid. 2. Clean the white document lid backing by using a soft cloth or sponge that - HP Q7840A | User Manual - Page 175
If the ADF has trouble feeding documents, clean the ADF pickup roller assembly. 1. Open the ADF cover. 2. Wipe the ADF rollers with a soft, dry cloth. 3. Close the ADF cover. NOTE If you are experiencing jams in the ADF, contact a local HP-authorized service provider. See HP Customer Care. ENWW - HP Q7840A | User Manual - Page 176
Clean the paper path 1. From the Home screen, touch Administration. 2. Touch Print Quality. 3. Touch Calibration/Cleaning. 4. Touch Create Cleaning Page. The device prints a cleaning page. 5. Follow the instructions printed on the cleaning page. 164 Chapter 10 Manage and maintain the device ENWW - HP Q7840A | User Manual - Page 177
notice offset problems with the scanned images. The scanner is calibrated before it leaves the factory. It needs to be calibrated again only rarely. 1. From the Home screen, touch Administration. 2. Touch Troubleshooting. 3. Touch Calibrate Scanner and then follow the instructions in the onscreen - HP Q7840A | User Manual - Page 178
166 Chapter 10 Manage and maintain the device ENWW - HP Q7840A | User Manual - Page 179
11 Problem solving This troubleshooting information is organized to help you resolve printing problems. Choose the general topic or type of problem from the following list. ● Problem-solving checklist ● Problem-solving flowchart ● Solve general printing problems ● Control-panel message types ● - HP Q7840A | User Manual - Page 180
recently replaced print cartridge installed correctly, and was the pull tab and/or attached tape on the cartridge removed? For additional information about installation and setup, see the getting started guide. If you cannot find solutions to problems in this guide, go to www.hp.com/support/M5025mfp - HP Q7840A | User Manual - Page 181
does not meet specifications. 1. Paper maintenance kit items might be ready for replacement. 3. Make sure the print cartridge is installed correctly. See Change the print cartridge. 4. Install the device maintenance kit. See Perform preventive maintenance. 5. If the problem persists, contact HP - HP Q7840A | User Manual - Page 182
Make sure the media meets specifications for the device. See Select print media. Replace the print cartridge. See Change the print cartridge Install the device maintenance kit. See Perform preventive maintenance. 4. If the problem persists, contact HP Customer Care. See HP Customer Care. General - HP Q7840A | User Manual - Page 183
not supported for stapling. printer driver. 3. Use only Letter- or A4-size paper for staple jobs. 4. If the problem persists, contact HP Customer Care. See HP Customer Care. Are the staples holding the pages together? You might be using staples that are not 1. Replace the staple cartridge with - HP Q7840A | User Manual - Page 184
all the doors on the left side of the device are closed completely. 2. If the problem persists, contact HP Customer Care. See HP Customer Care. Are the pages stacked neatly? The paper might not meet specifications 1. for the device. The paper might be stored in an environment that does not meet - HP Q7840A | User Manual - Page 185
connected the device to a digital phone line instead of an analog phone line. The fax accessory requires an analog phone line. See Solve fax problems. 1. Always use the phone cord that came with the device. 2. Test the telephone line by connecting a telephone to it and making a call. 3. Make sure - HP Q7840A | User Manual - Page 186
size configurations at the control panel. For Macintosh computers, use the HP Printer Utility to change the priority of the tray. The configured size and The tray is empty. The paper guides are set incorrectly. Solution Load paper in the tray. To set the guides correctly, see Load media into the - HP Q7840A | User Manual - Page 187
processes the back side of the page as well (the page comes part of the way out, and then goes back into the device). Cause Solution The device is set for duplexing. Even if the print job contains See Open the printer drivers to change the setting, or see the only one page, the - HP Q7840A | User Manual - Page 188
text is wrong, garbled, or incomplete. Cause Solution The wrong driver was selected in the software. The software program is malfunctioning. Check the software device selection menu to make sure that an HP LaserJet M5025 or HP LaserJet M5035 device is selected. Try printing a job from another - HP Q7840A | User Manual - Page 189
panel messages can indicate the status of or problems with the device. Message type Status messages appears if the device is online. Warning messages inform you of data and print errors. These messages typically alternate with the Ready or service is required. ENWW Control-panel message types 177 - HP Q7840A | User Manual - Page 190
supplies or unauthorized supplies are not covered under warranty. HP cannot ensure the accuracy or the availability of certain features. To continue printing, touch OK. 10.XX.YY Supply memory error The device cannot read or write to the print cartridge e-label, or the e-label is missing from the - HP Q7840A | User Manual - Page 191
OK to print the transferred data. (Some data might be lost.) Check the host configuration. If this message persists, contact an HP-authorized service or support provider. (See the HP support flyer, or go to www.hp.com/support/M5025mfp or www.hp.com/support/M5035mfp.) 22 Embedded I/O buffer overflow - HP Q7840A | User Manual - Page 192
DIMM. Turn the device off, and then replace the DIMM. See Installing printer memory. If this message persists, contact an HPauthorized service or support provider. (See the HP support flyer, or go to www.hp.com/ support/M5025mfp or www.hp.com/support/ M5035mfp.) 54.XX ERROR A temporary printing - HP Q7840A | User Manual - Page 193
the device on. If this message persists, contact an HPauthorized service or support provider. (See the HP support flyer, or go to www.hp.com/ support/M5025mfp or www.hp.com/support/ M5035mfp.) 62 NO SYSTEM To continue turn off then A problem exists with the device firmware. on Turn the device off - HP Q7840A | User Manual - Page 194
message persists, contact an HPauthorized service or support provider. (See the HP support flyer, or go to www.hp.com/ support/M5025mfp or www.hp.com/support/ M5035mfp.) 8X.YYYY EIO ERROR EIO accessory, and then turn the device on. 3. Replace the EIO accessory. 182 Chapter 11 Problem solving ENWW - HP Q7840A | User Manual - Page 195
connected correctly to the device. Remove and reinstall the duplexer. If the message persists contact an HPauthorized service or support provider. See the HP support flyer, or go to www.hp.com/ support/M5025mfp or www.hp.com/support/ M5035mfp. Chosen personality not available To continue touch OK - HP Q7840A | User Manual - Page 196
all jams have been cleared, a sensor might be stuck or broken. Contact an HP-authorized service or support provider. See the HP support flyer, or go to www.hp.com/support/M5025mfp or www.hp.com/support/M5035mfp. LDAP server is not responding. Contact administrator. The LDAP server has exceeded - HP Q7840A | User Manual - Page 197
digital sending service at does not service this MFP. Contact administrator. The print cartridge is out of toner. The stapler is out of staples. A problem occurred while updating the firmware for the stapler/stacker. The hard disk is being cleaned. Replace the print cartridge. (See - HP Q7840A | User Manual - Page 198
maximum number of sheets the stapler For print jobs that have more than 30 pages, can staple is 30. staple them manually. Unable to , contact an HP-authorized service or support provider. (See the HP support flyer, or go to www.hp.com/ support/M5025mfp or www.hp.com/support/ M5035mfp.) User - HP Q7840A | User Manual - Page 199
specifications. Use only media that meets HP specifications. See Media and trays. A component is installed incorrectly. Verify that the print cartridge edges. Replace the media. The media is perforated or embossed. Perforated or embossed media does not separate easily. Feed single sheets from - HP Q7840A | User Manual - Page 200
Use this illustration to troubleshoot jams in the device. For instructions about clearing jams, see Clear jams. 1 ADF 2 Stapler/stacker 3 Output path 4 Duplex path (for two-sided printing) 5 Stapler/stacker output bin 6 Output bin 7 Print cartridge 8 Input trays 9 Optional input - HP Q7840A | User Manual - Page 201
that determines if the device will reprint jammed pages after the jam is cleared. ● Auto instructs the device to automatically turn jam recovery on when sufficient device memory. ● Off instructs the device not to attempt to reprint jammed pages. This setting helps conserve device memory. ● On - HP Q7840A | User Manual - Page 202
, copy, or scan job. When this happens, the controlpanel message Jam in document feeder alerts you to the jam. To clear the jam, follow the instructions on the onscreen dialog box or follow the steps below. 1. Open the ADF cover. 2. If you were copying two-sided documents, lift the green lever - HP Q7840A | User Manual - Page 203
3. Gently try to remove the page without tearing it. Also pull paper from the ADF output bin. If you feel resistance, go to the next step. 4. Turn the green wheel to advance the media out of the ADF. 5. Close the ADF cover. If you were not able to remove all of the jammed media, continue to the next - HP Q7840A | User Manual - Page 204
6. Open the ADF lid and gently loosen the media by using both hands. 7. When the media is free, gently pull it out in the direction shown. 8. Close the lid to the flatbed scanner. 192 Chapter 11 Problem solving ENWW - HP Q7840A | User Manual - Page 205
Clear jams from the stapler/stacker The control-panel message 13.XX.YY Jam inside left door on the HP LaserJet M5035XS MFP alerts you to a jam in the stapler/stacker. To clear the jam, follow the instructions on the onscreen dialog box or follow the steps below. 1. If the most of the jammed media - HP Q7840A | User Manual - Page 206
the door snap into place. If a jam message persists, there is still media in the device. Look for media in other locations. 194 Chapter 11 Problem solving ENWW - HP Q7840A | User Manual - Page 207
in output path, follow the instructions on the onscreen dialog box or follow the steps below. The following control-panel messages alert you to jams in the output path: ● 13.XX.YY Jam inside left door (HP LaserJet M5025 MFP, HP LaserJet M5035 MFP, and HP LaserJet M5035X MFP) ● 13.XX.YY Jam inside - HP Q7840A | User Manual - Page 208
media out of the device. (There might be loose toner on the media. Be careful not to spill it on yourself or into the device.) NOTE If media is difficult to remove, try opening the upper-right door and removing the print cartridge to release pressure on the media. 4. Close the jam - HP Q7840A | User Manual - Page 209
-panel message 13.XX.YY Jam inside duplexer alerts you to a jam in the optional duplexer. To clear the jam, follow the instructions on the onscreen dialog box or follow the steps below. 1. Remove the duplexer. 2. Remove any media from the duplexer. 3. Reinstall the duplexer. ENWW Clear jams 197 - HP Q7840A | User Manual - Page 210
the printcartridge area. To clear the jam, follow the instructions on the onscreen dialog box or follow the steps below. 1. Open the jam access door. 2. Open the upper-right door and remove the print cartridge. CAUTION To prevent damage to the print cartridge, do not expose it to light for more than - HP Q7840A | User Manual - Page 211
it might cause temporary problems with print quality. Loose toner should clear from the paper path after a few pages are printed. If toner gets on your clothing, wipe it off with a dry cloth and wash clothing in cold water. (Hot water sets toner into fabric.) 5. Replace the print cartridge, and then - HP Q7840A | User Manual - Page 212
tray 3, follow the instructions on the onscreen dialog box or follow the steps below. The following control-panel messages alert you to jams in trays 2 and 3: ● 13.XX.YY Jam in Tray 2 ● 13.XX.YY Jam in Tray 3 ● Jam inside lower-left door (HP LaserJet M5025 MFP and HP LaserJet M5035 MFP) ● Jam inside - HP Q7840A | User Manual - Page 213
the device. NOTE Before replacing the tray, make sure the paper is flat in the tray at all four corners and below the tabs on the guides. NOTE If you were not able to clear the jam from the input area, paper might be jammed in the print-cartridge area. See Clear jams - HP Q7840A | User Manual - Page 214
instructions on the onscreen dialog box or follow the steps below. The following control-panel messages alert you to jams in optional trays: ● 13.XX.YY Jam in Tray 4 (HP LaserJet M5035X MFP and HP LaserJet M5035XS MFP) ● 13.XX.YY Jam in Tray 5 (HP LaserJet M5035XS MFP Chapter 11 Problem solving ENWW - HP Q7840A | User Manual - Page 215
the device. NOTE Before replacing the tray, make sure the paper is flat in the tray at all four corners and below the tabs on the guides. NOTE If you were not able to clear the jam from the input area, paper might be jammed in the print-cartridge area. See Clear jams - HP Q7840A | User Manual - Page 216
and meets specifications. See Specifications. ● Clean the device. See Clean the device. ● Contact an HP-authorized service or support provider to perform routine maintenance. See the support flyer that was included with the device, or see HP Customer Care. 204 Chapter 11 Problem solving ENWW - HP Q7840A | User Manual - Page 217
or 20 lb) at a time. The control-panel message 13.XX.YY Stapler jam inside stapler door on the HP LaserJet M5035XS MFP alerts you to a staple jam. To clear the jam, follow the instructions on the onscreen dialog box or follow the steps below. 1. Open the stapler door. 2. Lift up the green handle - HP Q7840A | User Manual - Page 218
5. Remove the staples that protrude from the staple cartridge. 6. Close the lever at the back of the staple cartridge. Be sure that it snaps into place. 7. Insert the staple cartridge into the opening inside the stapler door and then press the green handle down. 206 Chapter 11 Problem solving ENWW - HP Q7840A | User Manual - Page 219
8. Close the stapler door. 9. Test the stapler by printing or copying a staple job. Repeat steps these steps, if necessary. ENWW Clear staple jams 207 - HP Q7840A | User Manual - Page 220
is operating in excessively humid or dry conditions, verify that the printing environment is within specifications. See Operating environment. Print-quality problems associated with jams Make sure that all sheets are cleared from the paper path. See Clear jams. ● If the device recently jammed, print - HP Q7840A | User Manual - Page 221
ah call lthe cjakha aa d a sd fijs. Sincerely, Mr. Scmehnjcj See Gray background See Toner smear AaBbCc AaBbCc AaBbCc AaBbCc AaBbCc AaBbCc See Repeating defects See Repeating image See Misformed characters See Page dark) See Random image repetition (light) ENWW Solve print-quality problems 209 - HP Q7840A | User Manual - Page 222
through the device. Light print (partial page) 1. Make sure that the print cartridge is fully installed. 2. The toner level in the print cartridge might be low. Replace the print cartridge. 3. The media might not meet HP specifications (for example, the media is too moist or too rough). See Media - HP Q7840A | User Manual - Page 223
type of media. 4. Check the print cartridge for leaks. If the print cartridge is leaking, replace it. Dropouts 1. Make sure that the environmental specifications for the device are being met. See Operating environment. 2. If the media is rough, and the toner easily rubs off, open the Administration - HP Q7840A | User Manual - Page 224
menu at the device control panel. On the Print Quality menu, increase the Toner Density setting. See Print Quality menu. 6. Make sure that the environmental specifications for the device are being met. See Operating environment. 7. Replace the print cartridge. 212 Chapter 11 Problem solving ENWW - HP Q7840A | User Manual - Page 225
. 3. Make sure that the environmental specifications for the device are being met. See Operating environment. 4. Clean the inside of the device and run a cleaning page. See Clean the device. 5. Replace the print cartridge. Also see Loose toner . Loose toner Loose toner, in this context, is defined - HP Q7840A | User Manual - Page 226
to see if the problem corrects itself. 2. Make sure that type and quality of the media you are using meet HP specifications. See Media and trays. 3. If the distance between defects is 47 mm (1.9 in), 62 mm (2.4 in), or 96 mm (3.8 in), the print cartridge might need to be replaced. 214 Chapter 11 - HP Q7840A | User Manual - Page 227
trays. Make sure that the guides in the tray are not too tight or too loose against the media. 4. Turn over the stack in the tray. Also, try rotating the stack 180°. 5. Make sure that the type and quality of the media you are using meet HP specifications. See Media and trays. 6. Make - HP Q7840A | User Manual - Page 228
a few more pages to see if the problem corrects itself. 2. Make sure that the environmental specifications for the device are being met. See sure that the type and quality of the media you are using meet HP specifications. See Media and trays. 6. If envelopes are creasing, try storing envelopes - HP Q7840A | User Manual - Page 229
toner coverage. 1. Replace the print cartridge. 2. Reduce the number of pages that you print with very low toner coverage. White spots on black 1. Print a few more pages to see if the problem corrects itself. 2. Make sure that the type and quality of the media you are using meet HP specifications - HP Q7840A | User Manual - Page 230
and change the Toner Density setting. See Print Quality menu. 5. Open the Administration menu at the device control panel. On the Print Quality submenu, open Optimize and set Line Detail=On. Blurred print 1. Make sure that the type and quality of the media you are using meet HP specifications. See - HP Q7840A | User Manual - Page 231
at the top of the page (in solid black) repeats further down the page (in a gray field), the toner might not have been completely erased from the last job. (The repeated image might be lighter or darker than the then turn it on to restart the print job. ENWW Solve print-quality problems 219 - HP Q7840A | User Manual - Page 232
CD for help and for more information about the Jetdirect configuration page. To open the guide, run the CD, click Printer Documentation, click HP Jetdirect Guide, and then click Troubleshooting the HP Jetdirect Print Server. ● Try printing the job from another computer. ● To verify that a device - HP Q7840A | User Manual - Page 233
Solve fax problems Solve sending problems Faxes quit during sending. Cause The fax machine to Answer features. on Busy feature or the Redial on No Answer feature is enabled. See the fax guide for information about changing the settings. Faxes you send are not arriving at the receiving fax machine. - HP Q7840A | User Manual - Page 234
. The device toner level is low, or it has run out of toner. Replace the print cartridge. The device stops printing as soon as it is low on toner or runs out of toner. Any faxes received are stored in memory and are printed after the toner has been replaced. 222 Chapter 11 Problem solving ENWW - HP Q7840A | User Manual - Page 235
Vertical white or faded stripes appear on The media might not meet the copy. HP specifications. Use media that meets HP specifications. See Media and trays. The print-cartridge toner-level might be Replace the print cartridge. See Change low. the print cartridge. ENWW Solve copy problems 223 - HP Q7840A | User Manual - Page 236
drum inside the print Install a new HP print cartridge. See cartridge might have been scratched. Change the print cartridge. Black dots or streaks appear on Text/ Picture. Select Text. Media-handling problems Problem Poor print quality or toner adhesion Dropouts, jamming, or curl Excessive curl - HP Q7840A | User Manual - Page 237
printers. on the page. The media guides might be incorrectly adjusted. Remove the scanner. More than one sheet feeds at one time. The manual feed mode, and then print your job again. The pickup roller might be dirty or damaged. Contact HP Customer Care. See HP Customer Care or the support - HP Q7840A | User Manual - Page 238
or flatbed scanner. See Load media into the input trays. Use media that meets HP specifications. See Media and trays. The print-cartridge toner-level might be Replace the print cartridge. See Change low. the print cartridge. The ADF might be loaded. Make sure that the ADF is empty. The device - HP Q7840A | User Manual - Page 239
Solve e-mail problems If you are unable to send e-mails by using the digital-send 2. Type telnet followed by the SMTP gateway address and then the number 25, which is the port over which the MFP is communicating. For example, type telnet 123.123.123.123 25 where "123.123.123.123" represents the SMTP - HP Q7840A | User Manual - Page 240
Solution Close all software programs, restart Windows, and try again. Select a different printer driver. If the device PCL 6 printer driver is selected, switch to the PCL 5 or HP postscript level 3 emulation printer driver, which can be done from a software program. Delete all temp files from the - HP Q7840A | User Manual - Page 241
the following hard drive folder: Library/ Printers/PPDs/Contents/Resources/.lproj, where "" represents the two-letter language code for the language that you are using. Reinstall the software. See the getting started guide for instructions. The device name, IP address, or Rendezvous - HP Q7840A | User Manual - Page 242
using. If necessary, reinstall the software. See the getting started guide for instructions. The PPD file is corrupt. The device might not be ready. Delete the PPD file from the following hard drive folder: Library/ Printers/PPDs/Contents/Resources/.lproj, where "" represents the two - HP Q7840A | User Manual - Page 243
does not appear in the Print Center or Printer Setup Utility after the driver is selected. Cause Solution This problem is caused by either a software or a hardware component. Software troubleshooting ● Check that your Macintosh supports USB. ● Verify that your Macintosh operating system is - HP Q7840A | User Manual - Page 244
Solve Linux problems For information about Linux problem solving, go to the HP Linux support Web site: hp.sourceforge.net/. 232 Chapter 11 Problem solving ENWW - HP Q7840A | User Manual - Page 245
the selection next to the PS Errors section that you want. General problems The job prints in Courier (the default typeface) instead of the typeface that you requested. Cause Solution The requested typeface is not downloaded. Download the font that you want and send the print job again. Verify - HP Q7840A | User Manual - Page 246
234 Chapter 11 Problem solving ENWW - HP Q7840A | User Manual - Page 247
A Supplies and accessories This section provides information about ordering parts, supplies, and accessories. Use only parts and accessories that are specifically designed for this device. ● Order parts, accessories, and supplies ● Part numbers ENWW 235 - HP Q7840A | User Manual - Page 248
accessories, go to www.hp.com/support/M5025mfp or www.hp.com/support/M5035mfp. Order through service or support providers To order a part or accessory, contact an HP-authorized service or support provider. Order directly through the embedded Web server (for printers that are connected to a network - HP Q7840A | User Manual - Page 249
is included with the HP LaserJet M5035X MFP and the HP LaserJet M5035XS MFP. Part number Q7549A Q3701A Supplies and maintenance kits Item HP LaserJet print cartridge Staple cassette Print-engine maintenance kit (110 V) Print-engine maintenance kit (220 V) ADF maintenance kit Description 15,000 - HP Q7840A | User Manual - Page 250
for business documents with high impact, such as brochures, sales material, and documents with graphics and photographic images. A4 (210 x 297 mm), 50 sheets/box C4179B/Asia-Pacific countries/regions and Europe Specifications: 32 lb (120 g/m2). HP LaserJet tough paper Letter (8.5 x 11 in), 50 - HP Q7840A | User Manual - Page 251
Part number HP LaserJet paper For use with HP LaserJet devices. This is good for letterhead, high-value memos, legal documents, direct mail, and correspondence. Specifications: 96 bright, 24 lb (90 g/m2). Letter (8.5 x 11 in), 500 sheets/ream, 10ream carton Legal (8.5 x 14 in), 500 sheets - HP Q7840A | User Manual - Page 252
. For crisp, sharp text and graphics, rely on the only transparencies specifically designed and tested to work with monochrome HP LaserJet devices. Letter (8.5 x 11 in), 50 sheets to a carton A4 (210 x 297 mm), 50 sheets to a carton 92296T/North America, Asia-Pacific countries/regions, and Europe - HP Q7840A | User Manual - Page 253
B Service and support Hewlett-Packard limited warranty statement HP PRODUCT HP LaserJet M5025, M5035, M5035X, and M5035XS DURATION OF LIMITED WARRANTY One-year on-site warranty HP warrants to you, the end-user customer, that HP hardware and accessories will be free from defects in materials and - HP Q7840A | User Manual - Page 254
OF THIS PRODUCT TO YOU. Customer self repair warranty service HP products are designed with many Customer Self Repair (CSR) parts to minimize repair time and allow for greater flexibility in performing defective parts replacement. If during the diagnosis period, HP identifies that the repair can be - HP Q7840A | User Manual - Page 255
use. To obtain warranty service, please return the product to place of purchase (with a written description of the problem and print samples) or contact HP customer support. At HP's option, HP will either replace products that prove to be defective or refund your purchase price. TO THE EXTENT - HP Q7840A | User Manual - Page 256
Customer Care Online Services For 24-hour access to updated HP device-specific software, product information, and support information through an Internet connection, go to the Web site: www.hp.com/support/M5025mfp or www.hp.com/support/M5035mfp. Go to www.hp.com/support/net_printing for information - HP Q7840A | User Manual - Page 257
Printer Care software. See Use the embedded Web server. HP support and information for Macintosh computers Go to www.hp.com/go/macosx for Macintosh OS X support information and HP subscription service for driver updates. Go to www.hp.com/go/mac-connect for products that are designed specifically - HP Q7840A | User Manual - Page 258
a wide range of support needs. Maintenance agreements are not part of the standard warranty. Support services may vary by area. Check with your local HP dealer to determine the services available to you. On-site service agreements To provide you with the level of support best suited to your needs - HP Q7840A | User Manual - Page 259
HP-supplied internal components. The hardware maintenance covers a 1- to 3-year period from date of the HP product purchase. The customer must purchase HP Support within the stated factory warranty. For more information, contact the HP Customer Care Service and Support group. ENWW HP maintenance - HP Q7840A | User Manual - Page 260
248 Appendix B Service and support ENWW - HP Q7840A | User Manual - Page 261
C Specifications ● Physical specifications ● Electrical specifications ● Acoustic emissions ● Operating environment ENWW 249 - HP Q7840A | User Manual - Page 262
Physical specifications Table C-1 Dimensions Model HP LaserJet M5025 MFP and HP LaserJet M5035 MFP HP LaserJet M5035X MFP HP LaserJet M5035XS MFP 1 Without print cartridge Height Depth 775 mm (30.5 in) 584 mm (23 in) 1,035 mm (40.75 in) 1,194 mm (47 in) 762 mm (30 in) 762 mm ( - HP Q7840A | User Manual - Page 263
LaserJet M5025 MFP < 615 W6 615 W 75 W 21 W 0.01 W HP LaserJet M5035 MFP < 615 W7 615 W 75 W 21 W 0.01 W HP LaserJet M5035X MFP < 615 W7 615 W 75 W 21 W 0.01 W HP LaserJet M5035XS MFP < 615 W7 615 W 75 W 21 W 0.01 W 1 Values subject to change. See www.hp.com/support/M5025mfp - HP Q7840A | User Manual - Page 264
M5025mfp or www.hp.com/support/M5035mfp for current information. 2 Configuration tested: HP LaserJet M5035 MFP, simplex printing, A4-size paper. 3 Print speed is 35 ppm. Operating environment Table C-6 Necessary conditions Environmental condition Printing Temperature (printer and print cartridge - HP Q7840A | User Manual - Page 265
D Regulatory information This section contains the following regulatory information: ● FCC regulations ● Environmental product stewardship program ● Telecom statement ● Declaration of conformity ● Safety statements ENWW 253 - HP Q7840A | User Manual - Page 266
a Class A digital device, pursuant to Part 15 of the FCC rules. These limits are installed and used in accordance with the instructions, it may cause harmful interference to radio Any changes or modifications to the printer that are not expressly approved by HP could void the user's authority to - HP Q7840A | User Manual - Page 267
for energy efficiency. For more information, see www.energystar.gov. Toner consumption Economode uses significantly less toner, which might extend the life of the print cartridge. Paper use This product's manual/optional automatic duplex feature (two-sided printing, see Print on both sides of the - HP Q7840A | User Manual - Page 268
instruction guide in most HP LaserJet print cartridge boxes. Labels and bulk boxes are also available through the Web site: www.hp.com/recycle. Use the label to return empty, original HP LaserJet print cartridges guidelines outlined in the HP LaserJet Printer Family Print Media Guide. This product is - HP Q7840A | User Manual - Page 269
include the following: HP LaserJet M5025 MFP and HP LaserJet M5035 Series MFP device Type Carbon monofluoride lithium battery BR1632 Weight (1.5 g) Location On local city office, your household waste disposal service or the shop where you purchased the product. ENWW Environmental product - HP Q7840A | User Manual - Page 270
Material Safety Data Sheet (MSDS) Material Safety Data Sheets (MSDS) for supplies containing chemical substances (for example, toner) can be obtained by contacting the HP Web site at www.hp.com/go/msds or www.hp.com/hpinfo/ community/environment/productinfo/safety. For more information To obtain - HP Q7840A | User Manual - Page 271
statement The HP LaserJet M5035X MFP and HP LaserJet M5035XS MFP models have the HP LaserJet Analog Fax Accessory 300 already installed to provide communication to the public switch telephone network (PSTN) for fax functionality. See the HP LaserJet Analog Fax Accessory 300 User Guide for all - HP Q7840A | User Manual - Page 272
HP LaserJet M5025 / M5035 Series Accessories5): Q7549A - Optional Duplexer Q7834A - Optional 1x500 Sheet Cabinet Q7835A - Optional 3x500 Sheet Cabinet Q7604A - Optional Stapler/Stacker BOISB-0308-00 - Fax Module Regulatory Model Number3): Product Options: Print Cartridge CFR, Part 15 Class Service - HP Q7840A | User Manual - Page 273
Class 1" laser product under the U.S. Department of Health and Human Services (DHHS) Radiation Performance Standard according to the Radiation Control for , or performing procedures other than those specified in this user guide may result in exposure to hazardous radiation. Canadian DOC regulations - HP Q7840A | User Manual - Page 274
sätt än i bruksanvisning specificerats, kan användaren utsättas för osynlig laserstrålning, som överskrider gränsen för laserklass 1. HUOLTO HP LaserJet M5025, M5035, M5035X, M5035XS - kirjoittimen sisällä ei ole käyttäjän huollettavissa olevia kohteita. Laitteen saa avata ja huoltaa ainoastaan sen - HP Q7840A | User Manual - Page 275
and print server cards This section explains the memory features of the printer and provides steps for expansion. ● Overview ● Installing printer memory ● Check DIMM installation ● Save resources (permanent resources) ● Enable memory for Windows ● Using HP Jetdirect print server cards ENWW 263 - HP Q7840A | User Manual - Page 276
card for a serial or AppleTalk connection. NOTE The HP LaserJet M5025 MFP and the HP LaserJet M5035 Series MFP come with a network device already installed. The EIO slot may be used to provide networking capabilities in addition to those already built into the printer. To find out how much memory is - HP Q7840A | User Manual - Page 277
downloaded fonts. Added memory also gives you more flexibility in supporting job-storage features, such as quick copying. To install printer metal on the printer. The HP LaserJet M5025 MFP and HP LaserJet M5035 Series MFP MFPs come with one DIMM slot. If desired, you can replace a DIMM installed in - HP Q7840A | User Manual - Page 278
3. Open the formatter door. 4. Remove the DIMM from the antistatic package. CAUTION To reduce the possibility of damage caused by static electricity, always wear an electrostatic discharge (ESD) wrist strap or touch the surface of the antistatic package before handling DIMMs. 266 Appendix E Working - HP Q7840A | User Manual - Page 279
the locks on each side of the DIMM snap into place. NOTE To remove a DIMM, first release the locks. 7. Close the formatter door. ENWW Installing printer memory 267 - HP Q7840A | User Manual - Page 280
8. Replace the formatter cover. 9. Reconnect the cables, and then turn on the device. Check DIMM installation After installing the DIMM, make sure that the installation was - HP Q7840A | User Manual - Page 281
not while the device is printing. NOTE Overusing permanent resources or downloading them while the device is printing might affect device performance or Enable memory for Windows 1. On the Start menu, Settings, and Printers or Printers and Faxes. 2. Select this device and select Properties. 3. On - HP Q7840A | User Manual - Page 282
print server cards Follow these procedures to install or remove an EIO card. Install an HP Jetdirect print server card 1. Turn off the device. 2. Remove the two screws and cover plate from the EIO slot on the back of the device. - HP Q7840A | User Manual - Page 283
device is recognized. See Use information pages. NOTE When you print a configuration page, an HP Jetdirect configuration page that contains network configuration and status information also prints. Remove an HP Jetdirect print server card 1. Turn off the device. 2. Disconnect the network cable from - HP Q7840A | User Manual - Page 284
272 Appendix E Working with memory and print server cards ENWW - HP Q7840A | User Manual - Page 285
chips. duplex A feature that accommodates printing on both sides of a sheet of paper. Also called "two-sided printing." EIO Abbreviation for "enhanced input/output." A hardware interface that is used to add a print server, network adaptor, hard disk, or other plug-in item for HP printers. Emulated - HP Q7840A | User Manual - Page 286
of computer memory that stores data that should not change. supplies Materials that the printer uses and that must be replaced. The supply item for this printer is the print cartridge. TCP/IP An internet protocol that has become the global standard for communications. toner The fine black or colored - HP Q7840A | User Manual - Page 287
, device Macintosh, problem- solving 229 ADF cleaning 163 error messages 183 jams 190 loading 81 locating 5, 6, 7 maintenance kit 160 media supported 71 sizes supported 129 adhesive labels loading 78 specifications 64, 69 Administration menu, control panel 21 Alert Settings window, HP Toolbox 148 - HP Q7840A | User Manual - Page 288
solving 216, 224 curly paper, problem-solving 174 custom-size paper default settings 28 driver settings 104 printing on 85 customer support embedded Web server links 151 HP Printer Utility pages 154 Linux 232 online 244 repacking device 246 D dark copying 224 Data light locating 18 date, setting 29 - HP Q7840A | User Manual - Page 289
, replacing 160 dots, problem-solving 211, 217, 224 double-sided copying default settings 23 double-sided printing blank pages, default settings 45 default settings 28 error messages 183 loading paper 111 Macintosh settings 154 problem-solving 175 downloading software 9 dpi, settings 48, 154 drivers - HP Q7840A | User Manual - Page 290
models including 2 part numbers 238 removing 271 settings 32 HP LaserJet Tough paper 66 HP media, ordering 238 HP Printer Utility 153, 154 HP Printer Utility, Macintosh 13, 153 HP SupportPack 247 HP Toolbox browsers supported 15 opening 147 options 148 HP Universal Print Driver 10 HP Web Jetadmin 14 - HP Q7840A | User Manual - Page 291
drivers, problem-solving 229 HP Printer Utility 153 problems, solving 229 removing software 13 software 13 software components 15 support 245 supported operating systems 9 USB card, problem- solving 230 mailing labels loading 78 specifications 64, 69 maintenance agreements 246 maintenance kit using - HP Q7840A | User Manual - Page 292
-day on-site service 246 noise specifications 252 non-HP supplies 155 not responding, problem- solving 176 Novell login required 184 number of copies default settings 24 NVRAM errors 182 O on-site service agreements 246 on/off switch, locating 5, 6, 7 online help, control panel 20 online support 244 - HP Q7840A | User Manual - Page 293
50 part numbers accessories 237 cables 238 EIO cards 238 maintenance kits 237 media, HP 238 memory 237 print cartridges 237 staples 237 pausing a print request 112 PCL drivers default settings 46 operating systems supported 9 selecting 10 universal 10 PDF error pages 46 perform printer maintenance - HP Q7840A | User Manual - Page 294
repacking device 246 repeating defects, problem- solving 214, 219 replacing maintenance kits 160 replacing printing cartridges 157 reset button 18 Resets menu, control panel 54 resizing documents 103 resolution features 3 settings 48, 154 troubleshooting quality 208 Resolution Enhancement technology - HP Q7840A | User Manual - Page 295
trays, media supported 69 specks, problem-solving 211, 217 speed pages per minute 2 problem-solving 174 troubleshooting 168 speed dial list, printing 145 Spool32 errors 228 spots, problem-solving 211, 217 staple cartridges empty, stop or continue settings 94 loading 91 stapler default settings 24 - HP Q7840A | User Manual - Page 296
recycling 256 replacement intervals 155 replacing print cartridges 157 Resets menu 54 status page, printing 144 status, viewing with embedded Web server 150 status, viewing with HP Printer Utility 154 status, viewing with HP Toolbox 148 support embedded Web server links 151 HP Printer Utility pages - HP Q7840A | User Manual - Page 297
fraud reports 156 HP Easy Printer Care 15 HP Web Jetadmin, downloading 152 Linux support 232 Macintosh customer support 245 Material Safety Data Sheet (MSDS) 258 ordering supplies 236 paper specifications 63 software, downloading 9 universal print driver 10 weekly on-site service 246 white lines - HP Q7840A | User Manual - Page 298
286 Index ENWW - HP Q7840A | User Manual - Page 299
- HP Q7840A | User Manual - Page 300
© 2006 Hewlett-Packard Development Company, L.P. www.hp.com *Q7829-90925* *Q7829-90925* Q7829-90925
-
 1
1 -
 2
2 -
 3
3 -
 4
4 -
 5
5 -
 6
6 -
 7
7 -
8
-
9
-
10
-
11
-
12
-
13
-
14
-
15
-
16
-
17
-
18
-
19
-
20
-
21
-
22
-
23
-
24
-
25
-
26
-
27
-
28
-
29
-
30
-
31
-
32
-
33
-
34
-
35
-
36
-
37
-
38
-
39
-
40
-
41
-
42
-
43
-
44
-
45
-
46
-
47
-
48
-
49
-
50
-
51
-
52
-
53
-
54
-
55
-
56
-
57
-
58
-
59
-
60
-
61
-
62
-
63
-
64
-
65
-
66
-
67
-
68
-
69
-
70
-
71
-
72
-
73
-
74
-
75
-
76
-
77
-
78
-
79
-
80
-
81
-
82
-
83
-
84
-
85
-
86
-
87
-
88
-
89
-
90
-
91
-
92
-
93
-
94
-
95
-
96
-
97
-
98
-
99
-
100
-
101
-
102
-
103
-
104
-
105
-
106
-
107
-
108
-
109
-
110
-
111
-
112
-
113
-
114
-
115
-
116
-
117
-
118
-
119
-
120
-
121
-
122
-
123
-
124
-
125
-
126
-
127
-
128
-
129
-
130
-
131
-
132
-
133
-
134
-
135
-
136
-
137
-
138
-
139
-
140
-
141
-
142
-
143
-
144
-
145
-
146
-
147
-
148
-
149
-
150
-
151
-
152
-
153
-
154
-
155
-
156
-
157
-
158
-
159
-
160
-
161
-
162
-
163
-
164
-
165
-
166
-
167
-
168
-
169
-
170
-
171
-
172
-
173
-
174
-
175
-
176
-
177
-
178
-
179
-
180
-
181
-
182
-
183
-
184
-
185
-
186
-
187
-
188
-
189
-
190
-
191
-
192
-
193
-
194
-
195
-
196
-
197
-
198
-
199
-
200
-
201
-
202
-
203
-
204
-
205
-
206
-
207
-
208
-
209
-
210
-
211
-
212
-
213
-
214
-
215
-
216
-
217
-
218
-
219
-
220
-
221
-
222
-
223
-
224
-
225
-
226
-
227
-
228
-
229
-
230
-
231
-
232
-
233
-
234
-
235
-
236
-
237
-
238
-
239
-
240
-
241
-
242
-
243
-
244
-
245
-
246
-
247
-
248
-
249
-
250
-
251
-
252
-
253
-
254
-
255
-
256
-
257
-
258
-
259
-
260
-
261
-
262
-
263
-
264
-
265
-
266
-
267
-
268
-
269
-
270
-
271
-
272
-
273
-
274
-
275
-
276
-
277
-
278
-
279
-
280
-
281
-
282
-
283
-
284
-
285
-
286
-
287
-
288
-
289
-
290
-
291
-
292
-
293
-
294
-
295
-
296
-
297
-
298
-
299
-
300
 |
 |
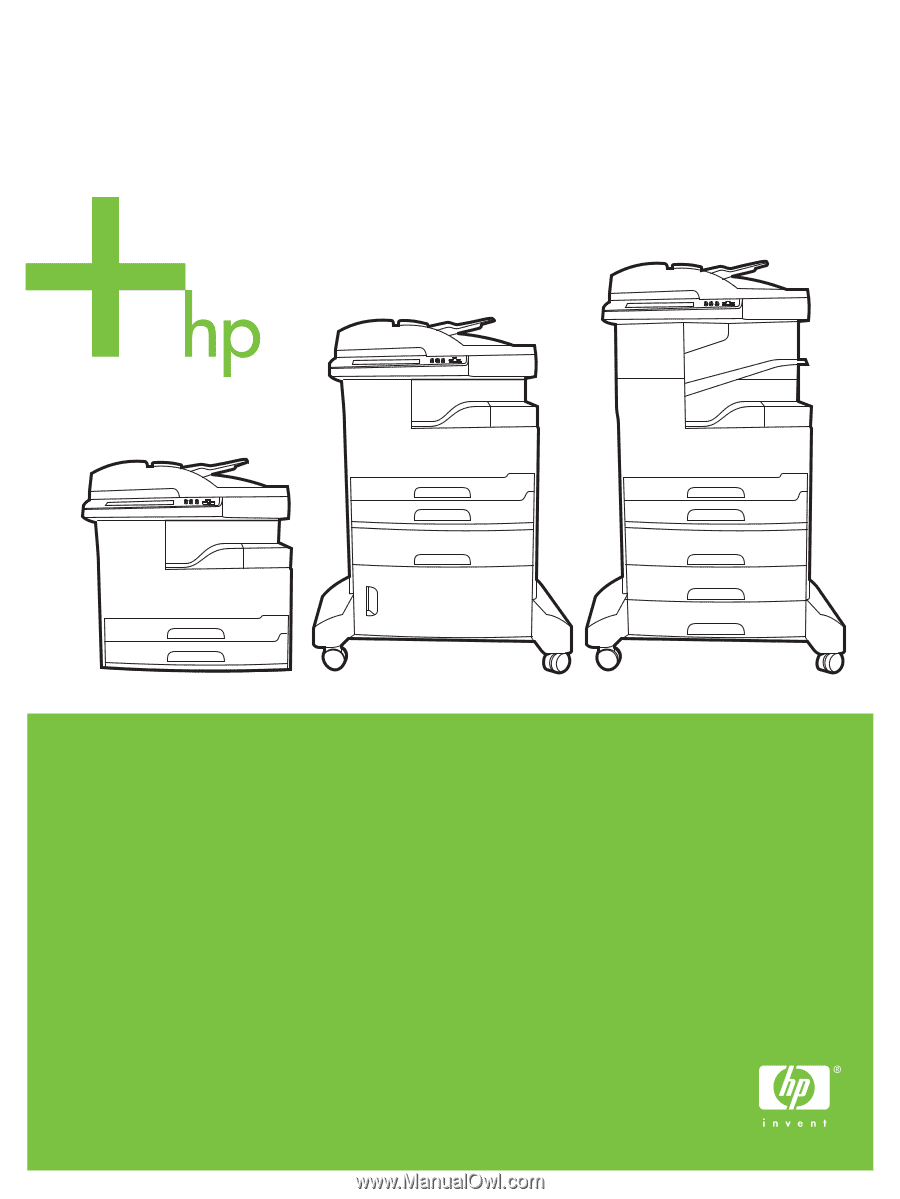
HP LaserJet M5025/M5035 MFP
User Guide