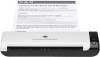
HP Scanjet 1000 User Guide
HP Scanjet 1000 Manual
 |
View all HP Scanjet 1000 manuals
Add to My Manuals
Save this manual to your list of manuals |
HP Scanjet 1000 manual content summary:
- HP Scanjet 1000 | User Guide - Page 1
User Guide - HP Scanjet 1000 | User Guide - Page 2
or its subsidiaries in the U.S. and/or other countries. Windows is either a registered trademark or trademark of Microsoft Corporation in To access the latest user guide, go to http://www.hp.com/support, and follow the instructions to find your product. Then select User Guides. Seventh Edition: - HP Scanjet 1000 | User Guide - Page 3
About this guide This guide provides information about monitor features, setting up the monitor, and to property damage). Warns the user that failure to follow a procedure exactly as described could result in loss of data or in damage to hardware or software. Also contains essential information to - HP Scanjet 1000 | User Guide - Page 4
iv About this guide - HP Scanjet 1000 | User Guide - Page 5
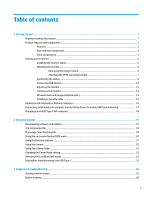
HP notebook or desktop computer 16 Connecting an HP notebook computer and installing drivers to enable USB Type-A docking 17 Charging a non-USB Type-C HP computer ...18 2 Using the monitor ...19 Downloading software 3 Support and troubleshooting ...25 Solving common issues ...25 Button lockouts ... - HP Scanjet 1000 | User Guide - Page 6
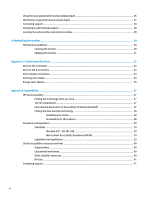
image performance (analog input 27 Contacting support ...28 Preparing to call technical support ...28 Locating the serial number and product user modes ...35 Energy saver feature ...35 Appendix B Accessibility ...37 HP and accessibility ...37 Finding the technology tools you need 37 The HP - HP Scanjet 1000 | User Guide - Page 7
users. The Safety & Comfort Guide also provides important electrical and mechanical safety information. The Safety & Comfort Guide is also available on the Web at http://www.hp and correctly sized furniture designed to properly support your monitor. WARNING! Monitors that are inappropriately - HP Scanjet 1000 | User Guide - Page 8
slot on rear of monitor for optional security cable ● HP Display Assistant software for adjusting monitor settings and enabling theft deterrence features user guides or manuals for your product, go to http://www.hp.com/support and follow the instructions to find your product. Then select User Guides - HP Scanjet 1000 | User Guide - Page 9
. Use only the HP USB Type-C cable provided. Supports DisplayPort Alt Mode (video, charging, and USB 3.1) over the USB Type-C connector. Also compatible with USB TypeC, Thunderbolt™-enabled ports. (9) USB Type-B upstream port Connects a USB Type-B cable to a source device. (10) RJ-45 (network - HP Scanjet 1000 | User Guide - Page 10
Table 1-1 Rear and side components and their descriptions (continued) Component Function (13) USB Type-A port Connects a USB device. (14) Audio-out (headset) jack Connects optional headphones, earbuds, a headset, or a television audio cable. WARNING! To reduce the risk of personal injury, - HP Scanjet 1000 | User Guide - Page 11
an OSD menu simulator, visit the HP Customer Self Repair Services Media Library at http://www.hp.com/go/sml. Setting up the This monitor supports the VESA® industry-standard 100 mm mounting holes. To attach a third-party mounting solution to the monitor head, use four 4 mm, 0.7 pitch, 10 mm-long - HP Scanjet 1000 | User Guide - Page 12
Removing the monitor stand IMPORTANT: Before beginning to disassemble the monitor, be sure that the monitor is turned off and all cables are disconnected. 1. Disconnect and remove all cables from the monitor. 2. Position the monitor facedown on a flat surface covered by protective sheet made of foam - HP Scanjet 1000 | User Guide - Page 13
Attaching the VESA mounting bracket 1. Remove the four screws from the VESA holes located on the rear of the monitor head. 2. To attach the monitor head to a swing arm or other mounting device, insert four mounting screws through the holes on the mounting device and into the VESA screw holes on the - HP Scanjet 1000 | User Guide - Page 14
Connecting the cables NOTE: The monitor ships with select cables. Not all cables shown in this section are included with the monitor. 1. Place the monitor in a convenient, well-ventilated location near the computer. 2. Before connecting the cables, route the cables through the cable routing hole in - HP Scanjet 1000 | User Guide - Page 15
the other end to the USB Type-A port on the source device. This enables video and data passthrough. NOTE: DisplayLink drivers are required for this setup. Drivers are available on the HP Support website. ● Connect one end of an HDMI cable to the HDMI port on the rear of the monitor and the other - HP Scanjet 1000 | User Guide - Page 16
to the USB Type-C port on the source device. (Use only the HP-approved USB Type-C cable provided with the monitor.) NOTE: The monitor's USB delivery (up to 65 W). The host device must be able to support DisplayPort Alt Mode (video, charging, and USB 3.1) over the USB 10 Chapter 1 Getting started - HP Scanjet 1000 | User Guide - Page 17
5. Connect one end of a network cable to the network jack on the monitor and the other end to a network wall jack or router. NOTE: To enable the network function, be sure that sure the USB upstream port is connected. 6. Connect one end of the power cord to the AC adapter (1) and the other end to a - HP Scanjet 1000 | User Guide - Page 18
7. Connect the DC cable to the power OUT connector on the monitor and the other end to the power IN connector on a host computer. When using USB Type-B for video and data, use DC OUT (DC-to-DC cable) for power. NOTE: Only one host computer should be connected to either the USB Type-C or DC OUT port - HP Scanjet 1000 | User Guide - Page 19
Adjusting the monitor 1. Tilt the monitor head forward or backward to set it to a comfortable eye level. 2. Swivel the monitor head to the left or right for the best viewing angle. Setting up the monitor 13 - HP Scanjet 1000 | User Guide - Page 20
monitor that is positioned low and reclined may be more comfortable for users with corrective lenses. The monitor should be repositioned as you adjust you can use the HP Display Assistant software by downloading it and installing on your computer from http://www.hp.com/support. The position of the - HP Scanjet 1000 | User Guide - Page 21
on the monitor is not covered under the HP warranty. NOTE: If pressing the power button and hold the monitor power button for 10 seconds. NOTE: You can disable the power for the screen. HP watermark and image retention monitor is not covered under the HP warranty. To avoid image retention damage, - HP Scanjet 1000 | User Guide - Page 22
to a fixed object with an optional security cable available from HP. Docking an HP notebook or desktop computer You can dock the computer to the connection through USB Type-C. NOTE: The host computer must be able to support DisplayPort Alt Mode (video, charging, and USB 3.1) over the USB Type - HP Scanjet 1000 | User Guide - Page 23
Update onto the Windows 10 OS host computer. Please check your Windows update policy if drivers are not downloaded automatically. After connecting the computer to the monitor, go to http://www.hp.com/support and follow the instructions to obtain the drivers. To install the drivers: 1. Turn on power - HP Scanjet 1000 | User Guide - Page 24
. To disable the AutoPlay window: 1. In Windows, open Control Panel, select Hardware and Sound, and then select AutoPlay. 2. Clear the check box for Use AutoPlay for all/some devices, and then select Save. For updates to the driver software, go to http://www.hp.com/support. Charging a non-USB Type - HP Scanjet 1000 | User Guide - Page 25
To download the files: 1. Go to http://www.hp.com/support. 2. Select Software and Drivers. 3. Select your product type. 4. Enter your HP monitor model in the search field and follow the on-screen instructions. The Information file The INF file defines monitor resources used by Windows® operating - HP Scanjet 1000 | User Guide - Page 26
Using the on-screen display (OSD) menu Use the on-screen display (OSD) menu to adjust the screen image based on your viewing preferences. You can access and make adjustments in the OSD using the buttons at the bottom of the monitor's front bezel. To access the OSD menu and make adjustments: 1. If - HP Scanjet 1000 | User Guide - Page 27
Using the function buttons Pressing one of the four OSD buttons activates the buttons and displays icons above the buttons. The default button icons and functions are shown in the following illustration and table. Table 2-2 Button names and descriptions Button Function (1) Menu Opens the OSD - HP Scanjet 1000 | User Guide - Page 28
raise the camera, press it down to unlock it. To close the camera, press it down until it locks. Using Auto-Sleep Mode The monitor supports an on-screen display (OSD) menu option called Auto-Sleep Mode that allows you to enable or disable a reduced power state for the monitor. When - HP Scanjet 1000 | User Guide - Page 29
Saver mode. If your display supports Performance mode, then to keep users. The Safety & Comfort Guide also provides important electrical and mechanical safety information. The Safety & Comfort Guide is available on the Web at http://www.hp graphics system. Check the manual that came with your graphics - HP Scanjet 1000 | User Guide - Page 30
OSD menu. Navigate to the USB Type-C configuration and select USB-C Video+USB2.0. NOTE: All but the final monitor in the chain must support DisplayPort multistreaming. 5. Connect the DisplayPort cable from the DisplayPort OUT port of one monitor to the DisplayPort IN port of the next monitor. 6. If - HP Scanjet 1000 | User Guide - Page 31
3 Support and troubleshooting Solving common issues The following table lists possible issues, the . NOTE: If pressing the power button has no effect, press and hold the power button for 10 seconds to disable the Power Button Lockout feature. Video cable is not connected. Connect a video cable - HP Scanjet 1000 | User Guide - Page 32
again for 10 seconds. This manually optimize the screen performance for the VGA (analog) input at any time from the Auto Adjustment menu in the OSD. You can download the auto-adjustment pattern software utility from http://www.hp.com/support can download this utility from http://www.hp.com/support.) - HP Scanjet 1000 | User Guide - Page 33
. NOTE: When using the controls, you will obtain the best results by using the auto-adjustment pattern software utility. You can download this utility from http://www.hp.com/support. When adjusting the Clock and Phase values, if the monitor images become distorted, continue adjusting the values - HP Scanjet 1000 | User Guide - Page 34
shifts the image up or down. Contacting support To resolve a hardware or software problem, go to http://www.hp.com/support. Use this site to get more information about your product, including links to discussion forums and instructions on troubleshooting. You can also find information about how - HP Scanjet 1000 | User Guide - Page 35
Locating the serial number and product number The serial number and product number are located on a label on the rear of the monitor head. You may need these numbers when contacting HP about the monitor model. Locating the serial number and product number 29 - HP Scanjet 1000 | User Guide - Page 36
product yourself. Adjust only those controls that are covered in the operating instructions. If the monitor is not operating properly or has been dropped or damaged, contact an authorized HP dealer, reseller, or service provider. ● Use only a power source and connection appropriate for this monitor - HP Scanjet 1000 | User Guide - Page 37
Shipping the monitor Keep the original packing box in a storage area. You may need it later if you ship the monitor or move. Maintenance guidelines 31 - HP Scanjet 1000 | User Guide - Page 38
manufacturers; actual performance may vary either higher or lower. For the latest specifications or additional specifications on this product, go to http://www.hp.com/go/ quickspecs/ and search for your specific monitor model to find the model-specific QuickSpecs. 68.5 cm (27 in) monitor Table - HP Scanjet 1000 | User Guide - Page 39
consumption Full power Typical settings USB Type-C power supply output Input terminal 170 W (without DC power out, with power delivery) 40 W 5 V DC, 3.0 A 9 V DC, 3.0 A 10 V DC, 5.0 A 12 V DC, 5.0 A 15 V DC, 4.3 A 20 V DC, 3.25 A One USB Type-C port, one HDMI port, one VGA port 60.5 cm (23.8 in - HP Scanjet 1000 | User Guide - Page 40
power Typical settings Sleep Off 155 W (without DC power out, with power delivery) 38 W 0.5 W 0.5 W USB Type-C power supply output 5 V DC, 3.0 A 9 V DC, 3.0 A 10 V DC, 5.0 A 12 V DC, 5.0 A 15 V DC, 4.3 A 20 V DC, 3.25 A Input terminal One USB Type-C port, one HDMI port, one VGA port Preset - HP Scanjet 1000 | User Guide - Page 41
mode just as it does a preset mode. In addition to the factory preset modes, there are at least 10 user modes that can be entered and stored. Energy saver feature The monitor supports a reduced power state. The reduced power state will be initiated if the monitor detects the absence of either the - HP Scanjet 1000 | User Guide - Page 42
See the computer manual for instructions on setting energy saver features (sometimes called power management features). NOTE: The energy saver feature only works when the monitor is connected to a computer that - HP Scanjet 1000 | User Guide - Page 43
establishes seven key objectives to guide HP actions. All HP managers and employees are expected to support these objectives and their implementation in Support internal and external research and development that improves assistive technology relevant to HP products and services. ● Support and - HP Scanjet 1000 | User Guide - Page 44
the accessibility features on your HP product, see Contacting support on page 41. Additional links to external partners and suppliers that may provide additional assistance: ● Microsoft Accessibility information (Windows 7, Windows 8, Windows 10, Microsoft Office) ● Google Products accessibility - HP Scanjet 1000 | User Guide - Page 45
of covered products. Specific criteria cover software applications and operating systems, web-based requirements applicable to ICT products and services, together with a description of and neurological disabilities, and by older web users with accessibility needs. WCAG 2.0 provides characteristics of - HP Scanjet 1000 | User Guide - Page 46
list. These organizations are provided for informational purposes only. HP assumes no responsibility for information or contacts you encounter on the Internet. Listing on this page does not imply endorsement by HP. Organizations ● American Association of People with Disabilities (AAPD) ● - HP Scanjet 1000 | User Guide - Page 47
Our contact webform HP comfort and safety guide HP public sector sales Contacting support NOTE: Support is in English only. ● Customers who are deaf or hard of hearing who have questions about technical support or accessibility of HP products: - Use TRS/VRS/WebCapTel to call (877) 656-7058 Monday
-
 1
1 -
 2
2 -
 3
3 -
 4
4 -
 5
5 -
 6
6 -
 7
7 -
8
-
9
-
10
-
11
-
12
-
13
-
14
-
15
-
16
-
17
-
18
-
19
-
20
-
21
-
22
-
23
-
24
-
25
-
26
-
27
-
28
-
29
-
30
-
31
-
32
-
33
-
34
-
35
-
36
-
37
-
38
-
39
-
40
-
41
-
42
-
43
-
44
-
45
-
46
-
47
 |
 |

User Guide