HP Server rp4440 User Service Guide, Fifth Edition - HP 9000 rp4410/4440
HP Server rp4440 Manual
 |
View all HP Server rp4440 manuals
Add to My Manuals
Save this manual to your list of manuals |
HP Server rp4440 manual content summary:
- HP Server rp4440 | User Service Guide, Fifth Edition - HP 9000 rp4410/4440 - Page 1
HP 9000 rp4410 and HP 9000 rp4440 User Service Guide HP Part Number: A9950-96011-ed5 Published: October 2009 Edition: 5 - HP Server rp4440 | User Service Guide, Fifth Edition - HP 9000 rp4410/4440 - Page 2
to change without notice. The only warranties for HP products and services are set forth in the express warranty statements accompanying such products and services. Nothing herein should be construed as constituting an additional warranty. HP shall not be liable for technical or editorial errors - HP Server rp4440 | User Service Guide, Fifth Edition - HP 9000 rp4410/4440 - Page 3
Identifier 19 Related Documents...19 HP Encourages Your Comments...19 1 Overview...21 HP 9000 rp4410 and rp4440 Server Views 21 Detailed Server Description...23 I/O Subsystem...23 Internal Core I/O...23 External Core I/O...23 Processors...24 Memory...24 Cooling...24 Power Supply Unit...24 Front - HP Server rp4440 | User Service Guide, Fifth Edition - HP 9000 rp4410/4440 - Page 4
Using the iLO MP 41 Powering Off the Server Manually 41 2 System Specifications 43 System Configuration...43 Dimensions and Values...43 Grounding...44 Electrical Specifications...44 AC Power Cords...44 Circuit Breaker...44 System Power Specifications...45 Power and Cooling...46 Environmental - HP Server rp4440 | User Service Guide, Fifth Edition - HP 9000 rp4410/4440 - Page 5
Power Supplies and Disk Drives 74 Installing Hot-Swappable Power Supplies 74 Power Supply Load Order...74 Installing Hot-Pluggable Disk Drives 75 Installing Processors...77 Required Hardware Errors 96 Troubleshooting PCI/PCI-X Hot Server Into a Rack, Non-HP Rack, or Pedestal 102 Table of Contents - HP Server rp4440 | User Service Guide, Fifth Edition - HP 9000 rp4410/4440 - Page 6
On the Server Manually 116 Powering Off the Server...116 Powering Off the Server Using the iLO MP PC Command 116 Powering Off the Server Manually 116 Booting the Operating System...116 Supported Operating System...116 Booting and Shutting Down HP-UX 117 Standard HP-UX Booting Using Boot Console - HP Server rp4440 | User Service Guide, Fifth Edition - HP 9000 rp4410/4440 - Page 7
Shutting Down HP-UX...126 Verifying the Server Configuration Using Boot Console Handler 127 5 Troubleshooting...129 Troubleshooting Methodology...129 Troubleshooting System Power...129 Using the Front Panel Power Button 129 Server Does Not Successfully Power On and Remain Powered On 130 System - HP Server rp4440 | User Service Guide, Fifth Edition - HP 9000 rp4410/4440 - Page 8
Ranks 156 Removing Memory DIMMs...157 Installing Memory DIMMs...157 Supported DIMM Sizes...159 DIMM Slot Fillers...159 Installing DIMMs... Time Required...194 Upgrade Tasks...194 Simplex Configuration Upgrade 194 Duplex Configuration Upgrade 195 Back Up Your Data...195 Removing Server Components - HP Server rp4440 | User Service Guide, Fifth Edition - HP 9000 rp4410/4440 - Page 9
...202 Accessing the SCSI Backplane 202 Converting to Simplex...202 Installing Server Components 206 Verifying the Upgrade Installation 206 Removing and Replacing Core I/O Cards 207 Safety Information...207 Required Service Tools...207 PCI Slot Locations and Configurations 207 Removing the LAN - HP Server rp4440 | User Service Guide, Fifth Edition - HP 9000 rp4410/4440 - Page 10
Submenus 236 Boot Command...236 Path Command...236 Search Command...237 Configuration Menu...237 Information Menu...238 Service Menu...238 Display Command...239 SCSI Command...239 ProductNum Command...239 iLO MP...239 C Physical and Environmental Specifications 241 Index...243 10 Table of Contents - HP Server rp4440 | User Service Guide, Fifth Edition - HP 9000 rp4410/4440 - Page 11
22 1-2 HP 9000 rp4410/rp4440 Server with Bezel Removed (Front View 22 1-3 HP 9000 rp4410/rp4440 Server (Rear View 23 1-4 Control Panel - Front View of Server (with Bezel 26 1-5 Accessing the Control Panel...26 1-6 Control Panel LEDs and Buttons 27 1-7 Rear Panel LEDs...29 1-8 Power Supply Status - HP Server rp4440 | User Service Guide, Fifth Edition - HP 9000 rp4410/4440 - Page 12
3-39 Installing the SCSI Cable B to the SCSI Adapter Board 101 3-40 Ports on Server Rear...104 3-41 iLO MP Setup Flowchart...106 3-42 Web Login Page...113 3-43 I/O Chassis Fans Removal and Replacement 173 6-20 Hot-Swappable Power Supply Chassis Fan Removal and Replacement 174 6-21 I/O Baseboard - HP Server rp4440 | User Service Guide, Fifth Edition - HP 9000 rp4410/4440 - Page 13
Filler in Slot 2 213 6-50 SCSI Backplane Removal and Replacement 215 6-51 Midplane Riser Board...217 6-52 Hot-Swappable Power Supply Removal and Replacement 219 6-53 Power Distribution Board Removal and Replacement 221 6-54 DVD Drive Removal and Replacement 223 6-55 DVD I/O Board Removal and - HP Server rp4440 | User Service Guide, Fifth Edition - HP 9000 rp4410/4440 - Page 14
, Buttons, and Sensors 39 1-17 Power States...40 2-1 Minimum and Maximum Server Configurations 43 2-2 Server Dimensions and Values...43 2-3 Power Cords...44 2-4 System Power Specifications...45 2-5 System Power Requirements...45 2-6 Typical Configuration Power Values 46 2-7 Physical and - HP Server rp4440 | User Service Guide, Fifth Edition - HP 9000 rp4410/4440 - Page 15
Board Indicators, Connectors, and Jumpers 147 6-1 DIMM Filler Requirements for 16-DIMM Memory Extender Board 157 6-2 DIMM Filler Requirements for 32-DIMM Memory Extender Board 158 6-3 Processor Submenus, and Commands 235 B-2 Boot Paths...236 C-1 Physical and Environmental Specifications 241 15 - HP Server rp4440 | User Service Guide, Fifth Edition - HP 9000 rp4410/4440 - Page 16
16 - HP Server rp4440 | User Service Guide, Fifth Edition - HP 9000 rp4410/4440 - Page 17
-UX 11i v1 HP-UX 11i v1 HP 9000 rp4410 and rp4440 HP 9000 rp4410 and rp4440 April 2005 July 2003 Document Organization This guide is divided into the following chapters: Chapter 1 Overview: Provides views and descriptions of the server. Chapter 2 System Specifications: Server details such as - HP Server rp4440 | User Service Guide, Fifth Edition - HP 9000 rp4410/4440 - Page 18
the utilities on the server such as Boot Console Handler (BCH) and iLO MP. Physical and Environmental Specifications: Provides temperature and airflow information for minimum, typical, and maximum configurations for the server. It also lists the server and rack weights and dimensions. Typographic - HP Server rp4440 | User Service Guide, Fifth Edition - HP 9000 rp4410/4440 - Page 19
and event monitoring tools, is available on the HP website at: http://docs.hp.com/hpux/diag/ This site has manuals, tutorials, FAQs, and other reference material. Website for HP Technical Support: http://us-support2.external.hp.com/ Books about HP-UX Published by Prentice Hall This website lists - HP Server rp4440 | User Service Guide, Fifth Edition - HP 9000 rp4410/4440 - Page 20
20 - HP Server rp4440 | User Service Guide, Fifth Edition - HP 9000 rp4410/4440 - Page 21
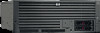
1 Overview The HP 9000 rp4410 and the HP 9000 rp4440 servers are designed to be easy to install, service, and maintain. They deliver performance, reliability, and availability in a compact, rack-dense design to meet the most demanding enterprise-level computing requirements. A rack-dense 4U form- - HP Server rp4440 | User Service Guide, Fifth Edition - HP 9000 rp4410/4440 - Page 22
Figure 1-1 HP 9000 rp4410/rp4440 Server (Top View) Figure 1-2 HP 9000 rp4410/rp4440 Server with Bezel Removed (Front View) 22 Overview - HP Server rp4440 | User Service Guide, Fifth Edition - HP 9000 rp4410/4440 - Page 23
card • PCI Gigabit, Fast Ethernet Controller with Wake-on-LAN enabled/disabled with BIOS setup Internal Core I/O The following is supported on the HP 9000 rp4410 and rp4440 servers: • Dual channel SCSI U320 or U160 (PA8800 only) interface or RAID, two internal 68-pin connectors, two 68-pin external - HP Server rp4440 | User Service Guide, Fifth Edition - HP 9000 rp4410/4440 - Page 24
interleaved mode and chip spare • Requires that DIMMs within each group of four (quad) be identical Cooling Six cooling fans with N+1 redundancy. Power Supply Unit The following is supported on the HP 9000 rp4410 and rp4440 servers: • One 1200 W hot-swappable power supply • Optional second 1200 - HP Server rp4440 | User Service Guide, Fifth Edition - HP 9000 rp4410/4440 - Page 25
these events helps you diagnose and troubleshoot problems with the server. Dimensions and Values Table 1-1 lists the dimensions and their values of the HP 9000 rp4410 and rp4440 servers. Table 1-1 Server Dimensions and Values Dimensions Height Width Depth Weight Value 6.8 in (17.3 cm) 19 in - HP Server rp4440 | User Service Guide, Fifth Edition - HP 9000 rp4410/4440 - Page 26
Figure 1-4 Control Panel - Front View of Server (with Bezel) Figure 1-5 shows how to access the control panel. The front control panel access door is on the bezel. Figure 1-5 Accessing the Control Panel Figure 1-6 shows the control panel LEDs and buttons. 26 Overview - HP Server rp4440 | User Service Guide, Fifth Edition - HP 9000 rp4410/4440 - Page 27
normal Housekeeping voltage present Power off Disk activity Thermal OK Thermal warning • System locator LED can be remotely or locally activated or deactivated • There is also a locator button on the rear panel of the server • Pressing either button turns both LEDs on or off and enables or disables - HP Server rp4440 | User Service Guide, Fifth Edition - HP 9000 rp4410/4440 - Page 28
than one second, but less than five seconds-do not use. This initiates e-buzzer functions that are not supported on the server. • More than five seconds then released causes an immediate hard power off. NMI Button Use a paper clip to press this button. Press the non-maskable interrupt (NMI) button - HP Server rp4440 | User Service Guide, Fifth Edition - HP 9000 rp4410/4440 - Page 29
status LED reports a consolidated status of all the power supplies. Figure 1-8 show the power supply status LEDs. Figure 1-8 Power Supply Status LED Table 1-4 lists power supply status LED information. Table 1-4 Power Supply Status LED Power LED (Green) Off Off Blinking Predict Fail LED (Amber - HP Server rp4440 | User Service Guide, Fifth Edition - HP 9000 rp4410/4440 - Page 30
(Amber) Status Off On Off Blinking PSU dc outputs are on and OK. Power supply failure. Predictive failure. The PSU is about to fail because of a poorly NOTE: There are two different iLO MP cards that were installed in this server. They have different LEDs on them. Both of them are shown below. - HP Server rp4440 | User Service Guide, Fifth Edition - HP 9000 rp4410/4440 - Page 31
Figure 1-10 iLO MP LAN LEDs - Example 2 Table 1-6 provides iLO MP LED status descriptions. Table 1-6 iLO MP LED Status Descriptions - Example 2 LED 100 M green 100 M green 10 M amber 10 M amber Condition On Blinking On Blinking Status Linked at 100 MBs, no activity Linked at 100 MBs, activity - HP Server rp4440 | User Service Guide, Fifth Edition - HP 9000 rp4410/4440 - Page 32
/s Link speed 100 Mbit/s Link speed 1000 Mbit/s Ports and Connectors Figure 1-13 shows the ports and connectors found on the rear panel of the server. 32 Overview - HP Server rp4440 | User Service Guide, Fifth Edition - HP 9000 rp4410/4440 - Page 33
Figure 1-13 Server Rear View The SCSI HBA card in slot 1 and the Gigabit Ethernet card +5 VDC MR PR Ground VGA Port The VGA (video) port is disabled on the rp4410 and rp4440 servers. Serial Ports Figure 1-15 and Table 1-10 show the serial port connector and pinouts. Controls, Ports, and LEDs - HP Server rp4440 | User Service Guide, Fifth Edition - HP 9000 rp4410/4440 - Page 34
Figure 1-15 Serial Port Connector Table 1-10 Serial Port Pinouts Pin Number 1 2 3 4 5 6 7 8 9 Signal Description Data carrier detect Receive data Transmit data Data term ready Ground Data set ready Request to send Clear to send Ring indicator iLO MP LAN Port Figure 1-16 and Table 1-11 show the - HP Server rp4440 | User Service Guide, Fifth Edition - HP 9000 rp4410/4440 - Page 35
, Ultra 3, 68-Pin Two Ultra 3, 68-pin SCSI connectors are located on the HBA located in PCI slot 1. The upper connector supports SCSI channel A and the lower connector supports SCSI channel B. Figure 1-18 and Table 1-13 show the SCSI port connector and pinouts. Figure 1-18 SCSI Port, Ultra 3, 68-Pin - HP Server rp4440 | User Service Guide, Fifth Edition - HP 9000 rp4410/4440 - Page 36
Table 1-13 SCSI Port Pinouts (continued) Pin Number 6 7 8 9 10 11 12 13 14 15 16 17 18 19 20 21 22 23 24 25 26 27 28 29 30 31 32 33 34 Signal Description S6 (+DB 0) S7 (+DB 1) S8 (+DB 2) S9 (+DB 3) S10 (+DB 4) S11 (+DB5) S12 (+DB 6) S13 (+DB 7) S14 (+DB P) S15 S16 (DIFFSENS) S17 (TERMPWR) S18 ( - HP Server rp4440 | User Service Guide, Fifth Edition - HP 9000 rp4410/4440 - Page 37
Drive is active Drive is operating (power applied) DVD Drives The server is delivered with one DVD drive. DVD required. Accessing the QuickFind Diagnostic Panel You can access the QuickFind diagnostic panel by removing the top cover. Use the QuickFind diagnostic panel as an aid in troubleshooting - HP Server rp4440 | User Service Guide, Fifth Edition - HP 9000 rp4410/4440 - Page 38
Figure 1-21 QuickFind Diagnostic Panel I/O Baseboard LED Indicators The following indicators are located on the I/O baseboard: • LEDs • Sensors • Reset button • Attention button Figure 1-22 shows the I/O baseboard LEDs, buttons, and sensors and Table 1-16 lists their definitions. 38 Overview - HP Server rp4440 | User Service Guide, Fifth Edition - HP 9000 rp4410/4440 - Page 39
LED iLO MP Heartbeat iLO MP Self Test LED Color Green Green Green Green Amber BMC Heartbeat Green 3.3 VSB Power LED Green iLO MP Soft Reset Button N/A Status On On On Blinking On Off Blinking On Press Condition 12 V VRM is functioning 5 V VRM is functioning 3.3 V - HP Server rp4440 | User Service Guide, Fifth Edition - HP 9000 rp4410/4440 - Page 40
On through the iLO MP PR command, the server automatically powers on to the full power state. To power on the server using the iLO MP, follow these steps: 1. Plug all power cables into the receptacles on the rear panel of the server. 2. Initiate a console session, and access the MP Main Menu. 3. To - HP Server rp4440 | User Service Guide, Fifth Edition - HP 9000 rp4410/4440 - Page 41
cables from the receptacles on the rear panel of the server. Powering Off the Server Manually To manually power off the server, follow these steps: 1. Gracefully shut down the operating system. 2. To power off the server, press the power button. IMPORTANT: The main DC voltage is now removed from - HP Server rp4440 | User Service Guide, Fifth Edition - HP 9000 rp4410/4440 - Page 42
42 - HP Server rp4440 | User Service Guide, Fifth Edition - HP 9000 rp4410/4440 - Page 43
specifications, and requirements for the HP 9000 rp4410 or rp4440 server. System Configuration Table 2-1 lists the minimum and maximum configuration options for the HP 9000 rp4410 and rp4440 servers Maximum memory is 128 GB. Supported DDR Maximum memory is 128 GB. Supported DDR DIMM sizes: 256 MB - HP Server rp4440 | User Service Guide, Fifth Edition - HP 9000 rp4410/4440 - Page 44
or motor-generator set grounding point. Electrical Specifications This section provides electrical specifications for the server. AC Power Cords Table 2-3 lists the power cables available for use with the HP 9000 rp4410 and rp4440 servers. Table 2-3 Power Cords Part Number 8120-5341 8120-1351 - HP Server rp4440 | User Service Guide, Fifth Edition - HP 9000 rp4410/4440 - Page 45
power needed for your computer room. Table 2-4 lists the ac power requirements for the server. Table 2-4 System Power Specifications Specification Value maximum and typical power requirements for the HP 9000 rp4410 and rp4440 servers. Table 2-5 System Power Requirements Power Required (50-60 Hz - HP Server rp4440 | User Service Guide, Fifth Edition - HP 9000 rp4410/4440 - Page 46
2-6 lists the typical configuration power values for HP 9000 rp4410 and rp4440 servers. Table 2-6 Typical Configuration Power Values CPU Memory Qty Gigabytes Specifications This section provides the temperature and humidity requirements, noise emission, and air flow specifications for the server. - HP Server rp4440 | User Service Guide, Fifth Edition - HP 9000 rp4410/4440 - Page 47
fan circuit controls the power and the pulse-width required temperature rating of the PCI cards. CAUTION: For maximum cooling effects, ensure that the chassis ventilation holes are not blocked or covered after installation. Figure 2-1 shows the airflow through the server. Environmental Specifications - HP Server rp4440 | User Service Guide, Fifth Edition - HP 9000 rp4410/4440 - Page 48
, typical, and maximum configurations for the HP 9000 rp4410 and rp4440 servers. It also lists the server and rack weights and dimensions. Table 2-7 Physical and Environmental Specifications Min. Config. Max. Config. Typical Config. Condition Weight Typical Heat Release 180-264 VAC Airflow - HP Server rp4440 | User Service Guide, Fifth Edition - HP 9000 rp4410/4440 - Page 49
Specifications (continued) Condition Typical Heat Release 180-264 VAC Weight Airflow, Nominal Airflow, at Maximum Ambient degrees C1 Server Alone Rack Overall Server (W x D x H) Pedestal Rack Pedestal ASHRAE Airflow cooling scheme (front to rear) Min./ One CPU, one power supply - HP Server rp4440 | User Service Guide, Fifth Edition - HP 9000 rp4410/4440 - Page 50
50 - HP Server rp4440 | User Service Guide, Fifth Edition - HP 9000 rp4410/4440 - Page 51
power supplies, hot-pluggable disk drives, and hot-pluggable PCI-X cards. The supported operating system is HP-UX 11i v1 (and higher HP-UX versions that support PA-RISC systems). Server Views Figure 3-1, Figure 3-2, and Figure 3-3 show the top, front, and rear views of the HP 9000 rp4410 and rp4440 - HP Server rp4440 | User Service Guide, Fifth Edition - HP 9000 rp4410/4440 - Page 52
View) Figure 3-3 HP 9000 rp4410 and rp4440 Servers (Rear View) Detailed Server Description The following sections list information on the main subsystems within the HP 9000 rp4410 and rp4440 servers. I/O Subsystem The following is supported on the HP 9000 rp4410 and rp4440 servers: • PCI-X slots - HP Server rp4440 | User Service Guide, Fifth Edition - HP 9000 rp4410/4440 - Page 53
interleaved mode and chip spare. • Requires that DIMMs within each group of four (quad) be identical. Cooling Six cooling fans with N+1 redundancy. Power Supply Unit The following is supported on the HP 9000 rp4410 and rp4440 servers: • One 1200 W hot-swappable power supply. • Optional second 1200 - HP Server rp4440 | User Service Guide, Fifth Edition - HP 9000 rp4410/4440 - Page 54
. Reviewing these events helps you diagnose and troubleshoot problems with the server. Dimensions and Values Table 3-1 lists the dimensions and values of the HP 9000 rp4410 and rp4440 servers. Table 3-1 Server Dimensions and Values Dimension Height Width Depth Weight Value 6.8 in (17.3 cm) 19 in - HP Server rp4440 | User Service Guide, Fifth Edition - HP 9000 rp4410/4440 - Page 55
, follow the instructions provided in this guide. • If installing a hot-swappable or hot-pluggable component when power is applied (fans are running), reinstall the server cover immediately to prevent overheating. • If installing a hot-pluggable component, complete the required software intervention - HP Server rp4440 | User Service Guide, Fifth Edition - HP 9000 rp4410/4440 - Page 56
to the server console. 3. Verify electrical requirements and ensure that grounding specifications and power requirements are met. 4. Validate server physical space requirements. 5. Confirm environmental requirements. Inspecting the Shipping Containers for Damage HP shipping containers protect - HP Server rp4440 | User Service Guide, Fifth Edition - HP 9000 rp4410/4440 - Page 57
Components This section describes how to install server components that are not installed before delivery. Service Tools Required Service of this product can require one or more of the following tools: • Electrically Conductive Field Service Kit (HP part number 9300-1155) • 1/4 inch flat blade - HP Server rp4440 | User Service Guide, Fifth Edition - HP 9000 rp4410/4440 - Page 58
Accessing a Rack-Mounted Server The HP 9000 rp4410 and rp4440 servers are designed to be rack mounted. The following procedure explains how to gain access to a server that is mounted in an approved rack. WARNING! Before extending the server, ensure that all anti-tip features are employed (front and - HP Server rp4440 | User Service Guide, Fifth Edition - HP 9000 rp4410/4440 - Page 59
Accessing a Pedestal-Mounted Server The HP 9000 rp4410 and rp4440 servers are also designed to be mounted in a pedestal (non-rack). You do not need to remove the pedestal from the server to gain access to internal components. The front bezel, front cover, and top cover can be removed with the - HP Server rp4440 | User Service Guide, Fifth Edition - HP 9000 rp4410/4440 - Page 60
Figure 3-6 Front View with Bezel Figure 3-7 Accessing the Control Panel Figure 3-8 Control Panel Table 3-3 and Table 3-4 list the control panel LED and button LED status and descriptions. 60 Installing the System - HP Server rp4440 | User Service Guide, Fifth Edition - HP 9000 rp4410/4440 - Page 61
up and running OS booting or at BCH Warning-System needs attention Redundancy lost, component failure pending Hard fault, server halted System off Power normal Housekeeping voltage present Power off Disk activity Thermal OK Thermal warning System locator LED can be remotely or locally activated and - HP Server rp4440 | User Service Guide, Fifth Edition - HP 9000 rp4410/4440 - Page 62
one second, but less than five seconds, do not use. This initiates e-buzzer functions that are not supported in the server. • More than five seconds then released, causes an immediate hard power off. NMI Button Use a paper clip to press this button. Press the non-maskable interrupt (NMI) button - HP Server rp4440 | User Service Guide, Fifth Edition - HP 9000 rp4410/4440 - Page 63
LED Indicators Table 3-6 DVD Drive LED Definitions LED Activity LED State Flashing green Description Drive is active Front Bezel You do not need to power off the server to remove the front bezel. Removing the Front Bezel To remove the front bezel, grasp the front bezel at the outer edges and - HP Server rp4440 | User Service Guide, Fifth Edition - HP 9000 rp4410/4440 - Page 64
top cover is replaced at the end of the operation, the chassis fans return to normal speed. Removing the Front Cover CAUTION: Power the server off before removing the front cover. All the components that are accessible behind the front cover are cold-swappable and require power to be off. To remove - HP Server rp4440 | User Service Guide, Fifth Edition - HP 9000 rp4410/4440 - Page 65
front cover in place. Figure 3-12 Removing and Replacing the Front Cover 4. Raise the cover slightly, and pull the cover toward the front of the server to free the tabs from the slots in the center of the chassis. Replacing the Front Cover To replace the front cover, follow these steps - HP Server rp4440 | User Service Guide, Fifth Edition - HP 9000 rp4410/4440 - Page 66
until it seats. 2. Tighten the two thumbscrews securely. Hot-Swappable Chassis Fan Units There are three hot-swappable chassis fan units in the server. • Fan units 0, 1, and 2 are in the center of the chassis, spanning the full chassis width. • Fan units 0 and 1 are interchangeable and are in - HP Server rp4440 | User Service Guide, Fifth Edition - HP 9000 rp4410/4440 - Page 67
Figure 3-14 Hot-Swappable I/O Fans (Units 0 and 1) • Fan unit 2 is smaller and fits into the right-most position behind the power supply. Fan unit 2 cannot be installed in the left or center positions. Installing Additional Components 67 - HP Server rp4440 | User Service Guide, Fifth Edition - HP 9000 rp4410/4440 - Page 68
to follow ESD safety precautions can result in damage to the server. NOTE: A hot-swappable device does not require interaction with the operating system before the device is removed from or installed into the server. The ac power to the server does not need to be off to remove or replace a hot - HP Server rp4440 | User Service Guide, Fifth Edition - HP 9000 rp4410/4440 - Page 69
two minutes a soft-shutdown of the server occurs. Replacing a Hot-Swappable Fan Unit To replace a hot-swappable I/O or power supply fan unit, follow these steps: For assistance with this procedure, contact your local HP Authorized Service Provider. Observe all ESD safety precautions before attempting - HP Server rp4440 | User Service Guide, Fifth Edition - HP 9000 rp4410/4440 - Page 70
6. Lift up on the locking lever attached to the side of the power supply cage to unplug the I/O baseboard assembly from the socket on the midplane riser board. Figure 3-16 I/O Baseboard Locking Lever 70 Installing the System - HP Server rp4440 | User Service Guide, Fifth Edition - HP 9000 rp4410/4440 - Page 71
, ensure the I/O baseboard locking lever is in the up position. CAUTION: The I/O baseboard assembly is large. Use care when sliding it into the server chassis. 3. With the I/O baseboard flush against the midplane riser board socket, push down firmly on the locking lever until the I/O baseboard plugs - HP Server rp4440 | User Service Guide, Fifth Edition - HP 9000 rp4410/4440 - Page 72
. Dispose of used batteries according to the manufacturer's instructions. Replacing the System Battery CAUTION: Before replacing the , follow these steps: 1. If rack-mounted, slide the server out from the rack until it stops. See "Extend the Server from the Rack" (page 58). 2. Remove the top cover - HP Server rp4440 | User Service Guide, Fifth Edition - HP 9000 rp4410/4440 - Page 73
off the system. b. Unplug the power cord. c. Wait for a minute before turning it back on. d. Run the DATE command again. If the time and date are now correct, you installed the system battery correctly. 10. If necessary, reconfigure the iLO MP. See "Console Setup" (page 104). Installing Additional - HP Server rp4440 | User Service Guide, Fifth Edition - HP 9000 rp4410/4440 - Page 74
off to install a hot-swappable power supply. Installing Hot-Swappable Power Supplies This section provides instructions on how to install power supplies. Power Supply Load Order The supported configuration of an HP 9000 rp4410 or rp4440 server requires a minimum of one power supply. You can install - HP Server rp4440 | User Service Guide, Fifth Edition - HP 9000 rp4410/4440 - Page 75
Slot P1 4. Supporting the power supply with both hands, slide it into slot P1 until it plugs into the socket on the internal power supply board. Hand tighten the thumbscrew. 5. Install the power cord into the power supply socket and secure it to the power cord bracket. 6. Apply power (200 - 240 - HP Server rp4440 | User Service Guide, Fifth Edition - HP 9000 rp4410/4440 - Page 76
1. Remove the volume filler from slot 2. Figure 3-20 Volume Filler Installation in Slot 2 NOTE: For cooling purposes, always leave the volume filler in slot 2 if you do not use a second disk drive. 2. Slide the hot-pluggable disk drive into slot 2 until it is seated. Figure 3-21 Installing a Disk - HP Server rp4440 | User Service Guide, Fifth Edition - HP 9000 rp4410/4440 - Page 77
-RISC/Itanium dipswitch is set to PA-RISC for the HP 9000 rp4410 and rp4440 servers. If this switch is incorrectly set, the system does not enter into self test. Required Tools To install processors in the server, use the CPU Install Kit (HP part number 5069-5441). This kit consists of the following - HP Server rp4440 | User Service Guide, Fifth Edition - HP 9000 rp4410/4440 - Page 78
service bay, directly under the memory extender board. If you are installing fewer than the maximum number of dual processor modules (one in the rp4410 server or fewer than four in the rp4440 server the server whenever an AC power source is connected. This voltage is present even when the main power - HP Server rp4440 | User Service Guide, Fifth Edition - HP 9000 rp4410/4440 - Page 79
Figure 3-23 Extender Board Latches 5. To unplug the processor extender board from the socket, pull out on the extraction levers located on the midplane riser board . 6. Pull out the processor extender board from the chassis. Figure 3-24 Removing the Processor Extender Board Installing Additional - HP Server rp4440 | User Service Guide, Fifth Edition - HP 9000 rp4410/4440 - Page 80
attempting this procedure. Failure to follow ESD safety precautions can result in damage to the server. NOTE: Before installing a processor into the server, read the following instructions carefully for a complete understanding of this process. To install a processor on the extender board, follow - HP Server rp4440 | User Service Guide, Fifth Edition - HP 9000 rp4410/4440 - Page 81
cable is not pinched between the heatsink and sheet metal frame of the extender board. Also, ensure that the two power cable ends attached to the dual processor module do not come unplugged from their sockets when you move the cable into place under the heatsink. See Figure 3- - HP Server rp4440 | User Service Guide, Fifth Edition - HP 9000 rp4410/4440 - Page 82
6. Lock the assembly to the socket by rotating the cam on the socket 180 degrees clockwise using the CPU Install Tool or 2.5-mm Allen wrench. TIP: When rotating the locking cam, hold the palm of your hand on top of the assembly and exert light pressure. This ensures that the assembly stays flush and - HP Server rp4440 | User Service Guide, Fifth Edition - HP 9000 rp4410/4440 - Page 83
IMPORTANT: Do not overtighten the four shoulder screws. They can shear off if overtightened. Stop tightening the shoulder screws when you feel them bottom out. 11. Using the CPU Install Tool (Torx T15 driver), finish tightening the two thumbscrews. IMPORTANT: Do not overtighten the two thumbscrews. - HP Server rp4440 | User Service Guide, Fifth Edition - HP 9000 rp4410/4440 - Page 84
commands. • To exercise the processor, use MAKODIAG provided by the offline diagnostic environment. Installing Memory The standard configuration of HP 9000 rp4410 and rp4440 servers include a 16-DIMM memory extender board. This extender board must contain a minimum of 1 GB of memory (four 256 MB - HP Server rp4440 | User Service Guide, Fifth Edition - HP 9000 rp4410/4440 - Page 85
Board (continued) 12 DIMMs in quads 0, 1, and 2 Two fillers total: Two fillers in quad 3 16 DIMMs in quads 0, 1, 2, and 3 No fillers required 1 One DIMM filler board covers two adjacent DIMM connectors. Figure 3-28 16-DIMM Memory Extender Board Minimum Configuration Table 3-9 and Figure 3-29 - HP Server rp4440 | User Service Guide, Fifth Edition - HP 9000 rp4410/4440 - Page 86
the front cover. WARNING! Ensure that the system is powered off and all power sources have been disconnected from the server before attempting this procedure. Voltages are present at various locations within the server whenever an ac power source is connected. This voltage is present even when the - HP Server rp4440 | User Service Guide, Fifth Edition - HP 9000 rp4410/4440 - Page 87
6. Remove the memory extender board from the chassis. Figure 3-30 Removing the Memory Extender Board Installing DIMMs To install DIMMs, follow these steps: 1. Align the DIMM with the socket located on the memory extender board (align the notch in the DIMM with the tab in the connector socket). - HP Server rp4440 | User Service Guide, Fifth Edition - HP 9000 rp4410/4440 - Page 88
on each end of the . 2. Align the memory extender board with the left and right chassis guide slots. 3. Slide the memory extender board in until it begins to Bezel" (page 64). Hot-Pluggable PCI/PCI-X The HP 9000 rp4410 and rp4440 servers support PCI/PCI-X hot-pluggable technology and include six hot - HP Server rp4440 | User Service Guide, Fifth Edition - HP 9000 rp4410/4440 - Page 89
HP-UX 11i v1 (and higher). Table 3-10 Hot-Pluggable Hardware and Software Interfaces and OS Availability Hot-Pluggable PCI/PCI-X Interface Hardware interface comprised of the following: -Attention button (doorbell) -Manual retention latch -Power LED -Attention LED -PCI/PCI-X card latch Supported - HP Server rp4440 | User Service Guide, Fifth Edition - HP 9000 rp4410/4440 - Page 90
Figure 3-32 Slot ID Numbering The following describes configuration requirements for slots 1 through 8: • PCI slots 1 and 2 are dedicated for use by the core I/O cards: SCSI HBA card in slot 1 and Gigabit Ethernet LAN card in - HP Server rp4440 | User Service Guide, Fifth Edition - HP 9000 rp4410/4440 - Page 91
and powers off. 5 Maximum bus mode and frequency supported on shared supports USB and the ports are already located on the rear of the server. If you are installing the RAID card A7143A, you must install it into slot 8. If you install this card in any other slot, it interferes with the manual - HP Server rp4440 | User Service Guide, Fifth Edition - HP 9000 rp4410/4440 - Page 92
CAUTION: Do not pull up on the MRL of a powered on, occupied slot or the server will crash. Figure 3-33 PCI/PCI-X OLX Divider Layout 4. Ensure that the MRL and the card latch on the OLX divider are already open and insert the PCI/PCI-X card into the empty slot. (Figure 3-34) 92 Installing the System - HP Server rp4440 | User Service Guide, Fifth Edition - HP 9000 rp4410/4440 - Page 93
again within five seconds to cancel the shutdown. NOTE: Ensure that you fully seat the card into the slot, or undesired results can occur after power is reapplied to the slot. Figure 3-34 Inserting a PCI/PCI-X Card 5. If the PCI/PCI-X card is full size, open the slider gate latch to - HP Server rp4440 | User Service Guide, Fifth Edition - HP 9000 rp4410/4440 - Page 94
the PCI/PCI-X card is full size, close the slider gate latch to secure the end of the card. (Figure 3-35) 7. Push the MRL down until it seats against . 9. Press the Attention button . The power LED starts to blink. Wait until the power LED goes from blinking to steady on. 94 Installing the System - HP Server rp4440 | User Service Guide, Fifth Edition - HP 9000 rp4410/4440 - Page 95
server all the way back into the rack until it stops. OLR CAUTION: For HP service bay. 4. Press the Attention button located on the OLX divider that controls the affected slot. The power LED starts to blink. Wait until the power the end of the server models. You must remove the PCI/PCI-X card manually - HP Server rp4440 | User Service Guide, Fifth Edition - HP 9000 rp4410/4440 - Page 96
operational fault NOTE: If the slot is powered on, it does not power off. If the slot is powered off, it does not power on Blinking Off Slot location is being indicated If power to the slot is on, the slot is functioning normally Troubleshooting PCI/PCI-X Hot-Pluggable Operations Sometimes a PCI - HP Server rp4440 | User Service Guide, Fifth Edition - HP 9000 rp4410/4440 - Page 97
HP 9000 rp4410 or rp4440 server server, follow these steps: • Use an antistatic wrist strap and a grounding mat, such as those included in the Electrically Conductive Field Service Grounding Kit (HP powered off and all power sources have been disconnected from the server required to convert the server - HP Server rp4440 | User Service Guide, Fifth Edition - HP 9000 rp4410/4440 - Page 98
1. Remove the SCSI jumper cable. Figure 3-36 Removing the SCSI Jumper Cable 2. Install the duplex board in the SCSI connector located nearest the disk drive cage. a. Align the bracket tabs with the slots on the side of the disk drive cage. b. Press the bracket against the disk drive cage until the - HP Server rp4440 | User Service Guide, Fifth Edition - HP 9000 rp4410/4440 - Page 99
0 and slot 1 are driven by SCSI channel A. When the duplex board is installed, the slot 1 hard disk drive is now driven by SCSI channel B. If HP-UX was previously installed and whole disk vxfs was not used, the system no longer boots. Figure 3-37 Installing the Duplex Board 3. Secure the duplex - HP Server rp4440 | User Service Guide, Fifth Edition - HP 9000 rp4410/4440 - Page 100
4. Install the SCSI Cable B on the SCSI backplane. (Figure 3-38) a. Release the SCSI Cable B from its stowed position within the chassis. b. Plug the SCSI Cable B connector into the SCSI connector located on the backplane next to the duplex board installed in the previous step. Figure 3-38 - HP Server rp4440 | User Service Guide, Fifth Edition - HP 9000 rp4410/4440 - Page 101
5. Connect the other end of the SCSI Cable B to the SCSI B channel connector on the SCSI Bezel" (page 64).) 6. If rack-mounted, slide the server back into the rack until it stops. (See "Installing the Server Into a Rack, Non-HP Rack, or Pedestal" (page 102).) Installing Additional Components 101 - HP Server rp4440 | User Service Guide, Fifth Edition - HP 9000 rp4410/4440 - Page 102
attach the pedestal to the server, follow the instructions in the kit installation guide. Connecting the Cables This section describes the cables to connect to power the server and to provide LAN connectivity for the server. AC Input Power The HP 9000 rp4410 and rp4440 servers come with one or two - HP Server rp4440 | User Service Guide, Fifth Edition - HP 9000 rp4410/4440 - Page 103
Core I/O Connections Each HP 9000 rp4410 and rp4440 server core I/O includes: end of the power cord into an appropriate outlet. Connecting to the LAN The server has the following ports that provide network connectivity: • iLO MP LAN port. Use this port to access the iLO MP through the LAN. • Console - HP Server rp4440 | User Service Guide, Fifth Edition - HP 9000 rp4410/4440 - Page 104
cable from an available LAN port into a live connection on the network. Console Setup This section describes how to set up and start a console session on the server. Setting Up the Console Setting up the console includes the following steps: • Determine the physical access method to connect cables - HP Server rp4440 | User Service Guide, Fifth Edition - HP 9000 rp4410/4440 - Page 105
• DHCP with DNS • ARP Ping • RS-232 serial port Log in to the iLO MP from a supported web browser or command line using the default user name and password. Change the default user name and password on To assist in the Integrity iLO MP setup process, use this flowchart as a guide. Console Setup 105 - HP Server rp4440 | User Service Guide, Fifth Edition - HP 9000 rp4410/4440 - Page 106
the iLO MP, you must first determine the correct physical connection method. The iLO MP has a separate LAN port from the system LAN port. It requires a separate 106 Installing the System - HP Server rp4440 | User Service Guide, Fifth Edition - HP 9000 rp4410/4440 - Page 107
is enabled or disabled on the server, and if DHCP and DNS services are available to the server. See Table 3-15 for possible scenarios servers with IP addresses, subnet masks, and gateway addresses. All HP 9000 entry class servers with iLO MP are shipped from the factory with DHCP enabled. Console - HP Server rp4440 | User Service Guide, Fifth Edition - HP 9000 rp4410/4440 - Page 108
TIP: HP recommends using the DHCP and DNS method to simplify access MAC address that identifies the hardware on the network. 2. Connect the LAN cable from the server to an active network port. 3. Apply ac power to the server (if not already done). 4. Open a browser, telnet, or SSH client and enter - HP Server rp4440 | User Service Guide, Fifth Edition - HP 9000 rp4410/4440 - Page 109
IP addresses conflict and the servers cannot connect to the network. The LC command enables you to configure an IP address, DNS name, subnet mask, and gateway address. IMPORTANT: To access the iLO MP, use the LC command to ensure you have a console connection through the RS-232 serial port or - HP Server rp4440 | User Service Guide, Fifth Edition - HP 9000 rp4410/4440 - Page 110
appropriately. Supported terminal types instructions on how to configure the software options. 3. To determine the required connection components and the ports used to connect the server to the console device, use Table 3-14. 4. Connect the cables. a. Connect the DB-9 end future troubleshooting. 10 - HP Server rp4440 | User Service Guide, Fifth Edition - HP 9000 rp4410/4440 - Page 111
Admin/Admin). The MP Main Menu screen displays. For security reasons, HP strongly recommends that you modify the default settings during the initial login MP Main Menu screen: MP MAIN MENU: CO: Console VFP: Virtual Front Panel CM: Command Menu CL: Console Logs SL: Show Event Logs HE: Main Menu Help - HP Server rp4440 | User Service Guide, Fifth Edition - HP 9000 rp4410/4440 - Page 112
services, HP recommends leaving at least one local account enabled as an alternate method of access. Accessing the Host Console This section describes the different ways to access the host console of the server. Accessing the Host Console LAN port. It requires a separate LAN drop, IP address - HP Server rp4440 | User Service Guide, Fifth Edition - HP 9000 rp4410/4440 - Page 113
have the following information: • DNS name for the iLO MP LAN. This is found on the toe-tag on the server. • Host name (used when messages are logged or printed). To interact with the iLO MP through the web GUI, option link to display data in the Display screen. Accessing the Host Console 113 - HP Server rp4440 | User Service Guide, Fifth Edition - HP 9000 rp4410/4440 - Page 114
the Graphic Console Using VGA IMPORTANT: Onboard VGA graphics capability is not supported. You must install the A6150 graphics card to enable VGA grpahics support. See "Enabling VGA Graphics Capability" (page 114). The graphics capability of your HP 9000 rp4410 or rp4440 server is not supported. The - HP Server rp4440 | User Service Guide, Fifth Edition - HP 9000 rp4410/4440 - Page 115
graphic console output displays on the monitor screen. Powering the Server On and Off This section provides information and procedures for powering on and powering off the server. Power States The server has three power states: • Standby power • Full power • Off Table 3-17 lists the server power - HP Server rp4440 | User Service Guide, Fifth Edition - HP 9000 rp4410/4440 - Page 116
all power cables from the receptacles on the rear panel of the server. Booting the Operating System This section covers procedures for booting and shutting down an operating system on the server. Supported Operating System The only supported operating system on the HP 9000 rp4410 and rp4440 servers - HP Server rp4440 | User Service Guide, Fifth Edition - HP 9000 rp4410/4440 - Page 117
and shutting down HP-UX on the HP 9000 rp4410 and rp4440 servers. • To boot HP-UX, follow these steps: - "Standard HP-UX Booting Using Boot Console Handler" (page 117) describes the standard way to boot HP-UX. Typically this results in booting HP-UX in multi-user mode. - "Booting HP-UX in Single - HP Server rp4440 | User Service Guide, Fifth Edition - HP 9000 rp4410/4440 - Page 118
power source before proceeding. If a problem is encountered during initial operation, remove any add-in or optional components and retest the server before continuing. Verify basic server operation before installing additional cards and configuring software and hardware for the server requirements - HP Server rp4440 | User Service Guide, Fifth Edition - HP 9000 rp4410/4440 - Page 119
Console Handler (BCH). Descriptions and user information about offline troubleshooting tools are available on the web at: http://www.docs.hp.com. The offline tools are available for downloading at: http://www.software.hp.com. Troubleshooting Using the Server Power Button The server power button - HP Server rp4440 | User Service Guide, Fifth Edition - HP 9000 rp4410/4440 - Page 120
there is a problem. Reseat the power supply. If the problem persists, remove and reseat the board within the server. If the problem persists, replace the power supply or the power supply interface board. • If the console shows that the server is powered on, but server LEDs indicate that power is off - HP Server rp4440 | User Service Guide, Fifth Edition - HP 9000 rp4410/4440 - Page 121
interconnections. If you are experiencing monitor, keyboard, or mouse problems, follow these steps: 1. Check the monitor controls. Adjust contrast and brightness as required. 2. Inspect all power and interconnecting cables. Check that all console connectors are fully engaged. 3. Check that all iLO - HP Server rp4440 | User Service Guide, Fifth Edition - HP 9000 rp4410/4440 - Page 122
instructions. Troubleshooting Using LED Indicators If you suspect a hardware failure during installation, the system LEDs help you identify the problem. 0.5 Hz Green Flashing at 1 Hz Yellow System LED System LED Power LED Power LED Power LED Disk LED Fault Off On On Off Thermal LED Thermal LED - HP Server rp4440 | User Service Guide, Fifth Edition - HP 9000 rp4410/4440 - Page 123
is attached to the top of the power supply cage. This panel contains LEDs server airflow. Check that recently installed items are correctly installed. Check event n/a log n/a n/a An event has occurred that requires attention. Figure 1-21 shows the QuickFind diagnostic panel. Troubleshooting - HP Server rp4440 | User Service Guide, Fifth Edition - HP 9000 rp4410/4440 - Page 124
to solve the problem. • Note failure symptoms and error indications (LEDs and messages) by checking the system event log. • Try to determine precisely what did or did not happen. 2. Collect the following information: • The model number of your server (for example, HP 9000 rp4440) • The product - HP Server rp4440 | User Service Guide, Fifth Edition - HP 9000 rp4410/4440 - Page 125
4 Booting the Operating System This chapter describes procedures for booting and shutting down the HP-UX operating system on the HP 9000 rp4410 and rp4440 servers. Supported Operating System Booting the server loads the operating system, which is essential for running all other programs. You can - HP Server rp4440 | User Service Guide, Fifth Edition - HP 9000 rp4410/4440 - Page 126
to shut down. You should log in to the iLO MP for the server and use the Console menu to access the system console. Accessing the console through the iLO MP enables you to maintain console access to the server after HP-UX has shut down. 3. Issue the shutdown command with the appropriate command-line - HP Server rp4440 | User Service Guide, Fifth Edition - HP 9000 rp4410/4440 - Page 127
Verifying the Server Configuration Using Boot Console Handler To go the Information Menu, enter in from the the PCI device information to determine if the values match the devices installed in the server) 2. Verify the parameters. 3. To return to the BCH Main Menu, use the ma command . Verifying the - HP Server rp4440 | User Service Guide, Fifth Edition - HP 9000 rp4410/4440 - Page 128
128 - HP Server rp4440 | User Service Guide, Fifth Edition - HP 9000 rp4410/4440 - Page 129
power on. No effect. Less than one second No effect. More than one second but less Not used. This selection initiates E-buzzer functions than five seconds that are not supported in the HP 9000 rp4410 and More than five seconds rp4440 servers. Hard shutdown. Troubleshooting Methodology - HP Server rp4440 | User Service Guide, Fifth Edition - HP 9000 rp4410/4440 - Page 130
than one second but less Not used. This selection initiates E-buzzer functions than five seconds that are not supported in the HP 9000 rp4410 and More than five seconds rp4440 servers. Hard shutdown Power on, OS shut down Less than one second No effect More than one second but less Not used - HP Server rp4440 | User Service Guide, Fifth Edition - HP 9000 rp4410/4440 - Page 131
power on using the PC command. If the system does not turn the DC power on, or if it does not remain on, check the SEL for errors as described below. Alternatively, you can press the power button (located behind the front bezel flap) to attempt to enable the DC voltages. Troubleshooting System Power - HP Server rp4440 | User Service Guide, Fifth Edition - HP 9000 rp4410/4440 - Page 132
If the SEL logs do not assist in determining the root cause of the problem, go to "System Build-Up Troubleshooting" (page 132). System Build-Up Troubleshooting To perform the system build-up troubleshooting procedure, follow these steps: 1. Remove all the AC power cords from the power supplies. 132 - HP Server rp4440 | User Service Guide, Fifth Edition - HP 9000 rp4410/4440 - Page 133
the CRU IDs, concentrate on the missing CRU IDs. NOTE: A defective midplane board can cause power on or dc voltage problems. If you do not get the above alert level 5 event, but get another high level alert CRU device - CPU 0 PIROM display, go to the next step. Troubleshooting System Power 133 - HP Server rp4440 | User Service Guide, Fifth Edition - HP 9000 rp4410/4440 - Page 134
BCH. For the rp4440 server, you do not normally see any POST forward progress messages on the console unless you are problems, use the following online tools to help solve your problem: • Support Tools Manager (STM) • Event Monitoring Service (EMS) • iLO MP See "Troubleshooting Using Online Support - HP Server rp4440 | User Service Guide, Fifth Edition - HP 9000 rp4410/4440 - Page 135
the following: (E) Enable Monitoring iLO MP For complete information on the iLO MP see the HP Integrity and HP 9000 Integrated Lights-Out (iLO) Management Processor Operations Guide. The following information provides iLO MP troubleshooting procedures. Troubleshooting Using Online Support Tools 135 - HP Server rp4440 | User Service Guide, Fifth Edition - HP 9000 rp4410/4440 - Page 136
press Ctrl+B. 2. Log in with proper user name and password. 3. To display the console logs, enter cl. The console log displays console history from oldest to newest. 4. To display the system logs, enter sl. The to the screen, enter d (if desired, save this file for reference). 136 Troubleshooting - HP Server rp4440 | User Service Guide, Fifth Edition - HP 9000 rp4410/4440 - Page 137
Offline Support Tools Use the ODE CD to troubleshoot your HP 9000 rp4410 or rp4440 server by accessing the offline diagnostic environment (ODE). ODE Use the ODE to evaluate specific hardware components using a command line interface. To access ODE from your ODE CD, follow these steps: 1. Power on - HP Server rp4440 | User Service Guide, Fifth Edition - HP 9000 rp4410/4440 - Page 138
about the variable. Lists the ODE modules that run on your computer. Runs an ODE module interactively. Runs an ODE module noninteractively. Troubleshooting PCI/PCI-X Hot-Pluggable Operations Sometimes a PCI/PCI-X card does not come online during hot-plugging due to a frequency mismatch between the - HP Server rp4440 | User Service Guide, Fifth Edition - HP 9000 rp4410/4440 - Page 139
slot does not power off during a hot-pluggable removal operation, do not open the manual retention latch (MRL) on the OLX divider. This action causes system failure or operating system crashes. Troubleshooting Using LED Indicators The HP 9000 rp4410 and rp4440 servers have LED indicators located - HP Server rp4440 | User Service Guide, Fifth Edition - HP 9000 rp4410/4440 - Page 140
NOTE: LED behavior is based on firmware. For changes in LED behavior, see your server firmware release notes. Table 5-4 lists the QuickFind diagnostic panel LED definitions. Table 5-4 QuickFind have failed and the module must be replaced. Fan 2 is in front of the power supplies 140 Troubleshooting - HP Server rp4440 | User Service Guide, Fifth Edition - HP 9000 rp4410/4440 - Page 141
in the specified rank (0-7) light. The processors are mismatched. Replace mismatched processor. A required component(s) is not installed in the system. This prevents the server from powering on. The internal temperature of the server has exceeded the warning or critical level. An event has occurred - HP Server rp4440 | User Service Guide, Fifth Edition - HP 9000 rp4410/4440 - Page 142
. Table 5-5 I/O Baseboard LEDs, Buttons, and Sensors LED/Button 12V VRM Power LED 5V VRM Power LED 3.3V VRM Power LED iLO MP heartbeat iLO MP Self Test LED Color Green Green Green Green . The BMC is functioning correctly. Standby power is available. Resets the iLO MP values. 142 Troubleshooting - HP Server rp4440 | User Service Guide, Fifth Edition - HP 9000 rp4410/4440 - Page 143
5-6 lists the 32-DIMM memory extender board LED states. Table 5-6 32-DIMM Memory Extender Board LED States LED 1.25 V power 1.5 V power Color Green Green Status On On Figure 5-6 shows the 16-DIMM memory extender board LEDs. Condition Power OK Power OK Troubleshooting Using LED Indicators 143 - HP Server rp4440 | User Service Guide, Fifth Edition - HP 9000 rp4410/4440 - Page 144
be included in the error message or logged into console or event logs. Table 5-8 describes the disk drive and PCI slot paths for the server. Table 5-8 Internal Disk and DVD Paths Slot mode) 0/1/1/1.0.0 Channel B (duplex mode) 0/1/1/0.1.0 Channel A (duplex mode) 0/0/3/0.0 144 Troubleshooting - HP Server rp4440 | User Service Guide, Fifth Edition - HP 9000 rp4410/4440 - Page 145
to edge of baseboard) ACPI Paths 0/1/1/0 Channel A 0/1/1/1 Channel B 0/1/2 0/1/2/1 (dual-port LAN only) 0/4/1 0/4/2 0/5/1 0/5/2 0/2/1 0/6/1 Core I/O Connections The HP 9000 rp4410 and rp4440 servers include the following core I/O connections: • Two USB ports • One iLO MP - One 10/100 LAN-RJ45 - HP Server rp4440 | User Service Guide, Fifth Edition - HP 9000 rp4410/4440 - Page 146
to the LAN card include one or two 10/100/1000 Base-T LAN RJ45 connectors. - New cards might be available for use in the server. See the available cards on the HP website at http://hp.com. System I/O Board Switches and Jumpers The following descriptions are for reference only. 146 Troubleshooting - HP Server rp4440 | User Service Guide, Fifth Edition - HP 9000 rp4410/4440 - Page 147
S5102 Pos 1 DS1808 DS1921 Slot 7 power J6305 Slot 6 attention P5401 PDH monitor connector RiLoe connector S5102 Pos 2 S5102 Pos 3 Function ac range off Console mux-off Manufacturing/ schmoo-off Manual power on/off VGA enable off for the rp4410/ rp4440 N/A N/A System I/O Board Switches and - HP Server rp4440 | User Service Guide, Fifth Edition - HP 9000 rp4410/4440 - Page 148
iLO N/A MP card LAN DB-15 analog video N/A DB-9 N/A remote/console RS-232 DB-9 auxillary N/A RS-232 DB-9 local RS-232 N/A Frequency input for N/A margin Function N/A N/A N/A N/A N/A N/A N/A N/A N/A N/A N/A N/A N/A N/A N/A N/A N/A N/A N/A N/A N/A N/A N/A N/A N/A N/A 148 Troubleshooting - HP Server rp4440 | User Service Guide, Fifth Edition - HP 9000 rp4410/4440 - Page 149
. Required Service Tools Service of this product may require one or more of the following tools: • Electrically Conductive Field Service Kit (HP part number 9300-1155) • 1/4 inch flat blade screwdriver • ACX-15 Torx screwdriver Accessing a Rack-Mounted Server The HP 9000 rp4410 and rp4440 servers - HP Server rp4440 | User Service Guide, Fifth Edition - HP 9000 rp4410/4440 - Page 150
instructions, review the document titled Installation Guide, Mid-Weight Slide Kit, 5065-7291. This document can be accessed in the HP website at http://www.hp.com/racksolutions. WARNING! Ensure that all anti-tip features are employed before extending the server (front and rear ant-itip feet - HP Server rp4440 | User Service Guide, Fifth Edition - HP 9000 rp4410/4440 - Page 151
a Pedestal-Mounted Server The HP 9000 rp4410 and rp4440 servers are also designed for use in a stand-alone pedestal (rackless) environment. A pedestal is available for use with the server in a floor- or pedestal-mount configuration. You do not need to remove the pedestal from the server to gain - HP Server rp4440 | User Service Guide, Fifth Edition - HP 9000 rp4410/4440 - Page 152
the top cover is replaced at the end of the operation, the chassis fans return to normal speed. Removing the Front Cover CAUTION: Power the server off before removing the front cover. All components accessible behind the front cover are cold-swappable and require power to be off. To remove the front - HP Server rp4440 | User Service Guide, Fifth Edition - HP 9000 rp4410/4440 - Page 153
the front cover in place. Figure 6-4 Removing and Replacing the Front Cover 4. Raise the cover slightly, and pull the cover toward the front of the server to free the tabs from the slots in the center of the chassis. Replacing the Front Cover To replace the front cover, follow these steps - HP Server rp4440 | User Service Guide, Fifth Edition - HP 9000 rp4410/4440 - Page 154
Figure 6-5 Removing and Replacing the Top Cover Replacing the Top Cover To replace the top cover, follow these steps: 1. Align the tabs at the rear of the top cover with the corresponding slots in the chassis. Fully seat the tabs into the slots, and push the top cover forward until it seats. 2. - HP Server rp4440 | User Service Guide, Fifth Edition - HP 9000 rp4410/4440 - Page 155
16 DIMMs. The optional high capacity memory extender board can hold up to 32 DIMMs. WARNING! Ensure that the system is powered off and all power sources have been disconnected from the server before removing or replacing a memory extender board. Voltages are present at various locations within the - HP Server rp4440 | User Service Guide, Fifth Edition - HP 9000 rp4410/4440 - Page 156
unlocked position. 2. Align the memory extender board with the front and rear chassis guide slots. 3. Slide the memory extender board in until it begins to seat in necessary to ensure that the memory is properly reallocated upon server boot. To ensure the repaired memory rank reallocates properly, - HP Server rp4440 | User Service Guide, Fifth Edition - HP 9000 rp4410/4440 - Page 157
standard configuration of HP 9000 rp4410 and rp4440 servers includes a 16-DIMM memory extender board. This extender board must contain a minimum of one GB of memory (four 256 MB DIMMs loaded in quad 0 [connectors 0A, 0B, 0C, and 0D]). Table 6-1 and Figure 6-8 show the filler requirements and slot - HP Server rp4440 | User Service Guide, Fifth Edition - HP 9000 rp4410/4440 - Page 158
loaded in quad 0 (connectors 0A, 0B, 0C, and 0D)]. Table 6-2 and Figure 6-9 show the filler requirements and slot IDs for the 32-DIMM memory extender board. Table 6-2 DIMM Filler Requirements for 32-DIMM Memory Extender Board DIMMs Loaded Fillers required1 4 DIMMs in quad 0 12 fillers total - HP Server rp4440 | User Service Guide, Fifth Edition - HP 9000 rp4410/4440 - Page 159
- DIMM boards. When adding DIMMs, you must use a minimum of four like sized DIMMs in the next available quad. Supported DIMM Sizes You can install up to 128 GB of memory in the server. Supported DIMM sizes are as follows: • 256 MB, 512 MB, 1 GB, 2 GB, 4 GB Dissimilar DIMM sizes can be used - HP Server rp4440 | User Service Guide, Fifth Edition - HP 9000 rp4410/4440 - Page 160
DIMM with the tab in the connector socket. Figure 6-10 Inserting the DIMM into the Extender Board Connector Socket 2. Firmly and evenly push on each end of the DIMM until it seats in the connector socket. Ensure that the extraction levers are in the closed position. 3. Replace the memory extender - HP Server rp4440 | User Service Guide, Fifth Edition - HP 9000 rp4410/4440 - Page 161
WARNING! Ensure that the system is powered off and all power sources have been disconnected from the server before removing or replacing the processor . For assistance with this procedure contact your local HP Authorized Service Provider. Observe all ESD safety precautions before attempting this - HP Server rp4440 | User Service Guide, Fifth Edition - HP 9000 rp4410/4440 - Page 162
to configure processor extender board circuits. Ensure that the dipswitch is set to PA RISC for the HP 9000 rp4410 or rp4440 servers. If this switch is set incorrectly, the system does not enter into power on self test (POST). To replace the processor extender board, follow these steps: 162 Removing - HP Server rp4440 | User Service Guide, Fifth Edition - HP 9000 rp4410/4440 - Page 163
1. Position the processor extender board as in Figure 6-12. There are two switch blocks. Figure 6-12 Dipswitch Location Processor Extender Board 163 - HP Server rp4440 | User Service Guide, Fifth Edition - HP 9000 rp4410/4440 - Page 164
switch banks 1 through 4 beneath the sheet metal. Figure 6-13 Dipswitch Setting for S5 3. Align the processor extender board with the front and rear card guides. 4. Slide the processor extender board down until it begins to seat in the socket located on the midplane riser board. 5. To fully seat the - HP Server rp4440 | User Service Guide, Fifth Edition - HP 9000 rp4410/4440 - Page 165
is powered off and all power sources have been disconnected from the server before service bay, directly under the memory extender board. If fewer than the maximum number of dual processor modules are to be installed (one in the HP 9000 rp4410 server or fewer than four in the HP 9000 rp4440 server - HP Server rp4440 | User Service Guide, Fifth Edition - HP 9000 rp4410/4440 - Page 166
settings of the dipswitches on the processor extender board. Removing a Dual Processor Module WARNING! Ensure that the system is powered off and all power sources have been disconnected from the server before removing or replacing a processor. Voltages are present at various locations within the - HP Server rp4440 | User Service Guide, Fifth Edition - HP 9000 rp4410/4440 - Page 167
from the Processor Extender Board Installing a Dual Processor Module NOTE: Before installing a dual processor module into your system, read the following instructions carefully and see Figure 6-18. To install a dual processor module on the processor extender board, follow these steps: Replacing Dual - HP Server rp4440 | User Service Guide, Fifth Edition - HP 9000 rp4410/4440 - Page 168
1. Remove the processor extender board from the server and place it on an antistatic mat. See "Removing the Processor Extender Board" (page 161). 2. Locate the socket (CPU0, CPU1, CPU2, or CPU3) to install - HP Server rp4440 | User Service Guide, Fifth Edition - HP 9000 rp4410/4440 - Page 169
cable is not pinched between the heatsink and sheet metal frame of the extender board. Also, ensure that the two power cable ends attached to the dual processor module do not come unplugged from their sockets when you move the cable into place under the heatsink (Figure 6-16 - HP Server rp4440 | User Service Guide, Fifth Edition - HP 9000 rp4410/4440 - Page 170
Figure 6-17 Processor Cable Placed Incorrectly 7. Using the CPU Install Tool 2.5-mm Allen wrench, lock the assembly to the socket by rotating the cam on the socket 180 degrees clockwise. TIP: When rotating the locking cam, hold the palm of your hand on top of the assembly and exert light pressure. - HP Server rp4440 | User Service Guide, Fifth Edition - HP 9000 rp4410/4440 - Page 171
them sufficiently. Figure 6-18 Installing the Dual Processor Module on the Processor Extender Board 13. Replace the processor extender board in the server. See "Replacing the Processor Extender Board" (page 162). 14. Replace the front cover. See "Replacing the Front Cover" (page 153). 15. Replace - HP Server rp4440 | User Service Guide, Fifth Edition - HP 9000 rp4410/4440 - Page 172
to follow ESD safety precautions can result in damage to the server. NOTE: A hot-swappable device does not require interaction with the operating system before the device is removed from or installed into the server. The ac power to the server does not need to be off to remove or replace a hot - HP Server rp4440 | User Service Guide, Fifth Edition - HP 9000 rp4410/4440 - Page 173
units operate at full speed. Operation will continue until an overtemperature condition is detected. If an overtemperature condition occurs, the server shuts down. 4. Repeat the same process for removal and replacement of the hot-swappable power supply chassis fan. Hot-Swappable Chassis Fan Unit 173 - HP Server rp4440 | User Service Guide, Fifth Edition - HP 9000 rp4410/4440 - Page 174
Figure 6-20 Hot-Swappable Power Supply Chassis Fan Removal and Replacement Replacing a Hot-Swappable Chassis Fan and close the handle until flush to the top of the chassis. The fan unit plugs into the power outlet on the I/O baseboard. CAUTION: If the fan unit handle does not close completely, it is - HP Server rp4440 | User Service Guide, Fifth Edition - HP 9000 rp4410/4440 - Page 175
HP Authorized Service Provider. Observe all ESD safety precautions before attempting this procedure. Failure to follow ESD safety precautions can result in damage to the server. Removing the I/O Baseboard Assembly NOTE: PA 8900 CPUs require setting for the iLO MP LAN console access by using the iLO - HP Server rp4440 | User Service Guide, Fifth Edition - HP 9000 rp4410/4440 - Page 176
Figure 6-21 I/O Baseboard Locking Lever 176 Removing and Replacing Components - HP Server rp4440 | User Service Guide, Fifth Edition - HP 9000 rp4410/4440 - Page 177
the VGA port of the new baseboard. This VGA graphics port is not supported in the HP 9000 rp4410 or rp4440 servers. NOTE: The I/O baseboard assembly is large. Be careful when lifting it out of the server chassis. Figure 6-22 I/O Baseboard Removal Replacing the I/O Baseboard Assembly To replace the - HP Server rp4440 | User Service Guide, Fifth Edition - HP 9000 rp4410/4440 - Page 178
as "unknown-unclaimed" in the ioscan output. Figure 6-23 S5102 Dipswitch Setting NOTE: The I/O baseboard is large. Use care when sliding it into the server chassis. 2. To disable the on-board Radeon graphics chip, set the S5102, #1 VGA dipswitch to the OFF position. Figure 6-24 Accessing the S5102 - HP Server rp4440 | User Service Guide, Fifth Edition - HP 9000 rp4410/4440 - Page 179
all power and external cables. 11. Turn on the server. 12 server. b. Monitor system startup on a terminal. c. To display the service menu, enter the SER command at the BCH prompt. d. To access server 9000/800rp4440 PA8800 dc - 9000/800rp4440 PA8900 dc - 9000/800rp4410 PA8900 dc- Max 4 Core - 9000 - HP Server rp4440 | User Service Guide, Fifth Edition - HP 9000 rp4410/4440 - Page 180
server console, configure the iLO MP. Incorporate settings saved before removing the I/O baseboard assembly or set up the iLO MP as needed. For additional information about using the iLO MP, see the HP Integrity and HP 9000 iLO MP Operations Guide instructions. 180 Removing and Replacing Components - HP Server rp4440 | User Service Guide, Fifth Edition - HP 9000 rp4410/4440 - Page 181
replacing the battery. To remove and replace the system battery, follow these steps: 1. If rack-mounted, slide the server out from the rack until it stops. See "Accessing a Rack-Mounted Server" (page 149). 2. Remove the top cover from the chassis. See "Removing the Top Cover" (page 153). 3. Remove - HP Server rp4440 | User Service Guide, Fifth Edition - HP 9000 rp4410/4440 - Page 182
Guide). Removing and Replacing PCI/PCI-X Cards HP 9000 rp4410 and rp4440 servers can contain up to eight PCI/PCI-X cards. PCI/PCI-X cards are located on the I/O baseboard assembly, under the top cover. Two of these cards are dedicated to I/O functions and require that the server be powered - HP Server rp4440 | User Service Guide, Fifth Edition - HP 9000 rp4410/4440 - Page 183
Figure 6-26 Slot ID Numbering The following describes configuration requirements for slots 1 through 8: • PCI-X slots 1 and 2 are dedicated for use by the core I/O cards: SCSI HBA card in slot 1 and Gigabit Ethernet LAN card in - HP Server rp4440 | User Service Guide, Fifth Edition - HP 9000 rp4410/4440 - Page 184
work. The new card does not initialize and powers off. 5 Maximum bus mode and frequency supported on shared slots is PCI-X 66 MHz. may be included in the error message or logged into console or event logs. Table 6-5 describes the PCI I/O paths for the server. Table 6-5 PCI I/O Paths Slot Slot 1 ( - HP Server rp4440 | User Service Guide, Fifth Edition - HP 9000 rp4410/4440 - Page 185
0/5/2 0/2/1 0/6/1 0/0/1/0 0/0/1/1 HP-UX Path 0/0/2/0 0/0/2/1 0/0/3/0.0.0 supports USB and the ports are already located on the rear of the server. If you are installing the RAID card A7143A, you must install it into slot 8. If you install this card in any other slot, it interferes with the manual - HP Server rp4440 | User Service Guide, Fifth Edition - HP 9000 rp4410/4440 - Page 186
empty slot and pull up on the MRL located on the OLX divider approximately 75 degrees. CAUTION: Do not pull up on the MRL of a powered on, occupied slot or your system will crash. Figure 6-27 PCI/PCI-X OLX Divider Layout Figure 6-28 PCI-X Card Latch Opening Sequence 186 Removing and - HP Server rp4440 | User Service Guide, Fifth Edition - HP 9000 rp4410/4440 - Page 187
again within five seconds to cancel the shutdown. NOTE: Ensure that you fully seat the card into the slot, or undesired results can occur after power is reapplied to the slot. Figure 6-29 Inserting a PCI/PCI-X Card Removing and Replacing PCI/PCI-X Cards 187 - HP Server rp4440 | User Service Guide, Fifth Edition - HP 9000 rp4410/4440 - Page 188
the chassis wall. 7. To capture the PCI/PCI-X card and manual retention latch into the closed position, turn the PCI/PCI-X card latch to the closed position. 8. Press the attention button. The power LED starts to blink. Wait until the power LED goes from blinking to steady on. 188 Removing and - HP Server rp4440 | User Service Guide, Fifth Edition - HP 9000 rp4410/4440 - Page 189
. After five seconds, pressing the attention button initiates slot power off for OLR of the card. 9. Replace the top cover. (See "Replacing the Top Cover" (page 154).) 10. Push the server all the way back into the rack until it stops. CAUTION: For HP-UX 11i v1 (and higher), you can only replace - HP Server rp4440 | User Service Guide, Fifth Edition - HP 9000 rp4410/4440 - Page 190
the operating system, replacing the PCI cards in a different location might require system reconfiguration and can cause boot failure. To remove a PCI card from the server with power off, follow these steps: 1. If rack-mounted, slide the server out from the rack until it stops. See "Accessing a Rack - HP Server rp4440 | User Service Guide, Fifth Edition - HP 9000 rp4410/4440 - Page 191
illumination from one green power LED and one amber powered off and all power sources have been disconnected from the server server whenever an ac power source is connected. This voltage is present even when the main power server out from the rack until it stops. See "Accessing a Rack-Mounted Server" - HP Server rp4440 | User Service Guide, Fifth Edition - HP 9000 rp4410/4440 - Page 192
Figure 6-31 OLX Divider Removal and Replacement 4. To unlock the rear edge of the PCI divider, slide open the latch on the slider gate bracket. 192 Removing and Replacing Components - HP Server rp4440 | User Service Guide, Fifth Edition - HP 9000 rp4410/4440 - Page 193
Figure 6-32 OLX Slider Gate Bracket 5. If you are removing the entire OLX divider rack, remove the four T15 screws attaching the rack to the I/O baseboard assembly. OLX Dividers 193 - HP Server rp4440 | User Service Guide, Fifth Edition - HP 9000 rp4410/4440 - Page 194
manual HP 9000 rp4410 and rp4440 servers required to perform the upgrade. The actual upgrade procedures are provided below. Simplex Configuration Upgrade 1. Back up your data 2. Shut down the server (disconnect AC power) 3. Remove server components 4. Replace SCSI backplane 5. Install server - HP Server rp4440 | User Service Guide, Fifth Edition - HP 9000 rp4410/4440 - Page 195
HP-Information Resource Center (ITRC). Removing Server Components WARNING! Ensure that the system is powered off and all power sources have been disconnected from the server before removing or replacing server this procedure, contact your local HP Authorized Service Provider. Observe all ESD safety - HP Server rp4440 | User Service Guide, Fifth Edition - HP 9000 rp4410/4440 - Page 196
To remove the SCSI duplex board, follow these steps: 1. Disconnect SCSI cable B from the SCSI backplane. Figure 6-33 Disconnecting SCSI Cable B from the SCSI Backplane 196 Removing and Replacing Components - HP Server rp4440 | User Service Guide, Fifth Edition - HP 9000 rp4410/4440 - Page 197
these steps: 1. Unplug the internal SCSI cables from the SCSI backplane. 2. Unplug the SCSI backplane-to-midplane riser cable from the SCSI backplane. 3. If the server is configured for simplex operation, remove the SCSI Jumper Cable (Figure 6-35). U320 SCSI Enablement and Conversion Procedures 197 - HP Server rp4440 | User Service Guide, Fifth Edition - HP 9000 rp4410/4440 - Page 198
NOTE: The SCSI jumper cable bridges the two SCSI connectors on the SCSI backplane when the server is configured for simplex operation. The SCSI jumper cable is not installed in duplex configurations. Figure 6-35 Remove the SCSI Backplane Jumper Cable 4. Remove the - HP Server rp4440 | User Service Guide, Fifth Edition - HP 9000 rp4410/4440 - Page 199
Replace the SCSI backplane to the rear of the disk drive cage (HP part number A6961-04075). 2. If your system is configured for simplex the SCSI back plane. If the server is configured for simplex operation, continue the upgrade at "Installing the Server Components" (page 201) Installing the - HP Server rp4440 | User Service Guide, Fifth Edition - HP 9000 rp4410/4440 - Page 200
. 5. Plug the SCSI cable B connector into the SCSI connector located on the backplane next to the duplex board (Figure 6-33 (page 196)). 6. Connect the other end of SCSI cable B to the SCSI B channel connector on the SCSI adapter board. 200 Removing and Replacing Components - HP Server rp4440 | User Service Guide, Fifth Edition - HP 9000 rp4410/4440 - Page 201
After completing the upgrade, verify that the sever is ready for operation as follows: 1. Reconnect AC power to rear panel connectors. 2. Press the front panel power button to power on the server. 3. Wait for completion of the POST. Verify that no errors have been detected. 4. At the BCH - HP Server rp4440 | User Service Guide, Fifth Edition - HP 9000 rp4410/4440 - Page 202
. This voltage is present even when the main power switch is in the off position. Failure to observe this warning can result in personal injury or damage to equipment. Accessing the SCSI Backplane Before adding the accessories required to convert the server from duplex to simplex, you must remove - HP Server rp4440 | User Service Guide, Fifth Edition - HP 9000 rp4410/4440 - Page 203
1. Unplug the SCSI B cable From the SCSI backplane. Figure 6-39 Unplugging the SCSI Cable B from the SCSI Backplane 2. Unplug SCSI cable B connector from the SCSI adapter board. U320 SCSI Enablement and Conversion Procedures 203 - HP Server rp4440 | User Service Guide, Fifth Edition - HP 9000 rp4410/4440 - Page 204
Figure 6-40 Unplug the SCSI Cable B from the SCSI Adapter Board 3. Secure the SCSI cable B within the chassis. 204 Removing and Replacing Components - HP Server rp4440 | User Service Guide, Fifth Edition - HP 9000 rp4410/4440 - Page 205
4. Remove the SCSI duplex board: a. Pull the SCSI duplex board forward to disconnect the backplane connector. b. Release it from the disk drive cage. Figure 6-41 Removing the Duplex Board U320 SCSI Enablement and Conversion Procedures 205 - HP Server rp4440 | User Service Guide, Fifth Edition - HP 9000 rp4410/4440 - Page 206
After completing the upgrade, verify that the sever is ready for operation as follows: 1. Reconnect AC power to the rear panel connectors. 2. To power on the server, press the front panel power button. 3. Wait for completion of the POST. 4. Verify that no errors have been detected. 5. At the - HP Server rp4440 | User Service Guide, Fifth Edition - HP 9000 rp4410/4440 - Page 207
HP 9000 rp4410 and rp4440 servers power switch is in the off position. Failure to observe this warning can result in personal injury or damage to equipment. Required Service Tools Service of this product can require one or more of the following tools: • Electrically Conductive Field Service Kit (HP - HP Server rp4440 | User Service Guide, Fifth Edition - HP 9000 rp4410/4440 - Page 208
IMPORTANT: Before disconnecting cables, note the cable configuration. Cables must be attached to the correct connectors to ensure proper functionality. 4. Open the blue PCI card latch for slot 2 by twisting it clockwise. Figure 6-43 LAN I/O Card Latch Location 5. Remove the LAN core I/O card. See " - HP Server rp4440 | User Service Guide, Fifth Edition - HP 9000 rp4410/4440 - Page 209
fully seat the card into the slot or the card can be damaged when power is reapplied to the slot. Figure 6-44 Installing the LAN I/O Card 2. the top cover. See "Replacing the Top Cover" (page 154). 5. Push the server back into the rack until it stops. Removing the SCSI Core I/O Card To remove the - HP Server rp4440 | User Service Guide, Fifth Edition - HP 9000 rp4410/4440 - Page 210
4. Open the blue PCI card latch for slot 1 by twisting it clockwise. Figure 6-45 SCSI I/O Card Latch Location 5. Remove the internal and external SCSI cables from the SCSI core I/O card. 6. Remove THE SCSI core I/O card. Installing the SCSI Core I/O Card To install the SCSI core I/O card, follow - HP Server rp4440 | User Service Guide, Fifth Edition - HP 9000 rp4410/4440 - Page 211
Ensure that you fully seat the card into the slot or the card can be damaged when power is reapplied to the slot. Figure 6-46 Installing the SCSI I/O Card 2. Close the the Top Cover" (page 154).) 5. Push the server back into the rack until it stops. Removing and Replacing Core I/O Cards 211 - HP Server rp4440 | User Service Guide, Fifth Edition - HP 9000 rp4410/4440 - Page 212
pluggable disk drives are located in the front of the HP 9000 rp4410 and rp4440 servers. The hot-pluggable disk drives are replaced using the procedures in this section when power is on or off. CAUTION: A hot-pluggable device can require interaction with the operating system before the device can be - HP Server rp4440 | User Service Guide, Fifth Edition - HP 9000 rp4410/4440 - Page 213
1. Slide the hot-pluggable disk drive into slot 2 until it is seated. Figure 6-48 Installing a Disk Drive in Slot 2 2. Close the drive-ejector handle by pushing it down until it clicks. If you will not be installing a hot-pluggable disk drive in slot 2, you must install a volume filler. Figure 6-49 - HP Server rp4440 | User Service Guide, Fifth Edition - HP 9000 rp4410/4440 - Page 214
. WARNING! Ensure that the system is powered off and all power sources have been disconnected from the server before removing or replacing the SCSI backplane. For assistance with this procedure contact your local HP Authorized Service Provider. Observe all ESD safety precautions before attempting - HP Server rp4440 | User Service Guide, Fifth Edition - HP 9000 rp4410/4440 - Page 215
12. Push the SCSI backplane away from the disk drive cage and lift it up and out of the chassis. Figure 6-50 SCSI Backplane Removal and Replacement Replacing the SCSI Backplane To replace the SCSI backplane, follow these steps: 1. Replace the SCSI backplane to the rear of the disk drive cage. 2. - HP Server rp4440 | User Service Guide, Fifth Edition - HP 9000 rp4410/4440 - Page 216
WARNING! Ensure that the system is powered off and all power sources have been disconnected from the server before removing or replacing the midplane . For assistance with this procedure, contact your local HP Authorized Service Provider. Observe all ESD safety precautions before attempting this - HP Server rp4440 | User Service Guide, Fifth Edition - HP 9000 rp4410/4440 - Page 217
Plug the DVD relay board and front panel display board cable into the midplane riser board. 4. Replace the air baffle. 5. Plug the power distribution board power cable and signal cable into the midplane riser board. 6. Plug the QuickFind diagnostic board cable into the midplane riser board. Midplane - HP Server rp4440 | User Service Guide, Fifth Edition - HP 9000 rp4410/4440 - Page 218
from or installed into the server. The ac power to the server does not need to be powered off to remove or replace a hot-swappable power supply. Power Supply Load Order The supported configuration of the HP 9000 rp4410 or rp4440 server requires a minimum of one power supply. A second, optional hot - HP Server rp4440 | User Service Guide, Fifth Edition - HP 9000 rp4410/4440 - Page 219
the captive thumbscrew located at the top left of the power supply. 5. Grasp the handle and pull the power supply out of the server. Figure 6-52 Hot-Swappable Power Supply Removal and Replacement Replacing a Hot-Swappable Power Supply 1. Supporting the power supply with both hands, slide it into the - HP Server rp4440 | User Service Guide, Fifth Edition - HP 9000 rp4410/4440 - Page 220
procedure contact your local HP Authorized Service Provider. Observe all ESD safety precautions before attempting this procedure. Failure to follow ESD safety precautions can result in damage to the server. Removing the Power Distribution Board To remove the power distribution board, follow these - HP Server rp4440 | User Service Guide, Fifth Edition - HP 9000 rp4410/4440 - Page 221
the keyway slots and up and out of the chassis. Figure 6-53 Power Distribution Board Removal and Replacement Replacing the Power Distribution Board To replace the power distribution board, follow these steps: 1. Replace the power distribution board over the keyway slots and push it towards the side - HP Server rp4440 | User Service Guide, Fifth Edition - HP 9000 rp4410/4440 - Page 222
at various locations within the server whenever an ac power source is connected. This voltage is present even when the main power switch is in the off . For assistance with this procedure contact your local HP Authorized Service Provider. Observe all ESD safety precautions before attempting this - HP Server rp4440 | User Service Guide, Fifth Edition - HP 9000 rp4410/4440 - Page 223
3. To remove the DVD drive from the chassis, pull it straight out of the server. Figure 6-54 DVD Drive Removal and Replacement Replacing a DVD Drive To replace a DVD drive, follow these steps: 1. Grasp the front of the DVD drive and - HP Server rp4440 | User Service Guide, Fifth Edition - HP 9000 rp4410/4440 - Page 224
at various locations within the server whenever an ac power source is connected. This voltage is present even when the main power switch is in the off . For assistance with this procedure, contact your local HP Authorized Service Provider. Observe all ESD safety precautions before attempting this - HP Server rp4440 | User Service Guide, Fifth Edition - HP 9000 rp4410/4440 - Page 225
8. Lift out the DVD I/O board and remove the midplane riser board connector cable. Remove the DVD I/O board from the chassis. Figure 6-55 DVD I/O Board Removal and Replacement Replacing a DVD I/O Board To replace a DVD I/O board, follow these steps: 1. Replace the DVD I/O board into the chassis and - HP Server rp4440 | User Service Guide, Fifth Edition - HP 9000 rp4410/4440 - Page 226
server power button and three LEDs that indicate server status. WARNING! Ensure that the system is powered off and all power sources have been disconnected from the server For assistance with this procedure, contact your local HP Authorized Service Provider. Observe all ESD safety precautions before - HP Server rp4440 | User Service Guide, Fifth Edition - HP 9000 rp4410/4440 - Page 227
7. Gently unplug the midplane riser board connector cable from the display board and remove the board from the chassis as shown in Figure 6-56. Figure 6-56 Display Board Removal and Replacement Replacing the Display Board To replace the display board, follow these steps: Display Board 227 - HP Server rp4440 | User Service Guide, Fifth Edition - HP 9000 rp4410/4440 - Page 228
various locations within the server whenever an ac power source is connected. This voltage is present even when the main power switch is in the failure. For assistance with this procedure, contact your local HP Authorized Service Provider. Observe all ESD safety precautions before attempting this - HP Server rp4440 | User Service Guide, Fifth Edition - HP 9000 rp4410/4440 - Page 229
. 2. Replace the QuickFind diagnostic board into the cover by snapping it into place. 3. Turn the assembly over and snap into place on top of the power supply cage. 4. Replace the top cover. See "Replacing the Top Cover" (page 154). QuickFind Diagnostic Board 229 - HP Server rp4440 | User Service Guide, Fifth Edition - HP 9000 rp4410/4440 - Page 230
230 - HP Server rp4440 | User Service Guide, Fifth Edition - HP 9000 rp4410/4440 - Page 231
guide No technical skills required. BY Optional Level B with instructions Low to moderate technical skills required. available in the service guide CY Optional Level C with instructions High technical skills required. available in the service guide N No Not a customer replaceable Some HP - HP Server rp4440 | User Service Guide, Fifth Edition - HP 9000 rp4410/4440 - Page 232
Use this parts list whenever ordering parts for the HP 9000 rp4410 and rp4440 servers. Table A-2 Replacement Parts List Manufacturing Part Description Board (includes plastic cover and label) PCA A6961-67009 A6961-60015 Power Distribution Board PCA A6961-67015 A6961-60113 I/O Board to DVD - HP Server rp4440 | User Service Guide, Fifth Edition - HP 9000 rp4410/4440 - Page 233
Assembly with 64 MB AD060A L2 Cache requires PDC greater than 44.21 Miscellaneous 0950-4428 Power Supply A6961-67016 A6961-04047 PCI Card Divider A6977-67002 right bracket in kit) A7124-04004 Bezel, Rack Mount (rp4440) A7124-04004 A9955-4001 Bezel, Rack Mount (rp4410) A9955-04001 Part - HP Server rp4440 | User Service Guide, Fifth Edition - HP 9000 rp4410/4440 - Page 234
Table A-2 Replacement Parts List (continued) Manufacturing Part Description Number Part Number Replacement A6979-04001 Rackless pedestal kit A6979-04001 Parts Shared with Other Products A6825-60101 Single Port GigE LAN Card (PA8800 only) A6825-67101 AB352-60001 Dual-port GigE LAN Card ( - HP Server rp4440 | User Service Guide, Fifth Edition - HP 9000 rp4410/4440 - Page 235
server. These include the Boot Console Handler (BCH) and the iLO MP. Boot Console PDC to view and modify a set of specific system parameters. Booting is standard for PA autobooting, a boot sequence ends in the interactive portion Service Commands Available to qualified service personnel. The service - HP Server rp4440 | User Service Guide, Fifth Edition - HP 9000 rp4410/4440 - Page 236
menu INformation menu SERvice menu Displays or sets boot values Displays hardware information Displays service commands DIsplay HElp controller with ID 6 and LUN 0. You can also set and display the paths of console (graphics/serial) and keyboard. For example: Main Menu: Enter command or menu > - HP Server rp4440 | User Service Guide, Fifth Edition - HP 9000 rp4410/4440 - Page 237
Alternate boot path: intscsib.2 0/1/1/0.2 0/01/01/01.2 (hex) Console path: 0/7/1/1.0 0/07/01/01.1 (hex) Keyboard path: 0/0/4/0.0 0/0/04/0.0 (hex) Main Menu: Enter command or manu > or set the real time clock in GMT BOot [PRI|ALT|] Boot from specified path Boot Console Handler 237 - HP Server rp4440 | User Service Guide, Fifth Edition - HP 9000 rp4410/4440 - Page 238
following values: Primary boot path: Alternate boot path: Console path: Keyboard path: Autoboot: Autosearch: Autostart: BootTimer boot. Review warning messages in the information menu. Service Menu The SERvice menu commands are used by service personnel to view information about the system for - HP Server rp4440 | User Service Guide, Fifth Edition - HP 9000 rp4410/4440 - Page 239
---Service Menu can manually update the server status or location. The iLO MP is available whenever the system is connected to a power source, even if the server main power button is in the off position. For complete information on the iLO MP, see the HP Integrity and HP 9000 iLO MP Operations Guide - HP Server rp4440 | User Service Guide, Fifth Edition - HP 9000 rp4410/4440 - Page 240
240 - HP Server rp4440 | User Service Guide, Fifth Edition - HP 9000 rp4410/4440 - Page 241
, typical, and maximum configurations for the HP 9000 rp4410 and rp4440 servers. It also lists the server and rack weights and dimensions. Table C-1 Physical and Environmental Specifications Min. Config. Max. Config. Typical Config. Condition Weight Typical Heat Release 180-264 VAC Airflow - HP Server rp4440 | User Service Guide, Fifth Edition - HP 9000 rp4410/4440 - Page 242
242 - HP Server rp4440 | User Service Guide, Fifth Edition - HP 9000 rp4410/4440 - Page 243
114 ac input power, 102 acoustic noise specification, 48 antistatic service, 238 ODE, 138 connecting to the LAN, 103 console accessing host with GUI, 112 accessing host with TUI, 112 determining connection method, 106 graphics, accessing using VGA, 114 setup, 104 troubleshooting, 121 contacting HP - HP Server rp4440 | User Service Guide, Fifth Edition - HP 9000 rp4410/4440 - Page 244
troubleshooting power supply, 74 processors, 77 installing the A6150 graphics card, 114 integrated lights-out management processor (see iLO MP) intermittent server problems, 120 internal core I/O features, 52 IP address methods to obtain, 107 K keystone system temperature and humidity specifications - HP Server rp4440 | User Service Guide, Fifth Edition - HP 9000 rp4410/4440 - Page 245
, 40, 115 problems, 119 reset command (see PR) standby state, 115 states, 40, 115 power supply hot-swappable, 218 load order, 218 remove, 218 replace, 219 installing, 74 status LED, 29 powering off the server, 116 iLO MP PC command, 41, 116 manually, 41, 116 powering on the server, 115-116 iLO - HP Server rp4440 | User Service Guide, Fifth Edition - HP 9000 rp4410/4440 - Page 246
jumpers, 146 T temperature and humidity specifications, 46 toe-tag, 108 tools required for remove and replace, 57, 149 troubleshooting iLO MP, 136 LEDs, 139 methodology, 118, 129 offline support tools, 137 online support tools, 135 Event Monitoring Service (EMS), 135 Support Tools Manager (STM), 135
-
 1
1 -
 2
2 -
 3
3 -
 4
4 -
 5
5 -
 6
6 -
 7
7 -
8
-
9
-
10
-
11
-
12
-
13
-
14
-
15
-
16
-
17
-
18
-
19
-
20
-
21
-
22
-
23
-
24
-
25
-
26
-
27
-
28
-
29
-
30
-
31
-
32
-
33
-
34
-
35
-
36
-
37
-
38
-
39
-
40
-
41
-
42
-
43
-
44
-
45
-
46
-
47
-
48
-
49
-
50
-
51
-
52
-
53
-
54
-
55
-
56
-
57
-
58
-
59
-
60
-
61
-
62
-
63
-
64
-
65
-
66
-
67
-
68
-
69
-
70
-
71
-
72
-
73
-
74
-
75
-
76
-
77
-
78
-
79
-
80
-
81
-
82
-
83
-
84
-
85
-
86
-
87
-
88
-
89
-
90
-
91
-
92
-
93
-
94
-
95
-
96
-
97
-
98
-
99
-
100
-
101
-
102
-
103
-
104
-
105
-
106
-
107
-
108
-
109
-
110
-
111
-
112
-
113
-
114
-
115
-
116
-
117
-
118
-
119
-
120
-
121
-
122
-
123
-
124
-
125
-
126
-
127
-
128
-
129
-
130
-
131
-
132
-
133
-
134
-
135
-
136
-
137
-
138
-
139
-
140
-
141
-
142
-
143
-
144
-
145
-
146
-
147
-
148
-
149
-
150
-
151
-
152
-
153
-
154
-
155
-
156
-
157
-
158
-
159
-
160
-
161
-
162
-
163
-
164
-
165
-
166
-
167
-
168
-
169
-
170
-
171
-
172
-
173
-
174
-
175
-
176
-
177
-
178
-
179
-
180
-
181
-
182
-
183
-
184
-
185
-
186
-
187
-
188
-
189
-
190
-
191
-
192
-
193
-
194
-
195
-
196
-
197
-
198
-
199
-
200
-
201
-
202
-
203
-
204
-
205
-
206
-
207
-
208
-
209
-
210
-
211
-
212
-
213
-
214
-
215
-
216
-
217
-
218
-
219
-
220
-
221
-
222
-
223
-
224
-
225
-
226
-
227
-
228
-
229
-
230
-
231
-
232
-
233
-
234
-
235
-
236
-
237
-
238
-
239
-
240
-
241
-
242
-
243
-
244
-
245
-
246
 |
 |

HP 9000 rp4410 and HP 9000 rp4440
User Service Guide
HP Part Number: A9950-96011-ed5
Published: October 2009
Edition: 5