HP VP17 User Guide
HP VP17 - 17 Inch LCD Monitor Manual
 |
UPC - 882780671317
View all HP VP17 manuals
Add to My Manuals
Save this manual to your list of manuals |
HP VP17 manual content summary:
- HP VP17 | User Guide - Page 1
User's Guide vp15 LCD Monitor vp17 LCD Monitor vp19 LCD Monitor FP1707 LCD Monitor WF1907 LCD Monitor w1707 LCD Monitor w1907 LCD Monitor w2007 LCD Monitor w2207 LCD Monitor w2216 LCD Monitor w2408 LCD Monitor - HP VP17 | User Guide - Page 2
assumes no responsibility for the use or reliability of its software on equipment that is not furnished by HP. This document contains proprietary information that is protected by copyright. No part of this document may be photocopied, reproduced, or translated to another language without the prior - HP VP17 | User Guide - Page 3
Notational Conventions The following section describes notational conventions used in this document. Notes, Cautions, and Warnings Throughout this guide, blocks of text may be accompanied by an icon. These blocks are notes, cautions, and warnings, and they are used as follows: Å WARNING: Indicates - HP VP17 | User Guide - Page 4
iv User's Guide - HP VP17 | User Guide - Page 5
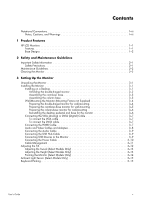
the VGA cable 3-7 To connect the DVI-D cable 3-7 Connecting the HDMI Cable 3-7 Audio and Video Cables and Adapters 3-8 Connecting the Audio Cable 3-9 Connecting the USB Hub Cable 3-9 Connecting USB Devices to the Monitor 3-9 Connecting the Power Cable 3-10 Cable Management 3-11 Adjusting - HP VP17 | User Guide - Page 6
-Hinged Monitor 5-3 A Troubleshooting Solving Common Problems A-1 Getting Support from hp.com A-2 Preparing to Call Technical Support A-2 Locating the Rating Label A-2 B Technical Specifications HP LCD Monitors B-1 Preset Video Modes B-7 LCD Monitor Quality and Pixel Policy B-12 Power Cord - HP VP17 | User Guide - Page 7
HP LCD Monitors The HP LCD (liquid crystal display) monitors have an active matrix, thin-film transistor (TFT) screen. This guide discusses the following models: ■ vp15 LCD Monitor ■ vp17 LCD Monitor ■ vp19 LCD Monitor ■ FP1707 LCD Monitor ■ WF1907 LCD Monitor ■ w1707 LCD Monitor ■ w1907 LCD Monitor - HP VP17 | User Guide - Page 8
models only) ■ Power Saver to reduce energy consumption ■ Quick View settings display ■ CD includes (select models only): ❏ Drivers (select models only) ❏ Auto-adjustment software ❏ My Display software (select models only) ❏ Documents ❏ Adobe® Acrobat® Reader ■ Varied monitor base designs Base - HP VP17 | User Guide - Page 9
the equipment as possible. To disconnect power from the equipment, unplug the power cord from the power outlet by grasping the plug firmly. Never pull on the cord. Ä CAUTION: To protect your monitor, as well as your computer, connect all power cords for your computer and its peripheral devices (such - HP VP17 | User Guide - Page 10
, reseller, or service provider. ■ Adjust only those controls that are described in the operating instructions. ■ Turn your monitor off when not cleaning. To clean the monitor, follow these steps: 1. Turn off the computer and the monitor. 2. Unplug your monitor from the power outlet before cleaning. - HP VP17 | User Guide - Page 11
are included. Store the packing box. 2. Turn off the computer and other attached devices. 3. Determine whether the monitor will be desktop mounted or wall-mounted. See "Installing the Monitor." 4. Prepare a flat area to assemble the monitor. You may need a flat, soft, protected area for placing the - HP VP17 | User Guide - Page 12
monitor, lift up the panel at its top without touching or putting pressure on the screen (3). 4. Remove the shipping strap (do not cut it) (4). 5. Put the shipping strap in a safe place, in case you need it to ship the monitor. 6. Lift and lower the base hinge for proper viewing. 3-2 User's Guide - HP VP17 | User Guide - Page 13
on a flat, stable surface. Assembling the column base 1. Set the monitor base on a flat, stable surface. 2. Lift the monitor, and align the pedestal with the base. 3. Lower the monitor until the base snaps in place. Make sure the base is securely locked. Attaching the column base User's Guide 3-3 - HP VP17 | User Guide - Page 14
future use. 6. Follow the instructions included with the mounting fixture to ensure that the monitor is safely attached. The four-threaded mounting holes that are on the back of the panel are compliant with the VESA standard for mounting flat-panel monitors. The15-inch monitor uses the 75 mm spacing - HP VP17 | User Guide - Page 15
future use. 7. Follow the instructions included with the mounting fixture to ensure that the monitor is safely attached. The four-threaded mounting holes that are on the back of the panel are compliant with the VESA standard for mounting flat-panel monitors. The vp15 monitor uses the 75 mm spacing - HP VP17 | User Guide - Page 16
future use. 7. Follow the instructions that are included with the mounting fixture to ensure that the monitor is safely attached. The four-threaded mounting holes that are on the back of the panel are compliant with the VESA standard for mounting flat-panel monitors. The vp15 monitor uses the 75 mm - HP VP17 | User Guide - Page 17
cable only if your compute has a DVI-compliant graphic card installed. The monitor DVI-D connector and cable are included with select models only. ✎ NOTE: If you use a DVI-to-HDMI adapter, you must connect the green audio cable to enable the speakers. The signal from the DVI connector is for video - HP VP17 | User Guide - Page 18
or connects an HDMI monitor to a DVI connector on the back of the computer, TV, or set-top box. ✎ NOTE: If you use a DVI-to-HDMI adapter, you must connect the green audio cable to enable the speakers. ✎ NOTE: When using a VGA or DVI signal, you must connect your audio separately because a VGA or - HP VP17 | User Guide - Page 19
Up the Monitor Connecting the Audio Cable Connect the built-in monitor speakers to the computer by using the audio cable, as shown in the following illustration. Connecting the audio cables-connector locations may vary Connecting the USB Hub Cable Connect the USB hub cable from the computer to the - HP VP17 | User Guide - Page 20
power outlet you plug the power cord is easily accessible to the operator and located as close to the equipment as possible. A power on power cords Power Cord Set Requirements" in Appendix B for additional information. Connecting the power cable 2. Connect one end of the power cable to the monitor - HP VP17 | User Guide - Page 21
Setting Up the Monitor Cable Management The HP LCD monitors have either two hooks or two cable tunnels on either side for cable management. Cables can be easily secured and are hidden when viewed from the front. ✎ NOTE: If your monitor has the pivot feature, make sure the cords are set loosely - HP VP17 | User Guide - Page 22
monitor while changing the tilt. 2. Adjust the tilt by moving the top edge of the monitor either toward or away from you, without touching the screen. Ä CAUTION: The double-hinged monitor can fall back if the hinge is extended fully and the monitor screen is tilted back too far. 3-12 User's Guide - HP VP17 | User Guide - Page 23
Up the Monitor Ä CAUTION: To avoid breakage or other damage, avoid applying pressure to the LCD screen while swiveling it or changing the tilt. Adjusting the Height (Select Models Only) The double-hinged monitor adjusts up and down easily by extending or lowering the hinge. User's Guide 3-13 - HP VP17 | User Guide - Page 24
: For full functionality of this pivot feature, the My Display software may need to be installed. See "My Display Software" in the Operating the Monitor chapter for information on how to install this software. Some graphics cards support rotating the image of the display automatically. 1. Facing the - HP VP17 | User Guide - Page 25
light sensor, on the left front of the monitor, adjusts the LCD backlight output to the current ambient light conditions. By default, the ambient light sensor is on. You manually enable or disable the sensor using the Image Control main menu in the OSD. If you adjust the Quick View, Brightness - HP VP17 | User Guide - Page 26
Setting Up the Monitor 3-16 User's Guide - HP VP17 | User Guide - Page 27
monitor drivers (INF or ICM files) manually from the CD, in case of an installation error. Refer to the "Driver Software Readme" file on the CD for instructions (in English only). Downloading Updated Drivers from the Internet To download the latest version of drivers and software files from the HP - HP VP17 | User Guide - Page 28
the language. 3. Click Install My Display Software (available on select models only). 4. Follow the onscreen instructions. 5. Restart the computer. To open the My Display software: 1. Click the HP My Display icon on the taskbar. Or 1. Click the Windows Vista start button™ on the taskbar. 2. Click - HP VP17 | User Guide - Page 29
. ✎ NOTE: You can use My Display OSD software (select models only) or the front-panel control buttons to adjust settings. 1. If the monitor is not already on, press the Power button to turn on the monitor. 2. To access the OSD menu, press the Menu button. The OSD Main Menu displays. 3. To navigate - HP VP17 | User Guide - Page 30
sensor is on the left front of the monitor. By default the sensor is set to On. If you adjust the Quick View, Brightness, Contrast, or sRGB functions in the OSD, the ambient light sensor will automatically be disabled and clear or sharpen the image of characters (VGA Input only). 4-4 User's Guide - HP VP17 | User Guide - Page 31
menu is displayed. The factory default is English. Selects the power-management features of the monitor. Adjusts the volume level. Adjusts the position of the OSD menu on the screen. Horizontal OSD Position - Changes the viewing position of the OSD menu to the left or right area of the screen. The - HP VP17 | User Guide - Page 32
is needed if contacting HP technical support. Version Reports the firmware version of the monitor. Backlight Hours Reports the total hours of backlight operation. Service Support For service support, go to: http://www.hp.com/support Returns settings to factory defaults. 4-6 User's Guide - HP VP17 | User Guide - Page 33
set higher than the monitor supports. Change your video card settings to a lower resolution or refresh rate. Restart your computer for the new settings to take effect. ■ Monitor Going to Sleep - Indicates the screen display is entering a sleep mode. The speakers are turned off in sleep mode. ■ Check - HP VP17 | User Guide - Page 34
devices or HDTV air or cable broadcasts. If you do not have an HDCP-enabled monitor, you may see a black screen or a lower resolution picture when playing high-definition protected content. Your computer graphic card and monitor must both support HDCP to display protected content. 4-8 User's Guide - HP VP17 | User Guide - Page 35
scratches, defacing, or breakage. Avoid applying pressure to the LCD screen; doing so can cause damage. Removing the cantilever base 1. Disconnect the power, video, and audio cables from the monitor. 2. Set the monitor screen down on a flat, soft, protected surface. 3. Press the center tab in - HP VP17 | User Guide - Page 36
the power, video, and audio cables from the monitor. 2. Set the monitor screen down on a flat, soft monitor. Removing the column base Å WARNING: Be careful to avoid pinching or scraping your fingers when removing the base. 4. Put the monitor and base in the original packing box. 5-2 User's Guide - HP VP17 | User Guide - Page 37
is flat. The monitor screen should still be vertical to the desktop so you can access the hinge. 3. Place the shipping strap around the base, pull it tight, and connect it by sliding the strap ends through the slips. 4. Lower the monitor screen down flat, horizontal to the desktop. User's Guide - HP VP17 | User Guide - Page 38
Preparing the Monitor for Shipping 5. Pivot the monitor to the portrait position (in the figure, you would be facing the monitor where the straight arrow is). 6. Place the folded monitor, screen-side up, in its original shipping box. 5-4 User's Guide - HP VP17 | User Guide - Page 39
fix this problem. Unable to set the monitor to the optimal resolution. Make sure that the graphics card supports the optimal resolution. Make sure that the latest supported driver is installed for the graphics card. For HP and Compaq systems, you can download the latest graphics driver for your - HP VP17 | User Guide - Page 40
Troubleshooting Problem No Plug and Play. Picture bounces, flickers, or wave pattern is present in the picture. Monitor is always in "Sleep Mode (Amber LED)." USB 2.0 ports are not working. Solution (Continued) In order for the Plug and Play feature of the monitor to work, you need a computer and - HP VP17 | User Guide - Page 41
lower. HP LCD Monitors Face treatment: Antiglare polarizer with hard coating (select models only) Input Terminals: ■ VGA 15-pin D-type connector ■ DVI Temperature: Relative Humidity: Power Source: Power Consumption: Sleep Power Consumption: TFT LCD active matrix 15.0 in typical User's Guide B-1 - HP VP17 | User Guide - Page 42
Technical Specifications Specifications (Continued) model vp17 Display Type: Screen Size: Viewable Image Size: Tilt: Relative Humidity: Power Source: Power Consumption: Sleep Power Consumption: TFT LCD active matrix 17.0 in., 43.2 cm 17.0 in., 43.2 watts maximum - HP VP17 | User Guide - Page 43
Temperature: Non-operating Temperature: Relative Humidity: Power Source: Power Consumption: Sleep Power Consumption: TFT LCD active matrix 17.0 in., 43.2 cm 17.0 in., 43.2 cm diagonal -5o to 80% 100-240Vv, 50/60 Hz 49 watts maximum - HP VP17 | User Guide - Page 44
) Operating Temperature: Non-operating Temperature: Relative Humidity: Power Source: Power Consumption: Sleep Power Consumption: TFT LCD active matrix 17.0 in., 43.2 cm 17.0 in., 43.2 cm diagonal -5o to +25o C 20% to 80% 100-240Vv, 50/60 Hz 49 watts maximum - HP VP17 | User Guide - Page 45
(independent of altitude) Operating Temperature: Non-operating Temperature: Relative Humidity: Power Source: Power Consumption: Sleep Power Consumption: TFT LCD active matrix 20.0 in., 50.8 cm 20.0 in., 50.8 cm C 20% to 80% 100-240Vv, 50/60 Hz 65 watts maximum - HP VP17 | User Guide - Page 46
(independent of altitude) Operating Temperature: Non-operating Temperature: Relative Humidity: Power Source: Power Consumption: Sleep Power Consumption: TFT LCD active matrix 21.6 in., 54.9 cm 21.6 in., 54.9 cm C 20% to 80% 100-240Vv, 50/60 Hz 130 watts maximum - HP VP17 | User Guide - Page 47
monitor automatically recognizes many preset video input modes that will appear properly sized and centered on the screen. The following modes are assigned at the factory and are the most commonly used display resolutions: ■ vp15 supports preset modes 1 through 11 ■ vp17 75.0 65.9 User's Guide B-7 - HP VP17 | User Guide - Page 48
60.0 14 1280 x 1024 79.9 75.0 15 1440 x 900 55.9 59.8 ■ WF1907 and w1907 support preset modes 1 through 16 Factory Preset Video Input Modes, WF1907 and w1907 Preset Resolution Horizontal Vertical Frequency ( .0 15 1280 x 1024 79.9 75.0 16 1440 x 900 55.9 59.9 B-8 User's Guide - HP VP17 | User Guide - Page 49
1280 x 960 60.0 15 1280 x 1024 63.9 16 1280 x 1024 79.9 17 1440 x 900 59.9 18 1680 x 1050 65.2 Vertical Frequency (Hz) 59.9 65.9 76.1 60.0 60.0 75.0 59.9 60.0 ■ w2207 supports preset modes 1 through 18 Factory Preset Video Input Modes, w2207 Preset Guide Technical Specifications B-9 - HP VP17 | User Guide - Page 50
1440 x 900 55.9 59.9 17 1600 x 1000 61.6 60.0 18 1680 x 1050 65.3 60.0 ■ w2216 supports preset modes 1 through 18 Factory 960 60.0 14 1280 x 1024 63.9 15 1280 x 1024 79.9 16 1440 x 900 55.9 17 1600 x 1000 61.6 18 1680 x 1050 65.3 Vertical Frequency (Hz) 59.9 75.0 70.0 60 - HP VP17 | User Guide - Page 51
■ w2408 supports preset modes 1 through 20 Factory Preset Video Input Modes, w2408 Preset .0 13 1280 x 1024 63.9 14 1280 x 1024 79.9 15 1440 x 900 55.9 16 1600 x 1000 61.6 17 1680 x 1050 65.3 18 1600 x 1200 75.0 19 1600 x 1200 93.8 20 1920 x 1200 74.0 Vertical Frequency - HP VP17 | User Guide - Page 52
imperfections, and we will adjust guidelines as improvements are made. For more information about your HP LCD Monitor, refer to the HP Web site at: http://www.hp.com/support Power Cord Set Requirements The monitor power supply is provided with Automatic Line Switching (ALS). This feature allows the - HP VP17 | User Guide - Page 53
device, pursuant to Part 15 of the FCC in accordance with the instructions, may cause harmful experienced radio or television technician for help. Modifications The FCC requires the user Only This device complies with Part 15 of the FCC Rules. part, series, or model number found on the product. User - HP VP17 | User Guide - Page 54
Materials Disposal This HP product contains mercury in the fluorescent lamp in the display LCD that might require of your waste equipment at the time of disposal will help to conserve natural resources and ensure that it is recycled service or the shop where you purchased the product. C-2 User - HP VP17 | User Guide - Page 55
Regulatory Notices Japanese Power Cord Notice Japanese the JIS-C-0950 material declaration for this product, visit www.hp.com/go/jisc0950. Korean Notice EPA ENERGY STAR® Compliance Products marked with HP recycling program, refer to the HP Web site at: http://www.hp.com/recycle User's Guide C-3 - HP VP17 | User Guide - Page 56
diphenyl ethers (PBDE) Liquid Crystal Display X X O O O O Panel Chassis/Other X O O O O O O: Indicates that this O O O O ᴎੵ/݊Ҫ X O O O O O O SJ/T11363-2006 X SJ/T11363-2006 X RoHS 2003 ᐕ 1 27 2002/95/EC ภᜰ̍ Part number: 440143-005 C-4 User's Guide
-
 1
1 -
 2
2 -
 3
3 -
 4
4 -
 5
5 -
 6
6 -
 7
7 -
8
-
9
-
10
-
11
-
12
-
13
-
14
-
15
-
16
-
17
-
18
-
19
-
20
-
21
-
22
-
23
-
24
-
25
-
26
-
27
-
28
-
29
-
30
-
31
-
32
-
33
-
34
-
35
-
36
-
37
-
38
-
39
-
40
-
41
-
42
-
43
-
44
-
45
-
46
-
47
-
48
-
49
-
50
-
51
-
52
-
53
-
54
-
55
-
56
 |
 |

User’s Guide
vp15 LCD Monitor
vp17 LCD Monitor
vp19 LCD Monitor
FP1707 LCD Monitor
WF1907 LCD Monitor
w1707 LCD Monitor
w1907 LCD Monitor
w2007 LCD Monitor
w2207 LCD Monitor
w2216 LCD Monitor
w2408 LCD Monitor