HP Visualize b2000 hp Visualize b2000 UNIX workstation parts removal and repla - Page 51
Replacing the Hard Disk Drive Bracket
 |
View all HP Visualize b2000 manuals
Add to My Manuals
Save this manual to your list of manuals |
Page 51 highlights
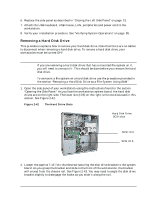
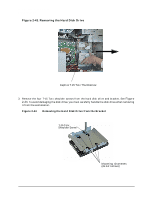
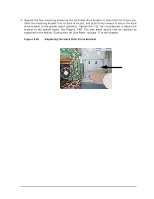
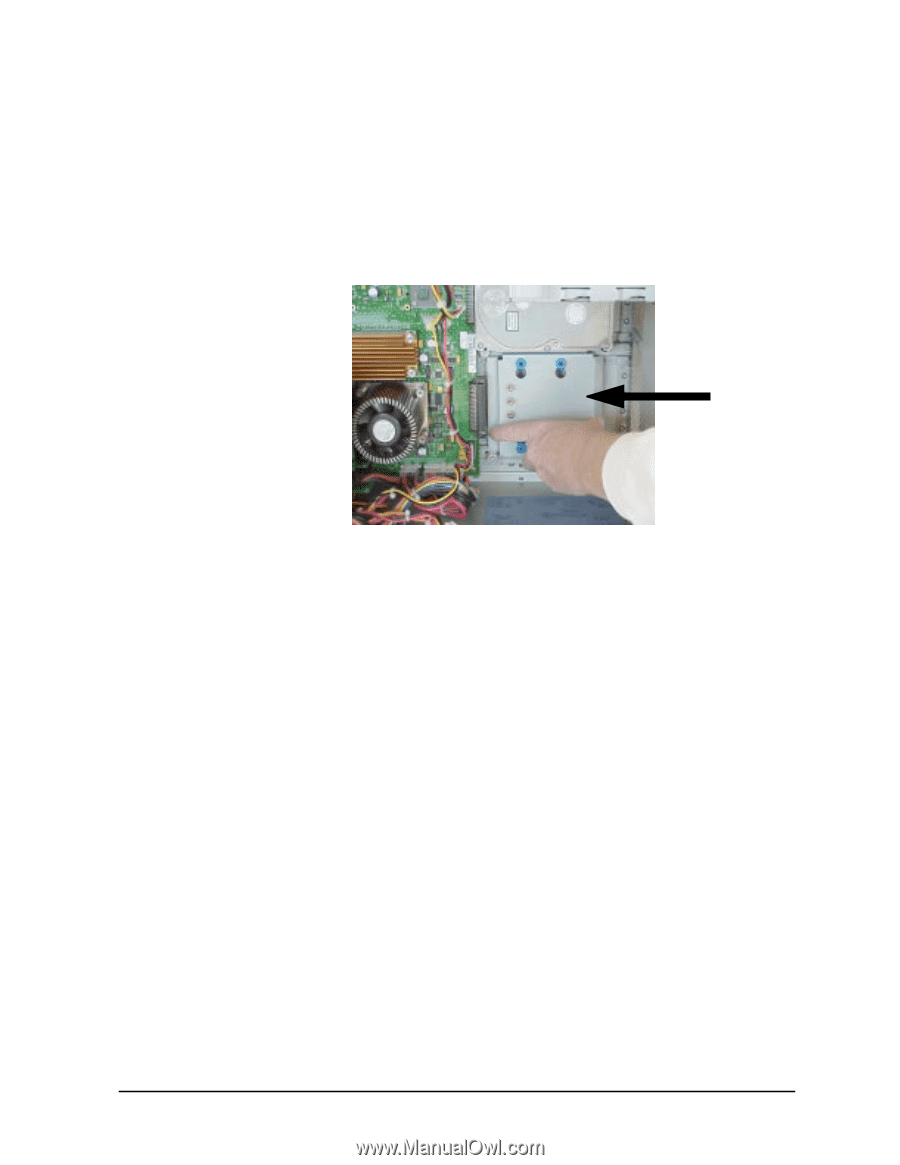
Parts Replacement Procedures Hard Disk Drive 4. Replace the four mounting screws on the hard disk drive bracket to store them for future use. Slide the mounting bracket into its hard drive slot, and push firmly inward to secure the hard drive bracket to the system board connector. Tighten the T-15 Torx thumbscrew to secure the bracket to the system board. See Figure 2-45. The side panel should now be replaced as explained in the section "Closing the Left Side Panel" on page 17 in this chapter. Figure 2-45 Replacing the Hard Disk Drive Bracket Chapter 2 51
-
 1
1 -
2
-
3
-
4
-
5
-
6
-
7
-
8
-
9
-
10
-
11
-
12
-
13
-
14
-
15
-
16
-
17
-
18
-
19
-
20
-
21
-
22
-
23
-
24
-
25
-
26
-
27
-
28
-
29
-
30
-
31
-
32
-
33
-
34
-
35
-
36
-
37
-
38
-
39
-
40
-
41
-
42
-
43
-
44
-
45
-
 46
46 -
 47
47 -
 48
48 -
 49
49 -
 50
50 -
 51
51 -
 52
52 -
 53
53 -
 54
54 -
 55
55 -
 56
56 -
57
-
58
-
59
-
60
-
61
-
62
-
63
-
64
-
65
-
66
-
67
-
68
-
69
-
70
-
71
-
72
-
73
-
74
-
75
-
76
-
77
-
78
-
79
-
80
-
81
-
82
-
83
-
84
-
85
-
86
-
87
 |
 |
Chapter 2
51
Parts Replacement Procedures
Hard Disk Drive
4.
Replace the four mounting screws on the hard disk drive bracket to store them for future use.
Slide the mounting bracket into its hard drive slot, and push firmly inward to secure the hard
drive bracket to the system board connector. Tighten the T-15 Torx thumbscrew to secure the
bracket to the system board. See
Figure 2-45
. The side panel should now be replaced as
explained in the section “Closing the Left Side Panel” on page 17 in this chapter.
Figure 2-45
Replacing the Hard Disk Drive Bracket