HP Z400 CRU Dataport DX115 kit Installation - Page 8
HP xw8000 and xw9000 Workstation series, Step 3—Installing a hard disk in the DX115 carrier - sata
 |
UPC - 890552660926
View all HP Z400 manuals
Add to My Manuals
Save this manual to your list of manuals |
Page 8 highlights
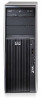
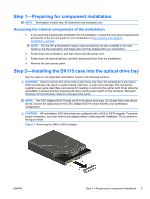
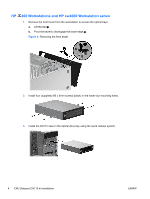
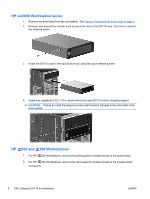
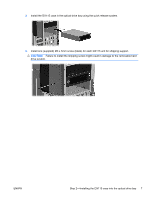
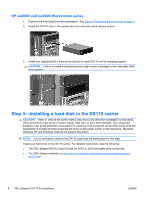
HP xw8000 and xw9000 Workstation series 1. Remove the front bezel from the workstation. See Figure 2 Removing the front bezel on page 4. 2. Install the DX115 case in the optical drive bay using the quick release system. 3. Install one (supplied) M3 x 5mm screw (black) for each DX115 unit for shipping support. CAUTION: Failure to install the shipping screw might result in damage to the removable hard drive system. Step 3-Installing a hard disk in the DX115 carrier CAUTION: Insert or remove the carrier (with a disk drive) only when the workstation is shut down. Other procedures may result in system hangs, data loss, or even drive damage. The component supplier's user guide describes a procedure for inserting or removing the carrier (with drive) while the workstation is booted and then powering the drive via the power switch on the enclosure. Microsoft Windows XP and Windows Vista do not support this action. NOTE: You do not have to remove the DX115 case from the workstation for this step. Install your hard drive in the DX115 carrier. For detailed instructions, see the following: ● The CRU Dataport DX115 User's Guide for SATA or SAS removable drive enclosures ● The CRU Dataport website at http://www.cru-dataport.com/htmldocs/products/dataexpress/ dx115.html 8 CRU Dataport DX115 kit installation ENWW
-
 1
1 -
2
-
 3
3 -
 4
4 -
 5
5 -
 6
6 -
 7
7 -
 8
8 -
 9
9 -
 10
10
 |
 |
