HP Z400 HP Workstations - Second Xeon Processor Installation - Page 10
Installing the processor heatsink in the HP xw Workstation series
 |
UPC - 890552660926
View all HP Z400 manuals
Add to My Manuals
Save this manual to your list of manuals |
Page 10 highlights
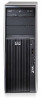
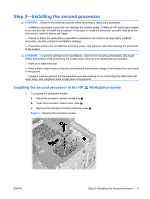
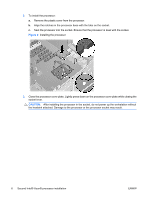
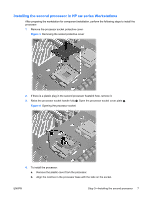
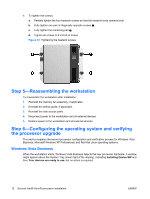
d. Fully tighten the remaining pair 2. e. Tighten all screws to 6 inch-lbs of torque. Figure 7 Tightening the heatsink screws Installing the processor heatsink in the HP xw Workstation series CAUTION: Ensure that the second heatsink does not crush the electrical wires of the first heatsink fan. 1. Remove and discard the thermal grease protective liner from the underside of the new heatsink, and then set the heatsink over the processor. NOTE: Do not touch the exposed thermal grease when handling the processor heatsink. 10 Second Intel® Xeon® processor installation ENWW
-
 1
1 -
2
-
3
-
4
-
 5
5 -
 6
6 -
 7
7 -
 8
8 -
 9
9 -
 10
10 -
 11
11 -
 12
12 -
 13
13 -
 14
14
 |
 |

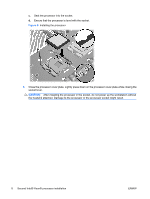
d.
Fully tighten the remaining pair
2
.
e.
Tighten all screws to 6 inch-lbs of torque.
Figure 7
Tightening the heatsink screws
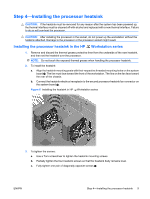
Installing the processor heatsink in the HP xw Workstation series
CAUTION:
Ensure that the second heatsink does not crush the electrical wires of the first heatsink
fan.
1.
Remove and discard the thermal grease protective liner from the underside of the new heatsink,
and then set the heatsink over the processor.
NOTE:
Do not touch the exposed thermal grease when handling the processor heatsink.
10
Second Intel® Xeon® processor installation
ENWW