HP Z400 HP Workstations - Second Xeon Processor Installation - Page 9
Installing the processor heatsink in the HP, Workstation series
 |
UPC - 890552660926
View all HP Z400 manuals
Add to My Manuals
Save this manual to your list of manuals |
Page 9 highlights
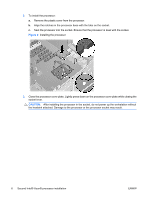
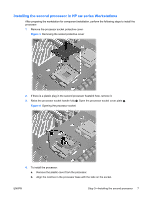
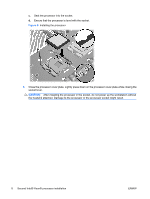
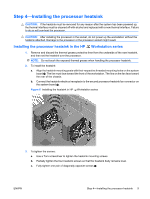
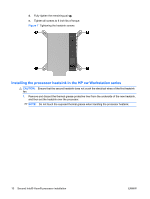
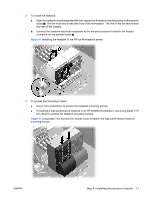
Step 4-Installing the processor heatsink CAUTION: If the heatsink must be removed for any reason after the system has been powered up, the thermal interface must be cleaned off with alcohol and replaced with a new thermal interface. Failure to do so will overheat the processor. CAUTION: After installing the processor in the socket, do not power up the workstation without the heatsink attached. Damage to the processor or the processor socket might result. Installing the processor heatsink in the HP Workstation series 1. Remove and discard the thermal grease protective liner from the underside of the new heatsink, and then set the heatsink over the processor. NOTE: Do not touch the exposed thermal grease when handling the processor heatsink. 2. To install the heatsink: a. Align the heatsink mounting posts with their respective threaded mounting holes on the system board . The fan must face toward the front of the workstation. The fins on the fan face toward the rear of the chassis. b. Connect the heatsink electrical receptacle to the second processor heatsink fan connector on the system board 2. Figure 6 Installing the heatsink in HP Workstation series 3. To tighten the screws: a. Use a Torx screwdriver to tighten the heatsink mounting screws. b. Partially tighten the four heatsink screws so that the heatsink body remains level. c. Fully tighten one pair of diagonally opposite screws . ENWW Step 4-Installing the processor heatsink 9
-
 1
1 -
2
-
3
-
 4
4 -
 5
5 -
 6
6 -
 7
7 -
 8
8 -
 9
9 -
 10
10 -
 11
11 -
 12
12 -
 13
13 -
 14
14
 |
 |
