Hitachi 50GX49B Owners Guide
Hitachi 50GX49B Manual
 |
View all Hitachi 50GX49B manuals
Add to My Manuals
Save this manual to your list of manuals |
Hitachi 50GX49B manual content summary:
- Hitachi 50GX49B | Owners Guide - Page 1
IMPORTANT - 1 - HITACHI PROJECTION COLOR TV 50GX49B OPERATING GUIDE TABLE OF CONTENTS IMPORTANT ...2 SAFETY TIPS...3 PICTURE CAUTIONS ...7 ACCESSORIES...8 REMOTE CONTROL BATTERY INSTALLATION AND REPLACEMENT 8 HOW TO SET UP YOUR NEW HITACHI PROJECTION TV 8 HOOK-UP CABLES AND CONNECTORS ...9 FRONT - Hitachi 50GX49B | Owners Guide - Page 2
EVENT REMINDER...53 CALENDAR...54 CARE OF YOUR HITACHI PROJECTION TV AND YOUR REMOTE CONTROL 54 RECEPTION PROBLEMS...55 USEFUL INFO ...56 Features ...56 HITACHI SERVICE HOTLINE...57 IMPORTANT Follow all warnings and instructions marked on this projection television. CAUTION: TO REDUCE THE RISK OF - Hitachi 50GX49B | Owners Guide - Page 3
properly, unplug the television and call your authorized dealer or service shop. SAFETY TIPS IMPORTANT SAFEGUARDS SAFETY POINTS YOU SHOULD KNOW ABOUT YOUR HITACHI PROJECTION TELEVISION CAUTION: * Read all of these instructions. * Save these instructions for later use. * Follow all warnings and - Hitachi 50GX49B | Owners Guide - Page 4
they may touch dangerous voltage points or short out parts that could result in a fire or electric shelf mounting should follow the manufacturer's instructions, and should use a mounting kit television from wall outlet and refer to qualified service personnel. 13 Choose a place where light - Hitachi 50GX49B | Owners Guide - Page 5
Code, NFPA No. 70-1975, provides information with respect to proper grounding of the mast and supporting ANTENNA GROUNDING AS PER NATIONAL ELECTRICAL CODE INSTRUCTIONS. 16-2 Note to CATV overhead power lines or other electrical lights or power circuits, or where it can fall into such power lines - Hitachi 50GX49B | Owners Guide - Page 6
on the marking label. If you are not sure of the type of power supply at your home, consult your dealer or local power company. For televisions designed to operate from battery power, refer to the operating instructions. 20 If the television does not operate normally by following the operating - Hitachi 50GX49B | Owners Guide - Page 7
part. Unauthorized substitutions may result in fire, electric shock, or other hazards. 27 Upon completion of any service or repairs to the television, ask the service damage to projection television receivers. Such "PATTERN BURNS" constitute misuse and are NOT COVERED by your HITACHI Factory - Hitachi 50GX49B | Owners Guide - Page 8
for the remote control. When replacing old batteries, push them towards the springs and lift them out. 3. Match the batteries to the (+) and (-) marks in the battery compartment. 4. Replace the cover. BOTTOM VIEW HOW TO SET UP YOUR NEW HITACHI PROJECTION TV ANTENNA Unless your TV is connected - Hitachi 50GX49B | Owners Guide - Page 9
changes, and increased chance of set failure, do not place the TV where temperatures can become excessively hot, for example, in direct sunlight or near a heating appliance, etc. VIEWING The major benefit of the HITACHI Projection Television is its large viewing screen. To see this large screen at - Hitachi 50GX49B | Owners Guide - Page 10
JACK PANEL 1. VHF (75-Ohm) antenna/CATV (Cable TV) When using a 75-Ohm coaxial cable system, connect the 75-Ohm) terminal. If you have a second antenna or cable TV system, connect the coaxial cable to the ANT B terminal. into the antenna terminal on the TV. To outdoor VHF or UHF Antenna 3. When both - Hitachi 50GX49B | Owners Guide - Page 11
to enter the MENU, making it possible to set TV features to your preference without using the remote. R INPUT TV screen. These buttons also serve as the cursor left ( ) and right ( ) buttons when in MENU mode. U POWER Button Press this button to turn the TV on or off. NOTE: Your HITACHI Projection TV - Hitachi 50GX49B | Owners Guide - Page 12
37.) FIRST TIME USE Q Antenna Input/Output The remote control allows you to switch between two separate 75 -CB-CR Input: 2 (36UX59B and 32UX59B models) This input provides Y-CB-CR jacks for input jacks, connect your components audio output to the TV's input 2 Left and Right Audio input jacks. Your - Hitachi 50GX49B | Owners Guide - Page 13
surround and external speaker features. See Page 17 for Audio System Setup. The TV's Internal Speakers will be switched off when "EXT" is selected. (8) for the surround sound feature. The volume level is controlled by the remote control main volume buttons. Use speakers with 8 Ohm impedance only. - Hitachi 50GX49B | Owners Guide - Page 14
CONNECT AFTER TURNING THE POWER TO THE TV OFF. Press the Right Projection TV and an external amplifier. This could damage both the TV and the speakers. Your TV connect it to the left audio jack on the TV. Refer to the operating guide of your other electronic equipment for additional information - Hitachi 50GX49B | Owners Guide - Page 15
and adjust the sound using the remote control of the TV set. CONNECTING EXTERNAL VIDEO SOURCES The exact arrangement you use to connect the VCR, camcorder, laserdisc player to your TV set is dependent on the model and features of each component. Check the owner's manual of each component for the - Hitachi 50GX49B | Owners Guide - Page 16
OUT of the VCR or the laserdisc player to the INPUT (VIDEO) jack on the TV set below. 2. Connect the cable from the AUDIO OUT of the VCR or the AUDIO OUT of the VCR or the laserdisc player to the INPUT (VIDEO) jack on the TV set below. 2. Connect the cable from the AUDIO OUT R of the VCR or the - Hitachi 50GX49B | Owners Guide - Page 17
. (INPUT: 1 in example on page 11.) Refer to your VCR operating guide for more information on line input-output connections. CONNECTING A STEREO LASERDISC PLAYER OR Laserdisc or the DVD player to the INPUT 2 (Y) jack as shown on the TV set below. 2. Connect the cable from the CB OUT or B-Y OUT of the - Hitachi 50GX49B | Owners Guide - Page 18
different surround sound requirements. Q The television's internal speakers. R These speakers are connected to a separate audio amplifier. Use the "Audio to Hi-Fi" output on the TV. (3) These speakers are connected to the Rear Speaker 8 Ohm output on the - Hitachi 50GX49B | Owners Guide - Page 19
point the remote control at the remote sensor of the TV and press the TV button. The remote will now control your television. To operate your VCR, point the remote at the remote sensor of the VCR and press the VCR button. The remote will now control your VCR. (See page 25 for instructions on how to - Hitachi 50GX49B | Owners Guide - Page 20
to light if the room is too bright. (4) PRECODED VCR BUTTONS These buttons always transmit the chosen precoded VCR codes. (5) TV/VCR BUTTON When the remote is in the TV of VCR mode, this is the TV/VCR button. When the remote is in the CABLE mode, this is the A/B button. HOW TO USE THE GENIUS - Hitachi 50GX49B | Owners Guide - Page 21
HOW TO USE THE GENIUS REMOTE TO CONTROL YOUR TV - 21 - (1) POWER Button Press this button to turn the TV set on or off when the remote is in TV mode. If a Special Event Reminder is set, it will be displayed when the TV is first turned on. (See page 52). (2) PICTURE-IN-PICTURE buttons See separate - Hitachi 50GX49B | Owners Guide - Page 22
HOW TO USE THE GENIUS REMOTE TO CONTROL YOUR TV - 22 - (5) LAST CHANNEL (LST-CH) Button Use this button to ) or down ( ). NOTE: The TV may not receive some channels if you are not in the correct SIGNAL SOURCE mode. (See page 32.) (8) EXIT button When in MENU mode, this button will exit all ON- - Hitachi 50GX49B | Owners Guide - Page 23
. (11) CHANNEL SKIP button Press this button when no menu is displayed and the TV will tune to the last channel viewed. The user can a blank PIP Sub picture. PICTURE-IN-PICTURE (PIP) Your HITACHI Projection TV incorporates Dual Tuner technology designed for improved viewing enjoyment. This Dual - Hitachi 50GX49B | Owners Guide - Page 24
between main picture and PIP Sub-Picture tuning, press PIP CH button on the remote. Every press of the PIP CH will highlight the main or sub-PIP want to watch more than one program at the same time. You can watch a TV program while viewing other programs from the ANT A source or any of the video - Hitachi 50GX49B | Owners Guide - Page 25
PICTURE-IN-PICTURE (PIP) - 25 - 2. If a channel is tuned during this SURF scanning, sub-pictures will be removed from the screen. (2) SWAP Button If you wish to switch what is being shown on the main picture to the Sub-Picture, press the SWAP button. NOTE: 1. The SWAP button will only operate - Hitachi 50GX49B | Owners Guide - Page 26
operating guide. 3. The remote control will remember the codes you have programmed until the batteries are removed from the remote VCR does not have a power function, the remote will issue the CHANNEL UP function. 5. The MENU button will act as the VCR MENU button for HITACHI VCRs. 6. The LST-CH - Hitachi 50GX49B | Owners Guide - Page 27
chosen precoded VCR codes. For some VCRs, you must press the RECORD button twice to record a program. (3) EXCLUSIVE TV Buttons These buttons are for operating the TV. NOTE: Refer to instruction manual of the VCR for operation of the buttons exclusively for the VCR. USING THE REMOTE TO CONTROL CABLE - Hitachi 50GX49B | Owners Guide - Page 28
buttons transmit the chosen precoded CABLE/SATELLITE codes. (3) EXCLUSIVE TV Buttons These buttons are for operating the TV. NOTES: 1. If your cable/satellite operating guide. 3. The remote control will remember the codes you have programmed in until the batteries are removed from the remote - Hitachi 50GX49B | Owners Guide - Page 29
CABLE/SATELLITE AND VCR CODES CABLE/SATELLITE AND VCR CODES CABLE BRAND CODES - 29 - ABC Archer Cable Star Citizen Comtronics Dae Ryung ,13 Gold Star 03,09,14,23,24 Hitachi 37 Jasco 00,08,13,38,53,55,56 Macom 16 Memorex 30,32,34 NSC 22,37,50 Panasonic 02 Philips 06,11,20 02 40 - Hitachi 50GX49B | Owners Guide - Page 30
CABLE/SATELLITE AND VCR CODES Signal SL Marx Starcom Starquest Sylvania Texscan Toshiba TV 86 United Cable Universal Viewstar Zentek Zenith 26,56 26 38,53,56 56 19 19 02 08 01,48,49 45 45 43 23 06 08,30 30 01,22,47 06,08,16,38,50 00 23 00,08,12,15,23,27,28 ,33,34,37,42,48,51, 52 09,22 00 23, - Hitachi 50GX49B | Owners Guide - Page 31
CABLE/SATELLITE AND VCR CODES Harman/Kardon Headquarter Hitachi JVC Kenwood Kodak Lloyd's LXI Magnin Marta MEI MGA Minolta Motorola Multitech Nikko Olympus Orion Penney Philco Pilot Portland Pulsar Quartz Radio Shack Randex Realistic - Hitachi 50GX49B | Owners Guide - Page 32
OSD - 32 - SATELLITE BRAND CODES Hitachi 61 Sony 63 RCA 62 ULTRATEC OSD 1. Press MENU on the remote control to display the different features on your HITACHI Projection TV. 2. Press the CURSOR buttons to highlight a different feature. 3. Press EXIT on the remote control to quickly exit - Hitachi 50GX49B | Owners Guide - Page 33
PARENTAL CONTROL 4 EVENT PROGRAM AUTO LINK CLOSED CAPTION MENU BACKGROUND FIRST TIME TOUR Label channels PAY 1, ABC, etc. Label video inputs VCR1, DVD1, etc. Allows you to set and view favorite channels. Block channel picture and sound. Turn TV on and off once, daily, or weekly. Automatically - Hitachi 50GX49B | Owners Guide - Page 34
the remote to highlight the function desired. NOTE: To see an auto-demonstration of the on-screen displays with HELP text displayed, press and hold the POWER button on the TV set for approximately five seconds. Press the POWER button on the TV again to end the autodemonstration. MENU LANGUAGE This - Hitachi 50GX49B | Owners Guide - Page 35
SET UP - 35 - Press CURSOR or to highlight the correct answers to both questions. Press CURSOR to display the graphic guide. Press EXIT to quit menu or CURSOR to begin AUTO CHANNEL SET. (See page 33). SIGNAL SOURCE Select ANTENNA if you are using an indoor or outdoor antenna. Select CATV - Hitachi 50GX49B | Owners Guide - Page 36
or to highlight and select the correct SIGNAL SOURCE mode. Press EXIT to quit MENU or CURSOR to return to previous menu. Reception channels for each mode are shown at the left. Refer to your cable or TV guide for channel identification standards. If certain CATV channels are poor or not possible in - Hitachi 50GX49B | Owners Guide - Page 37
ADD/DEL to add or erase additional channels. CHANNEL MEMORY Use this function after AUTO CHANNEL SET to add or erase additional channels to the remote control CHANNEL or buttons. - Hitachi 50GX49B | Owners Guide - Page 38
in CHANNEL MEMORY using CHANNEL or or the number buttons to change the channel. Press EXIT to quit menu or CURSOR to return to previous menu. CHANNEL LIST This function allows you to review which channels are labeled in CHANNEL ID (ID)., which have been added to CHANNEL MEMORY (SCAN), and which - Hitachi 50GX49B | Owners Guide - Page 39
to quit menu or CURSOR to return to previous menu when the CURSOR is in the first position. DIGITAL ARRAY Your HITACHI Projection TV has three color projection tubes: over each other to produce the white lines. To simplify convergence, HITACHI incorporates a feature to allow you to display a test - Hitachi 50GX49B | Owners Guide - Page 40
, or right. Press MENU to change the color you want to adjust. Press the front panel DIGITAL ARRAY button or the remote control MOVE button when TV OFF or press the remote control PIP button. When the TV is turned ON again, your old convergence data will be restored. When adjusting convergence, - Hitachi 50GX49B | Owners Guide - Page 41
change character position. (*) represents a blank space. Press CHANNEL or and the number buttons to label additional channels. Press EXIT to quit menu or CURSOR to return to previous menu when the CURSOR is in the first position. Select RESET to erase a CHANNEL ID. NOTE: If ANT A and ANT B are in - Hitachi 50GX49B | Owners Guide - Page 42
the video input to be named. Press CURSOR or to select letters. Press CURSOR or to change position. Press EXIT to quit menu or CURSOR to return to previous menu when the CURSOR is in the first position. (*) represents a blank space. Select RESET to set VIDEO ID to original condition. NOTE: VIDEO - Hitachi 50GX49B | Owners Guide - Page 43
CUSTOM - 43 - Channel stored with AUTO CHANNEL SET will automatically be stored in FAMILY FAVORITES. To rename the categories, use the CURSOR buttons to highlight the category you would like to rename. Use CURSOR or to change a letter and CURSOR to select the next character to change. To enter a - Hitachi 50GX49B | Owners Guide - Page 44
FRONT PANEL LOCK is turned on, all buttons on the front panel will be deactivated, except the power button. When TV TIME OUT is turned on, you can set the BEGIN and END times and the TV cannot be viewed during that time period. (Set clock first). Use CURSOR or to highlight ONCE - Hitachi 50GX49B | Owners Guide - Page 45
this function). Press CURSOR or , or CHANNEL ( ) or ( ), or number buttons to set the channel the TV will tune to when it automatically turns on. Press EXIT to quit menu or CURSOR to return to previous menu. IF the clock is not set, you can not use this function and the screen below - Hitachi 50GX49B | Owners Guide - Page 46
remote control is pressed. This is convenient when you want to record a movie with your VCR and watch it later. Select OFF to disable this function. Press EXIT to quit menu or CURSOR to return to previous menu. NOTE: 1. Once the TV TV screen. Your local TV program guide denotes these programs as or . - Hitachi 50GX49B | Owners Guide - Page 47
reports or a TV program guide. This information covers the entire screen and viewing the TV program is not MENU BACKGROUND This function allows you to choose from three menu backgrounds. Use CURSOR or to change MENU BACKGROUND setting. Press EXIT to quit menu or CURSOR to return to previous menu - Hitachi 50GX49B | Owners Guide - Page 48
, and the following screen will appear. Use CURSOR or then press CURSOR to select ON or OFF. Press EXIT to quit menu or CURSOR to return to previous menu. NOTE: 1. When TV set is turned on, the First Time Tour will always appear if it is set to ON. 2. To exit during the - Hitachi 50GX49B | Owners Guide - Page 49
CONTRAST is selected, you are adjusting CONTRAST. The additional menu items BRIGHTNESS, COLOR, TINT, and SHARPNESS can be to return video adjustments to factory preset conditions. ADVANCED SETTINGS Your HITACHI Projection TV has an Ultra AI (Artificial Intelligence) function which will automatically - Hitachi 50GX49B | Owners Guide - Page 50
AUDIO - 50 - ULTRA AI (ARTIFICIAL INTELLIGENCE) When the AI function is on, the TV's internal computer will perform the to adjust the function. Press EXIT to quit menu. NOTE: If BASS is selected you are adjusting BASS. The additional menu items TREBLE and BALANCE can be selected and adjusted - Hitachi 50GX49B | Owners Guide - Page 51
SAP (second audio program) which may be a secondary language, weather report, etc. The sources received will be displayed at the top center edge of the TV. The source you select will be displayed above the sources received. See example below for each selection when both stereo and second audio are - Hitachi 50GX49B | Owners Guide - Page 52
experience. THEATER MODES Use this function to choose from automatic picture and audio settings to optimize your TV's performance. Use CURSOR or to change THEATER MODES settings. When TV mode is chosen, the following are automatically set: Contrast almost maximum, Super Contrast-Off, Color Temp - Hitachi 50GX49B | Owners Guide - Page 53
is selected, it will take approximately two seconds to return to factory conditions (SPORTS mode). Press exit to quit menu or CURSOR to return to previous menu. INFO This function allows your TV to assist you with your busy day-to-day schedule. SPECIAL EVENT REMINDER Use this function to set up to - Hitachi 50GX49B | Owners Guide - Page 54
CURSOR or to change the month. Press EXIT to quit menu or CURSOR to return to previous menu. If the clock is not set, you can not sue "CALENDAR" when a Special Event Reminder is set. CARE OF YOUR HITACHI PROJECTION TV AND YOUR REMOTE CONTROL DO Dust the screen and cabinet with a soft cloth. Clean - Hitachi 50GX49B | Owners Guide - Page 55
PROBLEMS - 55 - Do not touch the screen too often. Do not subject the remote control to shocks such as dropping it on the floor, etc. Physical damage to the precision parts may result. Avoid placing the remote in the picture. NOTE: The TV set can generate sound distortion in external devices such - Hitachi 50GX49B | Owners Guide - Page 56
the power switch again. This protective technology should provide for years of lasting entertainment from your HITACHI Projection Television. Features • Superfine Picture Quality 850 Line Horizontal Resolution • Pure Green and Red Filter Lenses • Artificial Intelligence System • Remote (Controls - Hitachi 50GX49B | Owners Guide - Page 57
• Width (in.) • Depth (in.) • Weight (lbs) 50GX49B 51 7/8 45 1/2 23 3/4 185 NOTE: Due to improvements, specifications in this operating guide are subject to change without notice. HITACHI SERVICE HOTLINE To locate an authorized HITACHI service facility in the continental U.S.A. and Canada, DIAL - Hitachi 50GX49B | Owners Guide - Page 58
HITACHI SERVICE HOTLINE In Canada, please contact 1-800-HITACHI (1-800-448-2244) HITACHI (HSC) Canada Inc 6740 Campobello Road Mississauga, Ont. L5N 2L8 - 58 -
-
 1
1 -
 2
2 -
 3
3 -
 4
4 -
 5
5 -
 6
6 -
 7
7 -
8
-
9
-
10
-
11
-
12
-
13
-
14
-
15
-
16
-
17
-
18
-
19
-
20
-
21
-
22
-
23
-
24
-
25
-
26
-
27
-
28
-
29
-
30
-
31
-
32
-
33
-
34
-
35
-
36
-
37
-
38
-
39
-
40
-
41
-
42
-
43
-
44
-
45
-
46
-
47
-
48
-
49
-
50
-
51
-
52
-
53
-
54
-
55
-
56
-
57
-
58
 |
 |

IMPORTANT
- 1 -
HITACHI
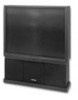
PROJECTION COLOR TV
50GX49B
OPERATING GUIDE
TABLE OF CONTENTS
IMPORTANT
...........................................................................................................................................................
2
SAFETY TIPS
..........................................................................................................................................................
3
PICTURE CAUTIONS
.............................................................................................................................................
7
ACCESSORIES
.......................................................................................................................................................
8
REMOTE CONTROL BATTERY INSTALLATION AND REPLACEMENT
.............................................................
8
HOW TO SET UP YOUR NEW HITACHI PROJECTION TV
.................................................................................
8
HOOK-UP CABLES AND CONNECTORS
.............................................................................................................
9
FRONT PANEL CONTROLS
................................................................................................................................
10
FIRST TIME USE
..................................................................................................................................................
12
REAR SPEAKER TERMINAL CONNECTIONS
...................................................................................................
14
TIPS ON REAR PANEL CONNECTIONS
.......................................................................................................................
14
EXTERNAL CONNECTIONS
................................................................................................................................
15
CONNECTING EXTERNAL VIDEO SOURCES
...................................................................................................
15
CONNECTING A STEREO VCR OR STEREO LASERDISC PLAYER
........................................................................
16
CONNECTING A STEREO LASERDISC PLAYER OR DVD PLAYER TO INPUT 2
. ................................................
17
AUDIO SYSTEM SET-UP
.....................................................................................................................................
18
THE GENIUS REMOTE CONTROL (CLU-435UI)
................................................................................................
19
HOW TO USE THE GENIUS REMOTE TO CONTROL YOUR TV
......................................................................
20
PICTURE-IN-PICTURE (PIP)
................................................................................................................................
23
USING THE REMOTE TO CONTROL VCR FUNCTIONS
...................................................................................
26
USING THE REMOTE TO CONTROL CABLE BOX/SATELLITE FUNCTIONS
..................................................
27
CABLE/SATELLITE AND VCR CODES
................................................................................................................
29
CABLE BRAND
CODES
.............................................................................................................................................
29
VCR BRAND
CODES
..................................................................................................................................................
30
SATELLITE BRAND
CODES
.....................................................................................................................................
32
ULTRATEC OSD
...................................................................................................................................................
32
SET UP
..................................................................................................................................................................
34
MENU LANGUAGE
..........................................................................................................................................................
34
PLUG & PLAY
...................................................................................................................................................................
34
SIGNAL SOURCE
.............................................................................................................................................................
35
AUTO CHANNEL SET
.....................................................................................................................................................
36
CHANNEL MEMORY
.......................................................................................................................................................
37
CHANNEL LIST
................................................................................................................................................................
38
CLOCK SET
.......................................................................................................................................................................
39
DIGITAL ARRAY
.............................................................................................................................................................
39
CUSTOM
...............................................................................................................................................................
40
CHANNEL ID
....................................................................................................................................................................
40
VIDEO ID
...........................................................................................................................................................................
41
FAMILY FAVORITES (MENU)
.......................................................................................................................................
42
FAMILY FAVORITES (OPERATION)
............................................................................................................................
43
PARENTAL CONTROL
....................................................................................................................................................
44
4 EVENT PROG
.................................................................................................................................................................
45
AUTO LINK
.......................................................................................................................................................................
46
CLOSED CAPTION
...........................................................................................................................................................
46
MENU BACKGROUND
....................................................................................................................................................
47
FIRST TIME TOUR
...........................................................................................................................................................
47