HoMedics SS-4510 Downloadable Instruction Book - Page 3
SoundSpa Clock Radio Features, Assembly and Instructions for Use - set time
 |
View all HoMedics SS-4510 manuals
Add to My Manuals
Save this manual to your list of manuals |
Page 3 highlights
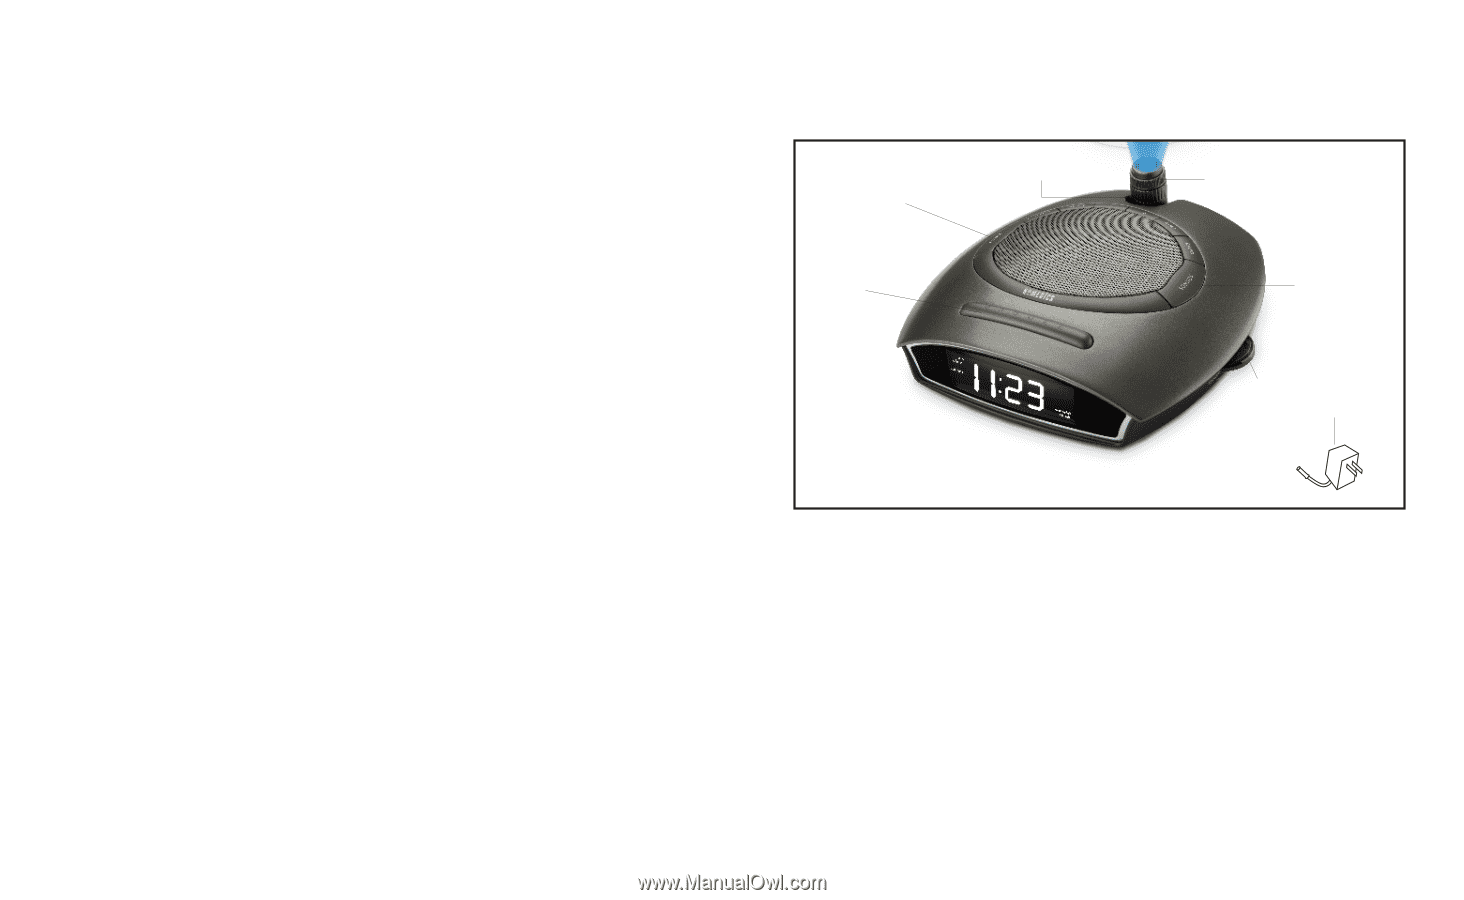
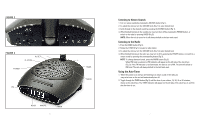
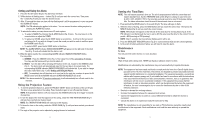
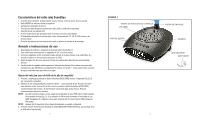
SoundSpa Clock Radio Features • 6 Nature Sounds: Rain Forest, Ocean, Thunder, Summer Night, Rain and Water Fall • AM/FM radio with alarm and snooze • Automatic time set • Three gentle-wake options - radio, beep tone or nature sounds • Easy-to-read clock with LCD display • Projection feature projects time on the ceiling in a soothing blue light • Auto-timer lets you choose how long you listen - 15, 30, 45 or 60 minutes or continuously • Volume control adjusts the volume of the radio, beep or nature sounds Assembly and Instructions for Use 1. Unpack the product and check to make sure everything is included (Fig 1). 2. This unit is powered by a DC adaptor, which is included. 3. Attach the DC adaptor to the jack located on the back of the unit (Fig 3) and insert the cord into a 120V household outlet. 4. Adjust clock region to your location. Clock will automatically set the current Eastern Standard Time. 5. Replace the backup battery when low battery indicator appears. To install a new battery, insert one CR2032 battery into the bottom compartment with the + side towards you. Replace cover and snap into place. Setting the Clock (in case of battery backup failure) 1. Press and hold the DATE/TIME button for 3 s ecconds (Fig 2). The year will begin to flash. 2. While the year is flashing, press the + button to increase the year. Press the - button to decrease the year. Once the correct year is set, press the DATE/TIME button again to set the month and day. Press again to Adjust the hour. Press again to adjust the minute. NOTE: PM indicator will appear on the left side of the clock face for evening hours (Fig 3). If the PM indicator is not illuminated , the hour is set to AM. Be sure to set the time for the correct 12-hour period- AM (morning) or PM (evening). NOTE: After 10 seconds, the time will stop flashing and it will be set. 3. Press the BACKLIGHT HIGH/LOW button (Fig 2) to choose between high and low clock brightness. 4 FIGURE 1 VOLUME TIME ROTATION KNOB SNOOZE BUTTON FOCUS KNOB SOUNDS TUNER ADAPTOR 5
-
 1
1 -
 2
2 -
 3
3 -
 4
4 -
 5
5 -
 6
6 -
 7
7 -
 8
8 -
 9
9 -
10
 |
 |