Homelite HOMHT10 User Manual - Page 9
Assembly, Operation
 |
View all Homelite HOMHT10 manuals
Add to My Manuals
Save this manual to your list of manuals |
Page 9 highlights
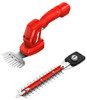
ASSEMBLY WARNING: Do not attempt to modify this product or create accessories not recommended for use with this tool. Any such alteration or modification is misuse and could result in a hazardous condition leading to possible serious personal injury. WARNING: To prevent accidental starting that could cause serious personal injury, always make sure the switch trigger is locked out in the off position when assembling parts. OPERATION WARNING: Do not allow familiarity with products to make you careless. Remember that a careless fraction of a second is sufficient to inflict serious injury. WARNING: Always wear eye protection with side shields marked to comply with ANSI Z87.1, along with hearing protection. Failure to do so could result in objects being thrown into your eyes resulting in possible serious injury. WARNING: Do not use any attachments or accessories not recommended by the manufacturer of this product. The use of attachments or accessories not recommended can result in serious personal injury. NOTICE: Before each use, inspect the entire product for damaged, missing, or loose parts such as screws, nuts, bolts, caps, etc. Tighten securely all fasteners and caps and do not operate this product until all missing or damaged parts are replaced. Please contact customer service or an authorized service center for assistance. APPLICATIONS You may use this product for the purpose listed below: n Light trimming and shaping of hedges and shrubbery with the shrubber blade n Light trimming of grass and other light weeds with the grass shear blade NOTE: The grass shear blade can only be used to cut grass. Using the grass shears to cut any other material can result in damage to the tool. INSTALLING/REMOVING BLADES See Figure 2. The grass shear/shrubber comes with two blades: the 4 in. grass shear blade for cutting grass and light weeds, and the 8 in. shrubber blade for trimming hedges. Make sure to use the correct blade for your application. NOTE: The grass shear blade can only be used to cut grass. Using the grass shears to cut any other material can result in damage to the tool. n Make sure the switch trigger is locked out in the off position. n Unscrew the lock knob and remove any attached blade from the tool. n Install the desired blade onto the bar stud and secure it in place using the lock knob. CHARGING THE TOOL See Figure 3. Make sure the switch trigger is locked out in the off position. Insert the charging cable into the product as shown. Connect the power adapter to an outlet providing normal household voltage, 120 volts, AC only, 60 Hz. When the tool is charging, the LED will turn red. Do not place tool in an area of extreme heat or cold. It will charge best at normal room temperature. If the LED does not turn on after connecting to a power supply, check connections. If all connections are secure, remove from power supply and recheck after one hour. After charging is complete, the LED will turn green. If LED does not turn to green after three hours, an error has occurred. If all connections are secure, remove from power supply and recheck after one hour. Page 7 - English
-
 1
1 -
2
-
3
-
 4
4 -
 5
5 -
 6
6 -
 7
7 -
 8
8 -
 9
9 -
 10
10 -
 11
11 -
 12
12 -
 13
13 -
 14
14 -
15
-
16
-
17
-
18
-
19
-
20
-
21
-
22
-
23
-
24
-
25
-
26
-
27
-
28
-
29
-
30
-
31
-
32
-
33
-
34
 |
 |
