Honeywell HCD544 User Manual
Honeywell HCD544 Manual
 |
View all Honeywell HCD544 manuals
Add to My Manuals
Save this manual to your list of manuals |
Honeywell HCD544 manual content summary:
- Honeywell HCD544 | User Manual - Page 1
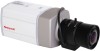
HCD544 Day/Night Color Camera NTSC PAL HCD544 HCD544X User Guide Document 800-01954 - Rev A - 08/08 - Honeywell HCD544 | User Manual - Page 2
dry cloth. • Do not block any ventilation openings. Install in accordance with the manufacturer's instructions. • Do not install near any heat sources such as radiators, heat registers, stoves, by the manufacturer, or sold with the apparatus. • Refer all servicing to qualified service personnel. 2 - Honeywell HCD544 | User Manual - Page 3
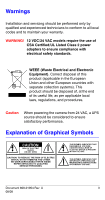
Warnings Installation and servicing should be performed only by qualified and experienced its useful life, as per applicable local laws, regulations, and procedures. Caution When powering the camera from 24 VAC, a UPS source should be considered to ensure satisfactory performance. Explanation of - Honeywell HCD544 | User Manual - Page 4
and, if not installed and used in accordance with the instructions, may cause harmful interference to radio communications. However, of Conformance The manufacturer declares that the equipment supplied with this guide is compliant with the essential protection requirements of the EMC directive - Honeywell HCD544 | User Manual - Page 5
the Lens 7 Connecting the Camera 8 Connecting LAMP Contact 9 Adjusting The Back Focus 9 Mounting the Camera 10 Making Final Adjustments 10 SETUP Menu Functions 13 SPECIAL Menu 14 SPECIAL Menu Functions 15 Adding a Camera ID Display 16 Programming Day and Night Modes 17 Setting A Privacy - Honeywell HCD544 | User Manual - Page 6
addition to this user guide, one HCD544 camera, and an accessory package (5-pin power and LAMP connector and a lens connector). If any parts are missing or damaged, contact the dealer you purchased the camera from or call Honeywell Customer Service (see the back of this guide for contact information - Honeywell HCD544 | User Manual - Page 7
Installing the Lens The HCD544 camera is factory configured for a CS-mount lens. Figure 1 demonstrates how to attach a customer supplied lens. Screw the lens ! into the front of the camera body ". An IR corrected Day/Night lens is recommended for this camera. Figure 1 ! CS Mount " Setscrews - Honeywell HCD544 | User Manual - Page 8
the power source from the external power supply before applying power to the camera. 1. Connect the VIDEO connector on the rear of the camera to the video-in connector on your monitor. 2. Connect the camera to a 12 VDC or 24 VAC power supply (appropriate to your installation). Use a screwdriver - Honeywell HCD544 | User Manual - Page 9
Connecting LAMP Contact The HCD544 camera is equipped with LAMP and GND external contact terminals. When the LAMP terminal is connected to the GND terminal, the camera is forced into night mode (see page 15). It stays in night mode until the LAMP terminal is disconnected from the GND terminal. - Honeywell HCD544 | User Manual - Page 10
and its lens. Caution Some installation codes dictate that the mounting bracket must be capable of supporting up to four times the combined weight of the camera and lens. Making Final Adjustments Adjust the focus for your desired field of view; that is, until you see a clear image. If necessary - Honeywell HCD544 | User Manual - Page 11
Programming Use the OSD (On-Screen Display) to program your HCD544 camera. OSD Menu Controls Figure 5 OSD Menu Controls Navigating through the menus ENTER (middle control) Press and hold two seconds to access the main SETUP menu. - Honeywell HCD544 | User Manual - Page 12
SETUP Menu The HCD544 menu system consists of one main SETUP menu for easy camera programming. Note Figure 6 shows the default settings. Figure 6 Setup Menu 1 LENS MANUAL 2 SHUTTER ESC .. 3 WHITE BAL AWC .. 4 BACKLIGHT OFF 5 AGC 30dB 6 SPECIAL .. 7 EXIT MENU .. .. - Honeywell HCD544 | User Manual - Page 13
AWB mode with a wider operating range. USER = Adjust the red or blue gain (0~255). MANUAL = Increase or decrease the red or blue gain on screen. 4 BACKLIGHT Control the light level see SPECIAL Menu). 7 EXIT MENU Exits the OSD; returns to video monitoring. Document 800-01954 Rev A 13 08/08 - Honeywell HCD544 | User Manual - Page 14
.. 2 DAY&NIGHT AUTO .. 3 PRIVACY OFF .. 4 MIRROR OFF 5 SHARPNESS 11 6 FACTORY DEFAULT YES 7 SW VERSION 0.16 8 RETURN .. indicates submenus Submenu CAMERA ID Menu Options DAY&NIGHT PRIVACY AUTO .. ON OFF ON .. OFF MIRROR ON OFF For a description of the submenus and menu options - Honeywell HCD544 | User Manual - Page 15
mode. See Programming Day and Night Modes. Options: AUTO = Depending on the light level, the camera automatically switches to night mode. ON = The camera is forced into night mode at all times. OFF = The camera never switches to night mode regardless of the light level unless the LAMP connector is - Honeywell HCD544 | User Manual - Page 16
default settings. NO = Does not reset to factory default settings. Displays the current firmware version Exits the SPECIAL menu; returns to the SETUP menu Adding a Camera ID Display You may assign a Camera ID to be displayed on the monitor. To add an ID: 1. On the SPECIAL menu, select - Honeywell HCD544 | User Manual - Page 17
monitor (maximum 10 characters, including spaces). Programming Day and Night Modes This screen allows you to set how the camera reacts to changes in illumination and when the camera switches between Day and Night modes. Note Figure 9 shows the default settings. Figure 9 Day and Night Setup - Honeywell HCD544 | User Manual - Page 18
LEVEL (Night to Day Threshold) Sets the time (5~60, in 5-second increments) before the camera switches to day or night mode after detecting a switching threshold. The light detection level (1~12) at which the camera switches to night mode. The lower the value, the darker the lighting must be before - Honeywell HCD544 | User Manual - Page 19
Setting A Privacy Zone Set an area of the screen for privacy mode; that is, the camera does not display video from this area. Note Figure 10 shows the default settings. Figure 10 Privacy Mode Setup 1 CONTROL OFF 2 H START 0 3 H END 0 4 V START 0 5 V END 0 RETURN Menu Item 1 - Honeywell HCD544 | User Manual - Page 20
EXIT 2 EXIT 3 RETURN Menu Item 1 SAVE AND EXIT 2 EXIT 3 RETURN Description Exits the SETUP menu, saving your changes, and returns to video monitoring Note If the camera times out after five minutes of inactivity, your changes are not saved. Exits the SETUP menu without saving your changes Returns - Honeywell HCD544 | User Manual - Page 21
, at its sole option, free of charge, any defective product returned prepaid. In the event you have a problem with any Honeywell Video Systems product, please call Customer Service at 1.800.796.CCTV (North America only) for assistance or to request a Return Merchandise Authorization (RMA) number - Honeywell HCD544 | User Manual - Page 22
Video Output: Sync System: S/N Ratio: Auto Gain Control: Automatic Electronic Shutter: White Balance: BLC: Gamma: Electrical Input Voltage: Input Range: Surge Suppression: Power Consumption: Mechanical Dimensions: Weight: Construction: (housing) HCD544 (NTSC) HCD544X Manual/User Off/On 0.45 - Honeywell HCD544 | User Manual - Page 23
Connectors: Environmental Temperature: Relative Humidity: Regulatory Emissions: Immunity: Safety: HCD544 (NTSC) HCD544X (PAL) Main Video Output: BNC Lens: 4-pin connector Power Input/LAMP: removable 5-pin screw terminal block Operating: 14°F to 122°F (-10°C to 50°C) Storage: -4°F to140°F (-20°C to - Honeywell HCD544 | User Manual - Page 24
this publication may be reproduced by any means without written permission from Honeywell Video Systems. The information in this publication is believed to be accurate in all respects. However, Honeywell Video Systems cannot assume responsibility for any consequences resulting from the use thereof
-
 1
1 -
 2
2 -
 3
3 -
 4
4 -
 5
5 -
 6
6 -
 7
7 -
8
-
9
-
10
-
11
-
12
-
13
-
14
-
15
-
16
-
17
-
18
-
19
-
20
-
21
-
22
-
23
-
24
 |
 |

Document 800-01954 – Rev A – 08/08
User Guide
HCD544
Day/Night
Color Camera
HCD544
HCD544X
NTSC
PAL