Honeywell HZ339BP User Guide - Page 4
Step 2: Set Temperature, Step 3: Set Timer, Step 4: Oscillation
 |
UPC - 092926344832
View all Honeywell HZ339BP manuals
Add to My Manuals
Save this manual to your list of manuals |
Page 4 highlights
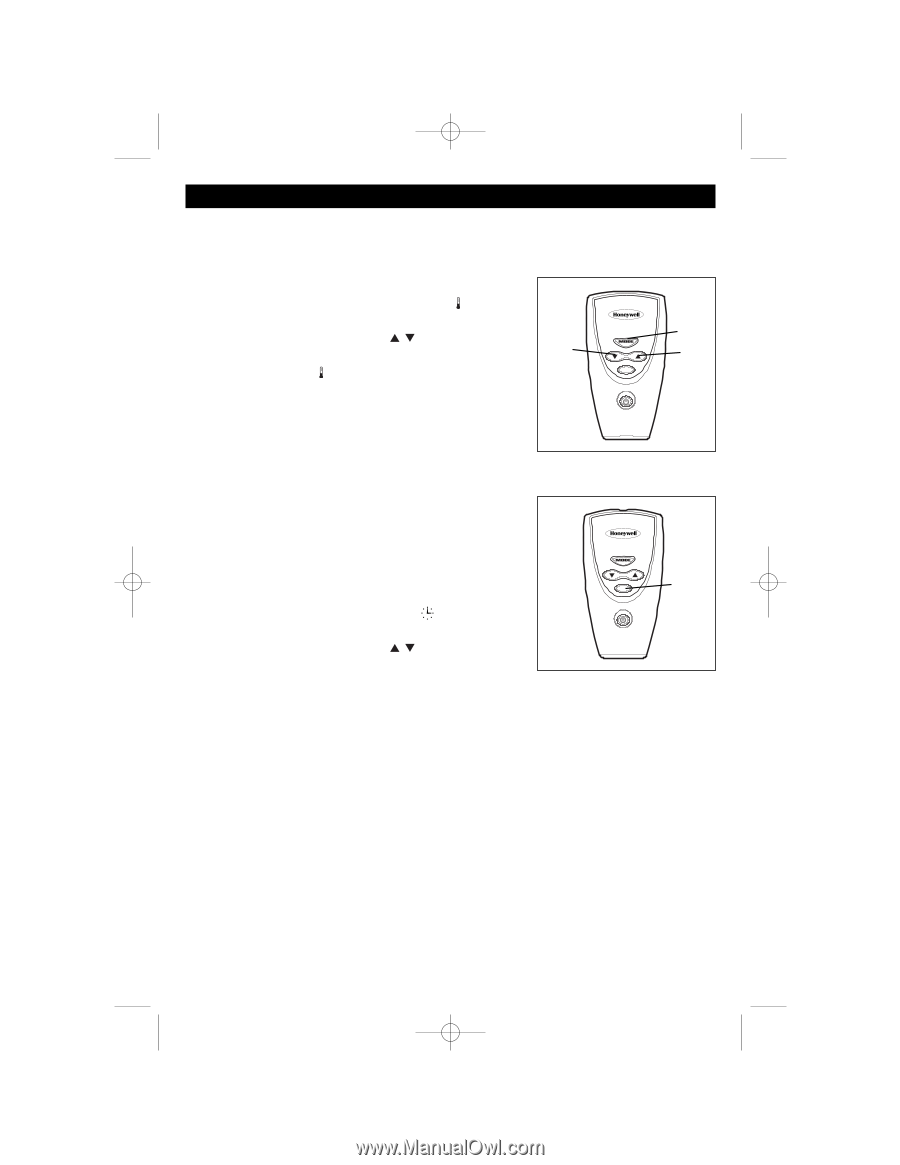
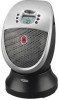
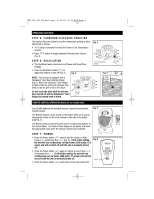
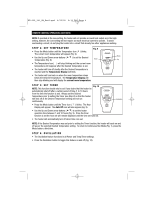
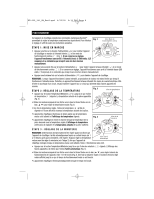
HZ-339_341_OM_Rev2.qxd 6/22/05 5:15 PM Page 4 REMOTE CONTROL OPERATION (CONTINUED) NOTE: If operated at the Low setting, the heater will not provide as much heat output as in the High setting, however, the Low setting will not require as much electrical current to operate. To avoid overloading a circuit, do not plug the heater into a circuit that already has other appliances working. STEP 2: SET TEMPERATURE Fig. 9 • Press the Mode button until the Temperature Icon ( ) blinks. The current room temperature will appear (Fig. 9). Mode • Use the Up and Down arrow buttons ( ) to set the Desired Temperature (Fig. 9). Down Up • The Temperature Icon ( ) will stop blinking and the current room temperature will reappear after the Desired Temperature is set. • The heater will turn off shortly after the Desired Temperature is reached and the Temperature Display will blink. • The heater will turn back on when the room temperature drops below the Desired Temperature. The Temperature Display will then stop blinking and will display the current room temperature. STEP 3: SET TIMER Fig. 10 NOTE: This function should only be set if you desire that the heater be automatically shut off after a certain period of time (1 to 10 hours from the time the function is set). Always set the Desired Temperature prior to setting the Timer (see Step 2) so that the heater will shut off at the Desired Temperature setting and not run continuously. • Press the Mode button until the Timer Icon ( ) blinks. The Hour Display will appear. The Auto Off icon will also appear (Fig. 9). • Use the Up and Down arrow buttons ( ) to set the heater operation time between 1 and 10 hours (Fig. 9). Once the timer function is set the hour set will remain displayed until the time set runs out. • The heater will automatically turn off when time runs out. Oscillation NOTE: If the Desired Temperature was set prior to setting the Timer function, the heater will cycle on and off as per the selected Desired Temperature setting. To return to Continuous Run Mode (Fig. 1), press the Mode button a third time. STEP 4: OSCILLATION • The Oscillation feature functions in all Power and Temp/Timer settings. • Press the Oscillation button to toggle this feature on and off (Fig. 10).
-
 1
1 -
 2
2 -
 3
3 -
 4
4 -
 5
5 -
 6
6 -
 7
7 -
 8
8 -
 9
9 -
 10
10 -
11
-
12
-
13
-
14
-
15
-
16
-
17
-
18
-
19
 |
 |