Hoover F5891 Manual - Page 8
Recovery, empty
 |
View all Hoover F5891 manuals
Add to My Manuals
Save this manual to your list of manuals |
Page 8 highlights
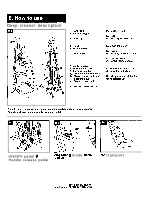
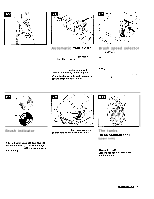
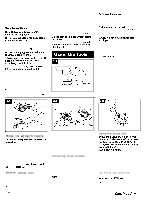
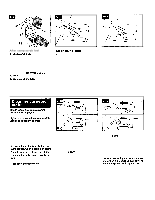
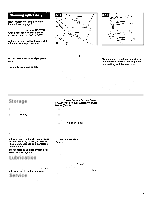
Rotate tank cap counterclockwise and lift up to remove cap. Using cap, measure detergent following the chart below. For carpet, carpeted stairs and upholstery: Fill cap to fill line (5 ounces) with HOOVER CarpeWpholstery Detergent. For bare floors: Fill cap to fill line (5 ounces) with HOOVER Bare Floor Cleaner Do not use Bare Floor Cleaner on carpet or upholstery. Do not use any type of wax with your 'SteamVac' deep cleaner. Turn cap (A) upside down to serve as a measuring cup. NOTE: Use only HOOVER detergents. They are specially formulated for use with your 'SteamVac' deep cleaner *Available at additional cost if not Included For heavy traffic areas: with your model. Pre-treat with HOOVER PreCleaner Spray*. If you do not have access to the PreCleaner Spray, double the amount of HOOVER Detergent (use 2 capfuls or 10 ounces per 1 gallon tank). CAUTION: Detergents contain Anionic and Nonionic Surfactants. Avoid contact with eyes and skin. In case of contact with eyes, flush with cold water for 15 minutes. In case of contact with skin, wash with water. If Irritation persists, call a physician. C For Medical Information (U.S.) call l-800-752-7869. D Replace cap. Rotate cap clockwise until it locks In place. Cap must be locked In place for proper performance and to prevent leaking. To assure proper performance, use only HOOVER cleaning detergent. If rubber ring (C) on cap has become dislodged, reposition it with uneven side against ledge (D) as shown. Position bottom of tank into unit and press on tank handle to snap tank into place. Recovery tank (lower tank) The recovery tank holds the dirty solu tion that is picked up from the carpet. When the recovery tank is full, the automatic shut-off will engage (see Fig. 2-6) and the tank must be emptied. How to empty Turn deep cleaner off and disconnect from electrical outlet. To prevent possible leaking, remove clean solution tank (Fig. 2-10) by pressing down on tank handle and pulling forward; set tank aside (do not set tank on furniture). Step on handle release pedal (Fig. 2-2) and lower handle until it rests on the floor. 8
-
 1
1 -
2
-
 3
3 -
 4
4 -
 5
5 -
 6
6 -
 7
7 -
 8
8 -
 9
9 -
 10
10 -
 11
11 -
 12
12 -
 13
13 -
14
-
15
 |
 |
