Hoover F72229RM User Guide - Page 4
Attach hose/cord, Attach upper handle, Attach hose/tool caddy - model
 |
View all Hoover F72229RM manuals
Add to My Manuals
Save this manual to your list of manuals |
Page 4 highlights
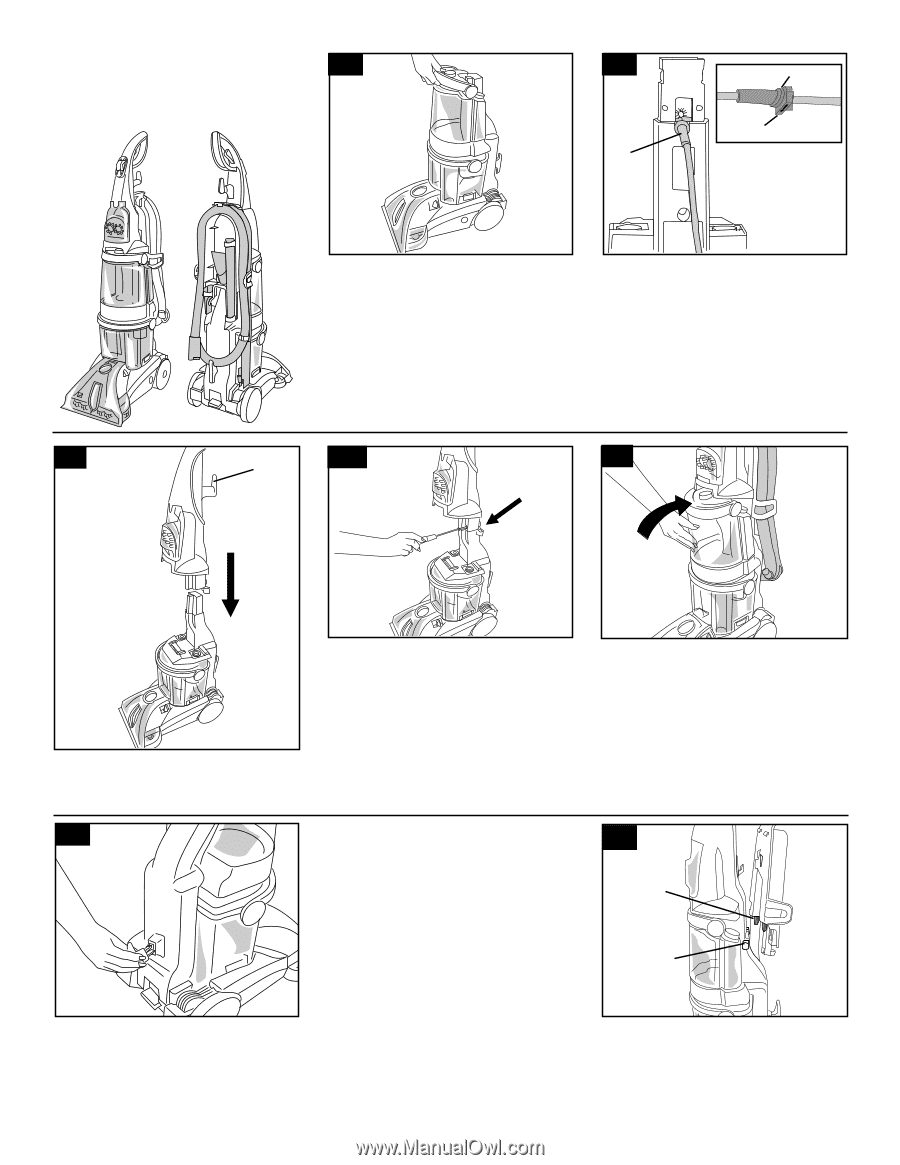
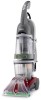
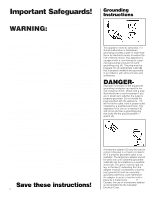
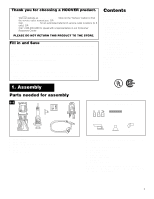
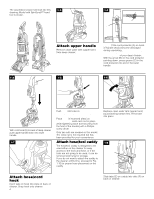
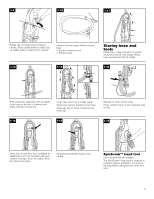
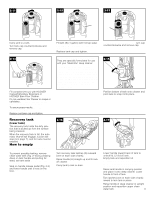
The assembled cleaner will look like this 1-2 drawing. Model with SpinScrub™ hand tool is shown. 1-3 C B A Attach upper handle Remove clean water tank (upper tank) from deep cleaner. NOTE: If the cord protector (A) on back of handle should become dislodged during unpacking, make sure it is repositioned properly before continuing with assembly of your deep cleaner. With the arrow (B) on the cord protector pointing down, press groove (C) in the cord protector into slot in the lower handle. 1-4 1-5 1-6 D With cord hook (D) to back of deep cleaner, push upper handle down onto lower handle. 1-7 Push bolts into holes on front of handle. If bolts will not go through hole easily, handle is not pushed completely down. Place nuts in recessed areas on back of the handle. Hold each nut in place while tightening each bolt securely (from the front of the handle) with a Phillips screw driver. Only two nuts are needed on this model. The extra nut is not required but has been provided for your convenience. Attach hose/tool caddy The hose/tool caddy is designed to be used either on the cleaner for easy access to the tools and hose, or if the tools are not going to be used, it can be removed and hung for storage. If you do not want to attach the caddy to the cleaner at this time, proceed to Fig. 1-10 for proper hose placement on the caddy. Replace clean water tank (upper tank) by positioning bottom first. Press tank into place. 1-8 E F Attach hose/cord hook Insert tabs on hook into slots on back of cleaner. Snap hook onto cleaner. 4 Slide tabs (E) on caddy into slots (F) on back of cleaner.
-
 1
1 -
 2
2 -
 3
3 -
 4
4 -
 5
5 -
 6
6 -
 7
7 -
 8
8 -
 9
9 -
 10
10 -
11
-
12
-
13
-
14
-
15
-
16
-
17
 |
 |