Hoover ONEPWR Cordless High Performance Blower Product Manual - Page 5
Warning
 |
View all Hoover ONEPWR Cordless High Performance Blower manuals
Add to My Manuals
Save this manual to your list of manuals |
Page 5 highlights
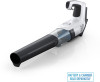
SYMBOLS Some of the following symbols may be used on this product. Please study them and learn their meaning. Proper interpretation of these symbols will allow you to operate the product better and safer. SYMBOL NAME DESIGNATION/EXPLANATION Eye and Hearing Protection Always wear eye protection with side shields marked to comply with ANSI Z87.1 along with hearing protection when operating this equipment. ASSEMBLY Unpacking This product requires assembly. Carefully remove the product and any accessories from the box. Make sure that all items listed on the box are included. WARNING! Do not use this product if it is not completely assembled or if any parts appear to be missing or damaged. Use of a product that is not properly and completely assembled or with damaged or missing parts could results in serious personal injury. • Inspect the product carefully to make sure no breakage or damage occurred during shipping. • Do not discard the packing material until you have carefully inspected and operated the product. If any parts are damaged or missing, please call 1- 800-406-2005. WARNING! Do not attempt to modify this product or create accessories or attachments not recommended for use with this product. Any such alteration or modification is misuse and could result in a hazardous condition leading to possible serious personal injury. Assembling the Blower Tube See figure 2, page 8 WARNING! To avoid serious personal injury, always remove the battery pack from the product when connecting or disconnecting blower tube. • With the logo area facing up, slide the blower tube over the outlet on the blower housing. • Press down on the tab on the blower housing outlet. • Push tube on the blower housing outlet until tab locks into place through the slot in the blower tube. • To remove the blower tube, push the tab down and slide the tube off. PG.4
-
 1
1 -
 2
2 -
 3
3 -
 4
4 -
 5
5 -
 6
6 -
 7
7 -
 8
8 -
 9
9 -
 10
10 -
 11
11 -
12
-
13
-
14
-
15
-
16
-
17
-
18
-
19
-
20
-
21
-
22
-
23
-
24
-
25
-
26
 |
 |
