Hoover UH70070 Manual - Page 3
Cleaner assembly - parts
 |
View all Hoover UH70070 manuals
Add to My Manuals
Save this manual to your list of manuals |
Page 3 highlights
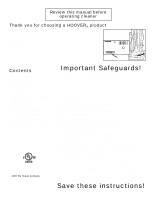
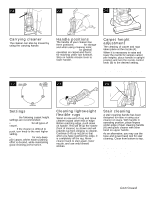
If you need any assistance: Visit our website at hoover.com. Click on the "Service" button to find the service outlet nearest you OR Call 1-800-944-9200 for an automated referral of authorized service outlet locations (U.S. only) OR Call 1-330-499-9499 to speak with a representative in our Consumer Response Center. Please do not return this product to the store. 1. Cleaner assembly Carton contents 1-1 A. Handle section B. Cleaner body C. Cleaning tools and wands * *NOTE: Three (3) wands and the floor A brush available on some models only. C Remove all parts from carton and B identify each item shown. Make sure all parts are located before disposing of packing materials. * Attach handle 1-2 1-3 A A B B C PUSH FIRMLY UNTIL YOU HEAR A SNAP OR CLICK! Note: The plug will only fit together one way. If plug is not fitting together, check alignment of ends. After the plug ends are fully connected, the orange tie wrap (A) must be removed. Use caution so as NOT TO CUT the black power cord. Discard the orange tie wrap. Grasp orange tie wrap (A) and pull until the black plug (B) comes out of the handle cavity. DO NOT remove orange tie wrap until step 1-3 is complete. 1-4 Hold plug (B) with one hand; upper handle (C) with other hand. Push plug into upper handle, aligning with opposite end of plug and push firmly UNTIL YOU HEAR A SNAP OR A CLICK. After ends are connected, pull on plug to make sure it is securely attached. 1-5 D F E Align the groove (D) on the back of the upper handle with the small projection (E) on the back of the handle housing. Push upper handle down until you hear a click. Press button (F) at handle base and push handle all the way down. Continued § 3
-
 1
1 -
 2
2 -
 3
3 -
 4
4 -
 5
5 -
 6
6 -
 7
7 -
 8
8 -
 9
9 -
10
-
11
-
12
 |
 |
