Insignia NS-C6500 User Manual (English)
Insignia NS-C6500 - Speaker - 50 Watt Manual
 |
UPC - 600603110535
View all Insignia NS-C6500 manuals
Add to My Manuals
Save this manual to your list of manuals |
Insignia NS-C6500 manual content summary:
- Insignia NS-C6500 | User Manual (English) - Page 1
Setting up your in-ceiling speakers I Installation de vos haut-parleurs encastrables au plafond | Instalación de sus altavoces empotrados en cielo raso NS-C6500 Required tools Pencil Keyhole or drywall saw Phillips screwdriver Small level Fish tape or coat hanger Wire strippers Gloves Safety - Insignia NS-C6500 | User Manual (English) - Page 2
Insignia 2 cache-peinture 2 grilles 1 gabarit Installation des haut-parleurs au plafond Pour un son stéréo Painting the speakers and grills The speakers de la zone d'écoute. Pour toutes instructions détaillées sur l'installation, voir « Instructions sur l'installation au plafond ». Pour un son de - Insignia NS-C6500 | User Manual (English) - Page 3
Instructions sur l'installation au plafond Pour installer les haut-parleurs au plafond: 1 Déterminez l'emplacement d'installation de haut-parleurs. Les hautparleurs doivent être installés dans des zones sans obstructions telles que des poutres (solives). Sondez le plafond pour localiser des espaces - Insignia NS-C6500 | User Manual (English) - Page 4
7,68 po (195 mm) de diamètre 6,9 lb (3,12 kg) par paire Herramientas requeridas Lápiz Sierra para hacer cerraduras de puerta o para drywall (paneles para el agujero de prueba del taladro) Contenido de la caja Altavoces Insignia (2) Máscaras de pintura (2) Rejillas (2) Plantilla (1) Montaje de los - Insignia NS-C6500 | User Manual (English) - Page 5
5 Use una sierra para hacer cerraduras de puerta o para drywall (paneles de yeso), cortando cuidadosamente la sección de cielo raso que trazó y luego remueva la sección. 12 Reinstale la rejilla del altavoz. 6 Encamine los cables desde las salidas de altavoces en su equipo audio hasta sus altavoces - Insignia NS-C6500 | User Manual (English) - Page 6
1 Year Limited Warranty Insignia Products ("Insignia") warrants to you, the original purchaser of this new NS-C6500 ("In-Ceiling Speakers"), that the Product shall be free of defects in the original manufacture of the material or workmanship for a period of one (1) year from the date - Insignia NS-C6500 | User Manual (English) - Page 7
QUI VARIENT D'UN ÉTAT OU D'UNE PROVINCE À L'AUTRE. Pour contacter Insignia : Pour le service à la clientèle, appeler le 1-877-467-4289 www.insignia-products.com INSIGNIAMC est une marque de commerce de Best Buy Enterprise Services, Inc. Distribué par Best Buy Purchasing, LLC Dynex, 7601 Penn Avenue - Insignia NS-C6500 | User Manual (English) - Page 8
™ Products All rights reserved. All other products and brand names are trademarks of their respective owners. © 2007 produits Insignia™ Tous droits réservés. Tous les autres produits ou noms de marques sont des marques de commerce qui appartiennent à leurs propriétaires respectifs. © 2007 productos
-
 1
1 -
 2
2 -
 3
3 -
 4
4 -
 5
5 -
 6
6 -
 7
7 -
8
 |
 |
Required tools
Pencil
Keyhole or drywall saw
Phillips screwdriver
Small level
Fish tape or coat hanger
Wire strippers
Gloves
Safety goggles
Drill
1-inch flat drill bit (if drilling through studs)
¼-inch to ½-inch drill bit (for drilling test hole)
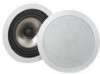
Package contents
Insignia speakers (2)
Paint plugs (2)
Grills (2)
Template (1)
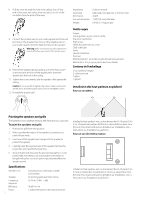
Mounting speakers in the ceiling
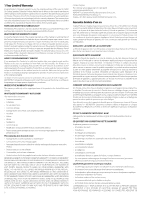
For stereo sound
Mount the speakers 6 to 10 feet apart. Each speaker should be the same
distance from the listening area. For detailed mounting instructions, see
“Ceiling mount instructions.”
For home theater sound
Mount the speakers 6 to 10 feet apart and 3 to 6 feet behind the
listening area. For detailed mounting instructions, see “Ceiling mount
instructions.”
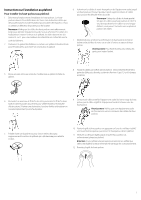
Ceiling mount instructions
To mount the speakers in the ceiling:
1
Determine where you want to mount the speakers. The speakers
must be mounted in areas where there are no obstructions like
studs (joists). Tap the ceiling to find a “hollow” space, or use a stud
finder to locate the studs.
Note
: Make sure that your speaker wires are long enough to run from the
speakers to your audio equipment. If you plan to run the speaker wires
through the walls or ceiling, the wires must be UL or CL rated to ensure
your safety and to meet building code compliance.
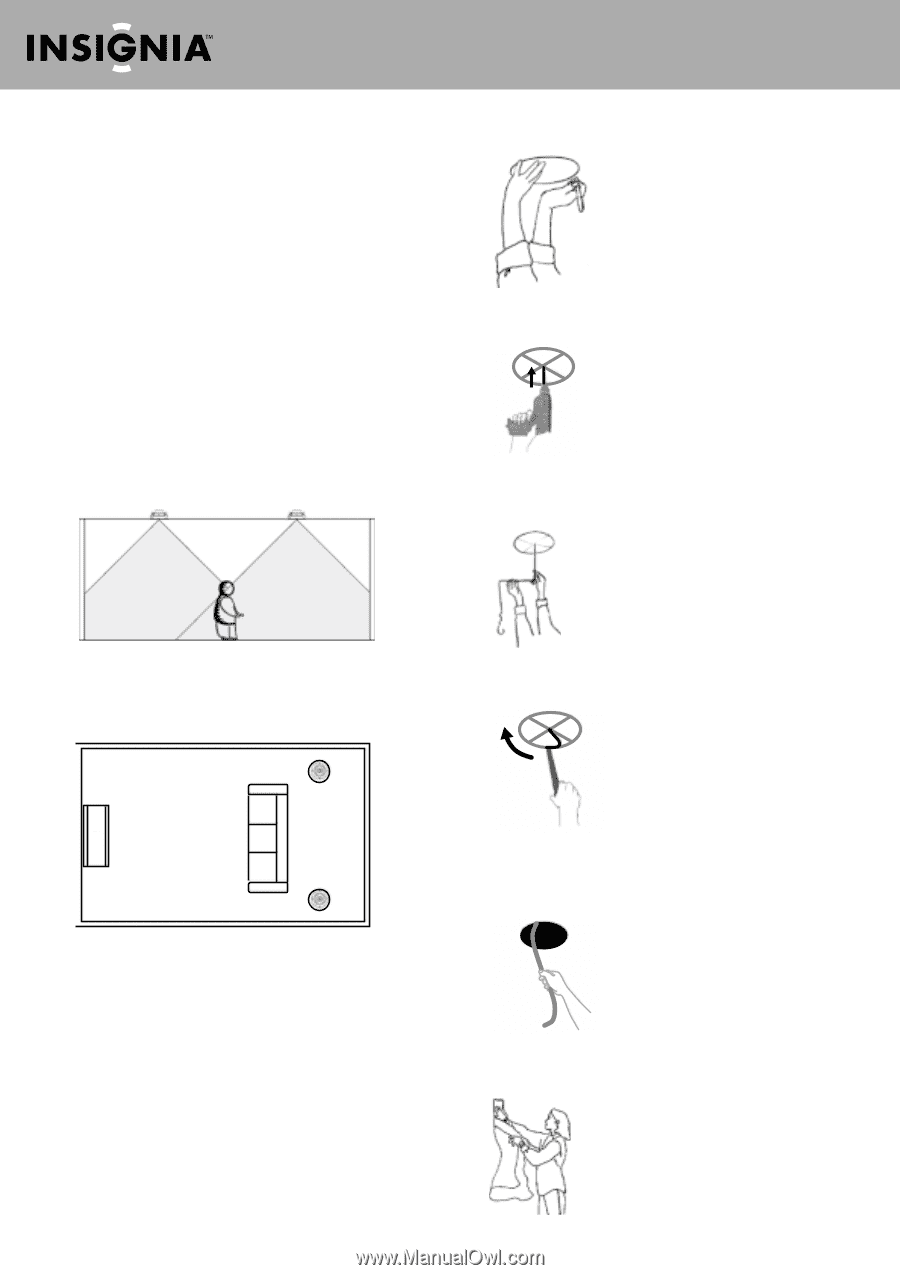
2
Position the cardboard mounting template on the ceiling where
you want to mount a speaker, then trace around the template.
3
Drill a small hole in the center of the template outline you drew on
the ceiling.
4
Bend a piece of coat hanger wire, then insert the wire into the hole.
Slowly rotate the wire to check for any obstructions. If you find an
obstruction, patch the hole and find a new location for the speaker.
5
Using a keyhole or drywall saw, carefully cut the ceiling section you
outlined, then remove the section.
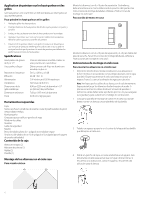
6
Run the wires from the speaker outputs on your audio equipment
to your speakers. Allow a few extra feet of wire so you will have
enough wire to strip the insulation and splice the wires.
Note
: Use high quality wire such as 16/4 speaker
wire. If you need to run the wires a long distance,
you can splice one or more lengths of wires
together.
7
(Optional) To improve speaker performance, insert unbacked
fiberglass insulation behind and around the speaker.
Warning
: To avoid personal injury, wear gloves when
inserting the insulation.
Setting up your in-ceiling speakers
I
Installation de vos haut-parleurs encastrables au
plafond
|
Instalación de sus altavoces empotrados en cielo raso
NS-C6500